
Get 30+ FREE Crochet Patterns — Join Our Newsletter
Free Ladybug Crochet Pattern: Make a Tiny Amigurumi Ladybug
A tiny crochet ladybug can have just as much personality as a much larger handmade toy. Bright red wings, a contrasting white belly and a little embroidered smile give this miniature amigurumi its cheerful expression.
This free ladybug crochet pattern makes a figure approximately 5.5 cm (2.2 inches) tall with the original thread and hook. Below, you will find the supply list, stitch abbreviations, complete written instructions for every piece, assembly directions and facial details. Take your time with the small stitches and use the photographs to check the overall look.
You can follow the full written pattern here on the blog. If you prefer a version without advertisements, the printable PDF brings the same instructions, step-by-step photographs and stitch diagrams together in a clean layout, so you can keep the guide beside you as you work.
Finished Ladybug Preview
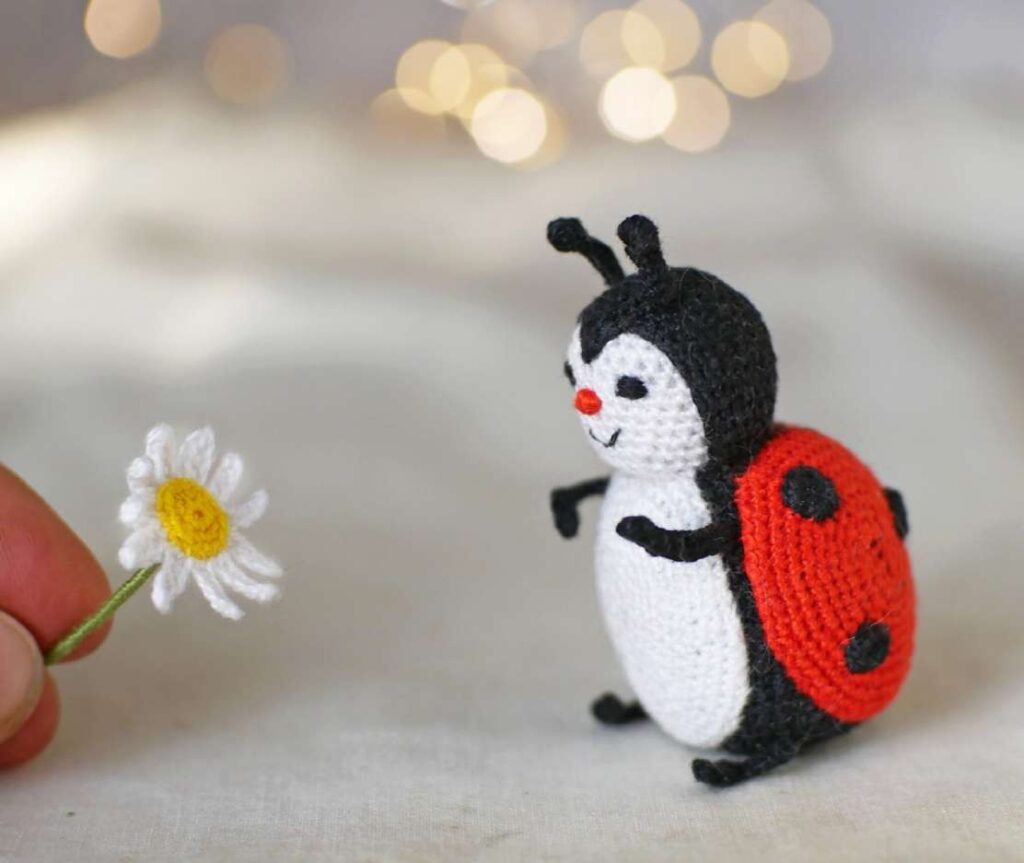
Project Details
| Detail | Information |
|---|---|
| Finished height | Approximately 5.5 cm / 2.2 inches with the original materials |
| Skill level | Beginner/intermediate |
| Colours | Black, white and red |
| Hook | 0.9 mm |
| Yarn | Iris Gamma cotton crochet thread, 10 g / 87 m |
| Construction | Separate pieces, then sewn and assembled |
| Terminology | US crochet terms; UK equivalents listed below |
The crochet is straightforward, but the miniature scale and careful sewing require patience. The original head measures approximately 2 cm (0.8 inches) high and the body approximately 3.5 cm (1.4 inches) high. Your materials and tension can affect the finished size.
Materials and Tools
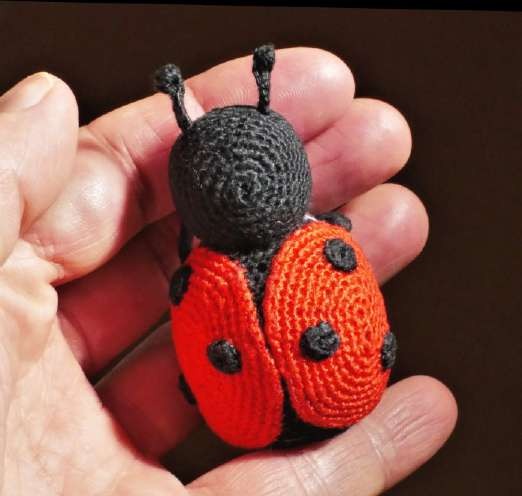
- Iris Gamma cotton crochet thread: white, black and red. Original specification: 10 g / 87 m; the source also gives an approximate yarn-weight equivalent of 1 oz / 267 yd.
- Embroidery thread: white, black and red for sewing and facial details.
- 0.9 mm crochet hook.
- Sewing needle and pins.
- Tapestry needle.
- Scissors.
- Synthetic or natural stuffing.
Materials: Project Reference
Stitch Abbreviations
| Abbreviation | Meaning in this pattern |
|---|---|
| sts | Stitches |
| ch | Chain stitch |
| sl st | Slip stitch |
| sc | Single crochet |
| hdc | Half double crochet |
| dc | Double crochet |
| tr | Treble crochet |
| inc | Increase: 2 sc in one stitch |
| dec | Decrease |
| 3-hdc cluster | 3 half double crochet worked together |
| 5-hdc cluster | 5 half double crochet worked together |
| tr2tog | 2 treble crochet worked together |
| R | Round |
Instructions in parentheses or brackets are repeated the stated number of times. The number at the end of a round is its stitch count.
Original Crochet Symbol Key

US and UK Terminology
| US term used here | UK equivalent |
|---|---|
| Single crochet | Double crochet |
| Half double crochet | Half treble crochet |
| Double crochet | Treble crochet |
| Treble crochet | Double treble crochet |
Before You Begin
All pieces are crocheted in continuous rounds except the limbs. To begin the head, body and cap, make 2 ch, then work 6 sc into the first ch. Finish each piece as directed with a slip stitch.
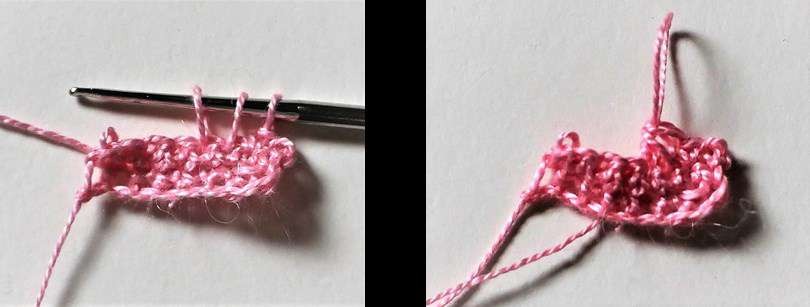
How to Work the Decrease
Insert the hook into the next stitch, yarn over and pull up a loop: there are now 2 loops on the hook. Insert the hook into the following stitch, yarn over and pull up another loop: there are now 3 loops on the hook. Yarn over and pull through all three loops.
Decrease: Photo Reference
Marking the Rounds
For circular pieces, pull the starting thread tail out between rounds 2 and 3. Use it as a marker to help locate the beginning and count your rounds.
Round Marker: Photo Reference
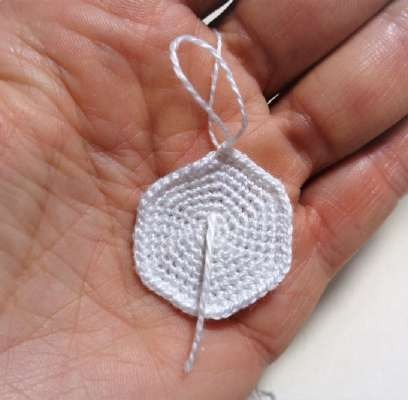
1. Crochet the Head
White thread.
| Round | Instructions | Stitch count |
|---|---|---|
| R1 | 2 ch; 6 sc into the first ch | 6 |
| R2 | inc × 6 | 12 |
| R3 | (1 sc, inc) × 6 | 18 |
| R4 | (2 sc, inc) × 6 | 24 |
| R5 | (3 sc, inc) × 6 | 30 |
| R6–12 | sc around for 7 rounds | 30 each round |
| R13 | (3 sc, dec) × 6 | 24 |
| R14 | (2 sc, dec) × 6 | 18 |
| R15 | (1 sc, dec) × 6 | 12 |
| R16 | dec × 6 | 6 |
| R17 | Decrease and close the opening with a sl st | Closed |
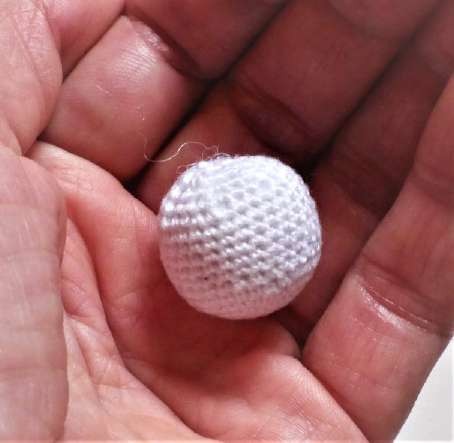
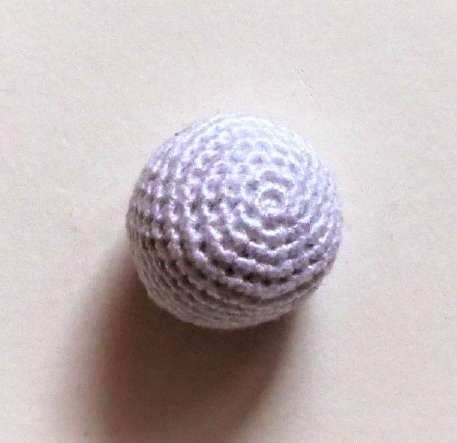
Stuff the head firmly after round 14. The original author suggests using the ends of scissors to help push the filling inside. With the original materials, the head is approximately 2 cm / 0.8 inches high.
Head: Photo Steps
2. Crochet the Body
Black thread.
| Round | Instructions | Stitch count |
|---|---|---|
| R1 | 2 ch; 6 sc into the first ch | 6 |
| R2 | inc × 6 | 12 |
| R3 | (1 sc, inc) × 6 | 18 |
| R4 | (2 sc, inc) × 6 | 24 |
| R5 | (3 sc, inc) × 6 | 30 |
| R6 | (4 sc, inc) × 6 | 36 |
| R7 | (5 sc, inc) × 6 | 42 |
| R8–24 | sc around for 17 rounds | 42 each round |
| R25 | (5 sc, dec) × 6 | 36 |
| R26 | (4 sc, dec) × 6 | 30 |
| R27 | (3 sc, dec) × 6 | 24 |
| R28 | (2 sc, dec) × 6 | 18 |
| R29 | (1 sc, dec) × 6 | 12 |
| R30 | dec × 6 | 6 |
| R31 | Decrease and close the opening with a sl st | Closed |
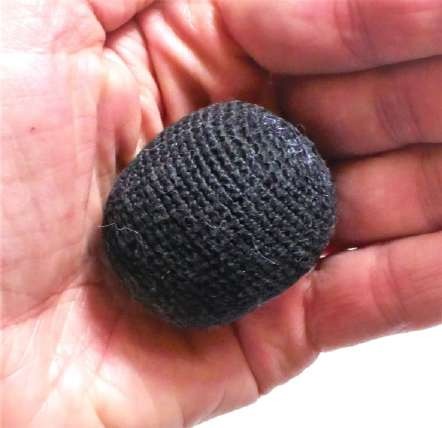
Stuff the body firmly after R28. With the original materials, the body is approximately 3.5 cm / 1.4 inches high.
Body: Photo Reference
3. Crochet the Cap
Black thread. The cap frames the white face.
| Round | Instructions | Stitch count |
|---|---|---|
| R1 | 2 ch; 6 sc into the first ch | 6 |
| R2 | inc × 6 | 12 |
| R3 | (1 sc, inc) × 6 | 18 |
| R4 | (2 sc, inc) × 6 | 24 |
| R5 | (3 sc, inc) × 6 | 30 |
| R6–13 | sc around for 8 rounds | 30 each round |
| R14 | 10 sc, (1 dc, tr2tog worked into the same stitch and the next stitch, 1 dc in the same stitch), 10 sc, 3 sl st | 26 |
The shaped front edge is shown in the cap stitch diagram below. The written sequence and count above follow the original pattern.
Cap: Original Stitch Diagram

4. Crochet the Belly
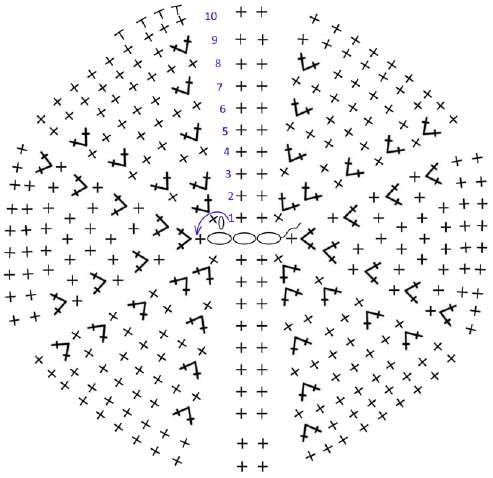
White thread. Work an oval around the starting chain.
| Round | Instructions | Stitch count |
|---|---|---|
| R1 | Make 4 ch; 3 sc in the 3rd ch from the beginning, 1 sc, 5 sc in the 1st ch, 1 sc | 10 |
| R2 | [3 inc, 2 sc] × 2 | 16 |
| R3 | [(inc, sc) × 3, 2 sc] × 2 | 22 |
| R4 | [(2 sc, inc) × 3, 2 sc] × 2 | 28 |
| R5 | [(inc, 3 sc) × 3, 2 sc] × 2 | 34 |
| R6 | [(4 sc, inc) × 3, 2 sc] × 2 | 40 |
| R7 | [(inc, 5 sc) × 3, 2 sc] × 2 | 46 |
| R8 | [(6 sc, inc) × 3, 2 sc] × 2 | 52 |
| R9 | [(inc, 7 sc) × 3, 2 sc] × 2 | 58 |
| R10 | sc around | 58 |
Make 3 additional sl st, then cut the thread.
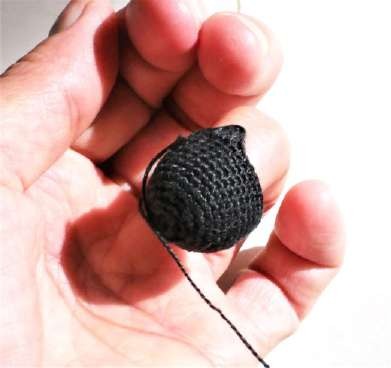
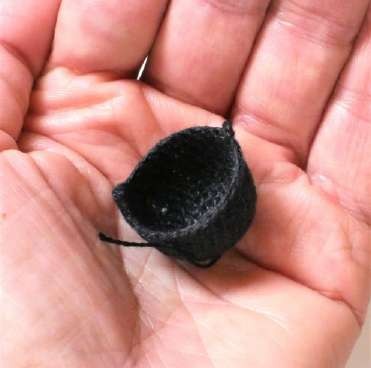
Belly: Chart and Source Detail Photos
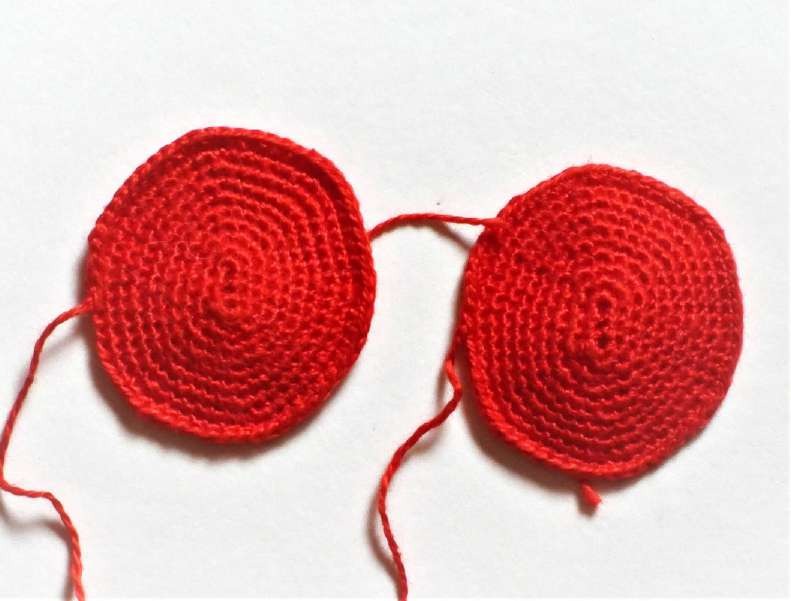
5. Crochet the Red Wing Cases
Red thread. Make 2.
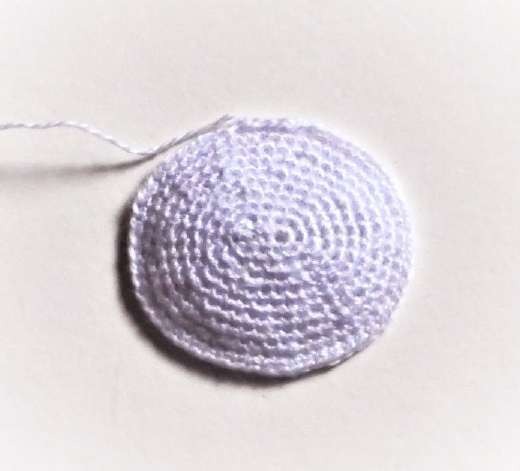
Crochet each wing case, or elytron, exactly as the belly: follow R1–10 with the same stitch counts. Finish each one with 3 additional sl st and cut the thread.
Wing Cases: Photo References
PRINTABLE · PHOTO INSTRUCTIONS · NO ADS
Prefer to Crochet Without Ads?
Save the complete ladybug pattern as a clean, printable PDF. Keep the instructions, stitch diagrams and step-by-step photos together in one organized 19-page guide—ready to print or follow on your tablet.
Enjoy no advertisements, no scrolling through a long blog page and a convenient file to keep beside your crochet project. The full pattern and photos remain free here on the blog; the PDF is for a simpler reading and printing experience.
Get My Ad-Free Printable Pattern →
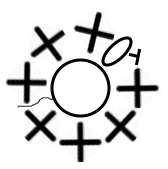
6. Crochet the Black Dots
Black thread. Make 6.
- Make 2 ch.
- Work 7 sc into the first ch.
- Join into a ring with a sl st.
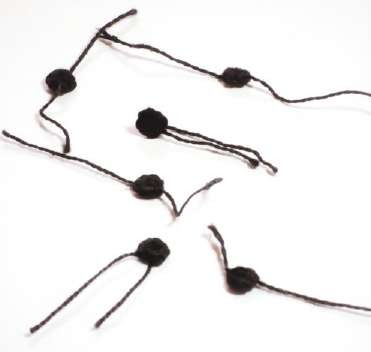
Repeat until you have six dots. The sewing instructions below explain how to attach them and hide their thread ends.
Black Dots: Diagram and Photo
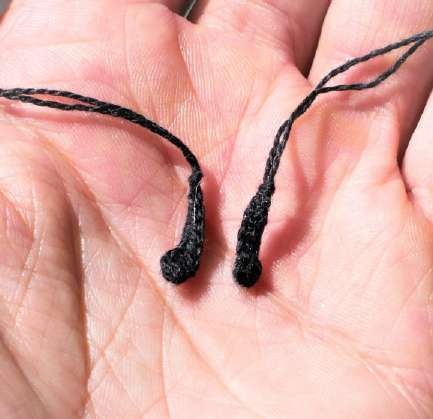
7. Crochet the Antennae
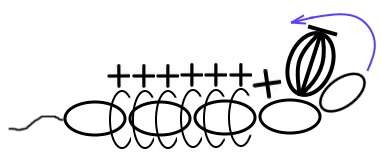
Black thread. Make 2.
- Make 5 ch.
- Work a 5-hdc cluster into the 4th ch.
- Work 1 sc into the same ch.
- Make 6 sc around the starting chain, not into its individual stitches.
- Push the stitches closer to the cluster.
- Thread both the starting and finishing tails through the final loop.
Antennae: Diagram and Photo
8. Crochet the Arms
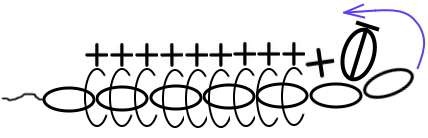
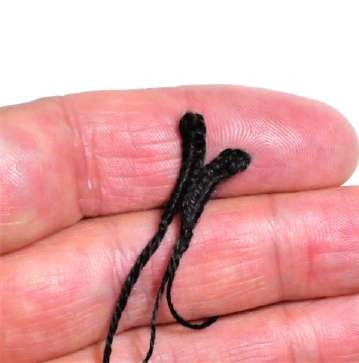
Black thread. Make 2. The original pattern calls these pieces paws.
Work as for an antenna, with these changes:
- Begin with 7 ch.
- Work a 3-hdc cluster into the 6th ch.
- Work 1 sc into the same ch.
- Make 9 sc around the starting chain.
Arms: Diagram and Photo
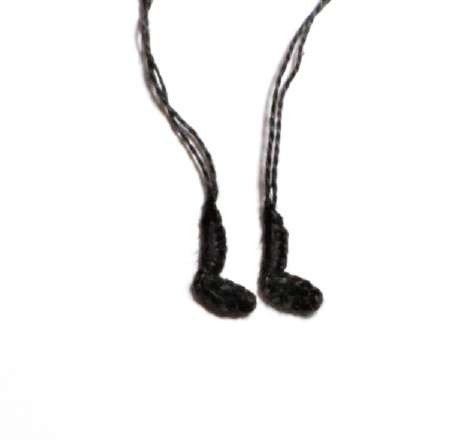
9. Crochet the Legs
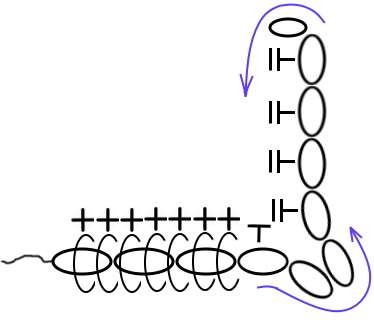
Black thread. Make 2.
- Make 11 ch.
- Work hdc into the 10th, 9th, 8th and 7th ch.
- Work 1 sl st into the 4th ch.
- Make 7 sc around the starting chain.
- Push the stitches close together.
The original stitch diagrams above let you follow the antennae, arms and legs visually.
Legs: Diagram and Photo
10. Assemble the Head and Body
Use thin sewing thread, such as embroidery thread, because it slides well through the crochet. Choose your needle carefully: a needle that is too thin may not create a large enough opening, causing the thread to catch and tangle. A needle that is too thick may get stuck in the crochet. Test several needles before beginning so the sewing feels comfortable.
Attach the Cap
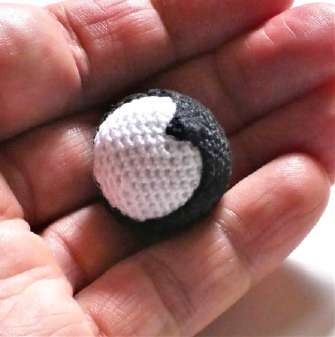
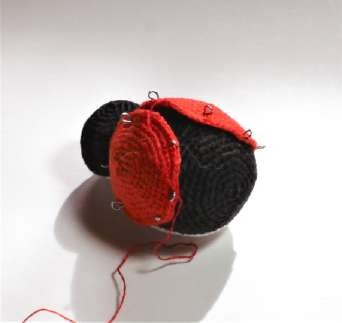
The last-crocheted, less even end of the head forms its top and will be covered by the cap. Place the black cap over the white head, tilting it slightly forward so it sits over the forehead.
Pin the pointed edge in place. Sew the cap around its edge with tiny stitches into each loop.
Attaching the Cap: Photo Steps
Attach the Belly
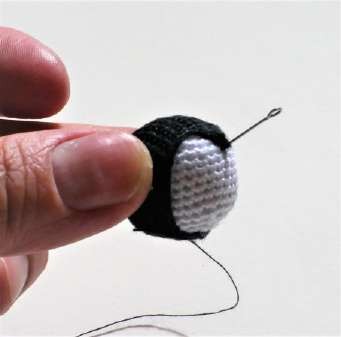
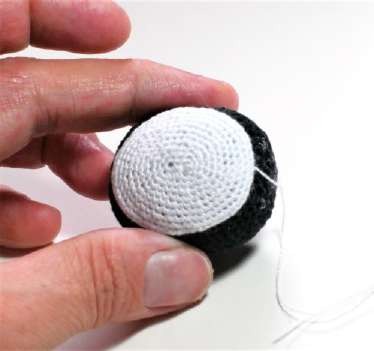
The last-crocheted, less even end of the body forms the neck. Position the white belly 3 mm below the centre of the neck.
Pin it in place, then sew around the edge with white thread and small stitches into each loop.
Attaching the Belly: Photo Steps
Join the Head to the Body
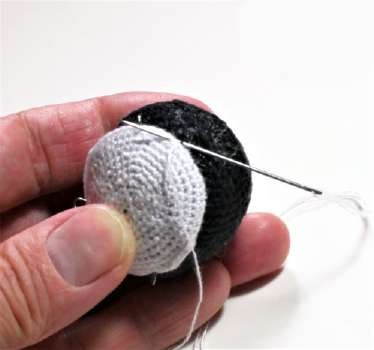
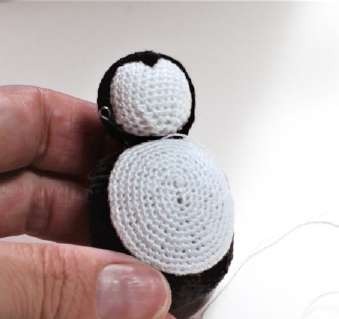
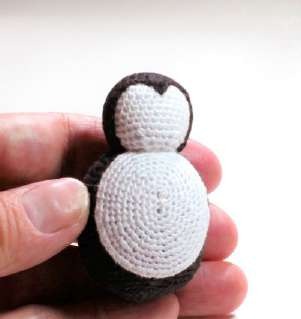
Pin the head onto the body. First sew the white face to the belly using white thread. Then sew the black cap to the body using black thread.
Joining the Head: Photo Steps
Attach the Wings
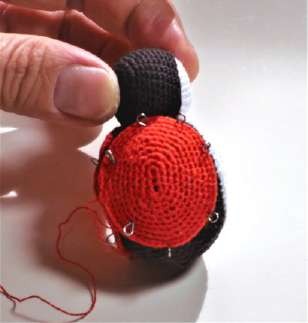
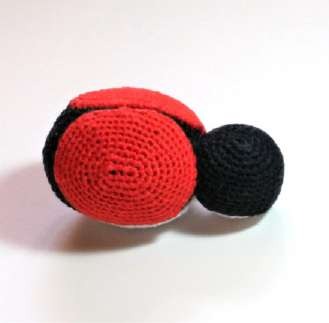
Pin the two red wing cases to the body. Sew around each edge with red thread, using the same small stitches into each loop as for the belly.
Attaching the Wings: Photo Steps
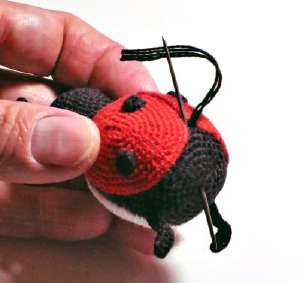
11. Attach the Antennae, Dots, Arms and Legs
Antennae
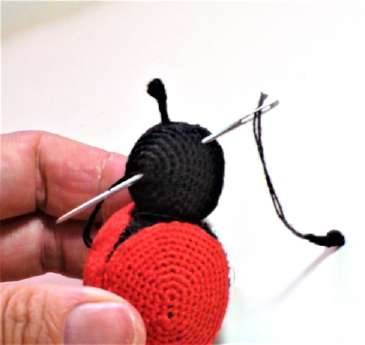
Mark the antenna positions on the head. Insert a tapestry needle through one marked hole and bring it out at the centre of the back of the head.
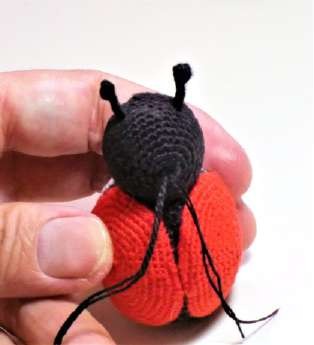
Thread one antenna tail through the needle and pull it through until the antenna sits snugly in place. Repeat for the second antenna. Both tails now emerge from the central hole at the back of the head.
Tie the tails securely together. Insert the tapestry needle into the same hole, thread the tails through it and bring them out at the bottom of the head. Pull the tails and trim them.
Attaching the Antennae: Photo Steps
Black Dots
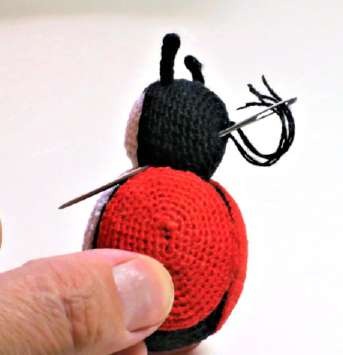
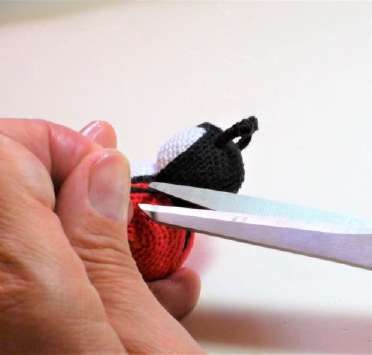
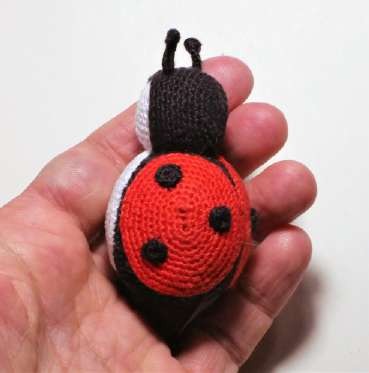
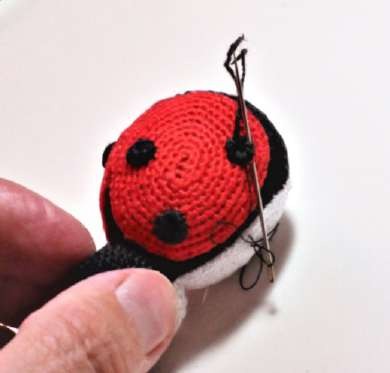
For each dot, thread the finishing tail through the needle and bring it out at the centre of the wrong side.
Sew the dot to a wing case with black thread and tiny stitches. When you have sewn halfway around, trim any protruding tails to 3 mm, push the ends underneath the dot and finish sewing.
Repeat for all six dots. Arrange them as on a real ladybug, using the finished photographs to check their positions.
Attaching the Dots: Photo Steps
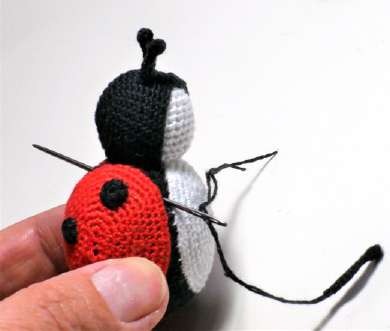
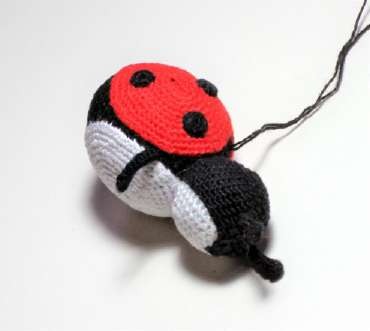
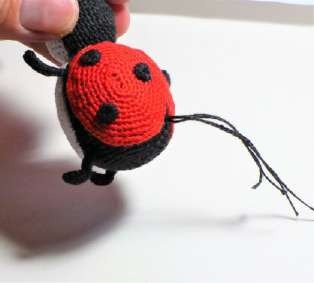
Arms
Attach the arms in the same way as the antennae. Find a suitable hole on each side of the body. Insert the tapestry needle and bring it out in the upper black triangle between the wings.
Insert both arms, tie their tails together, pass the tails through the body with the tapestry needle and trim them.
Attaching the Arms: Photo Steps
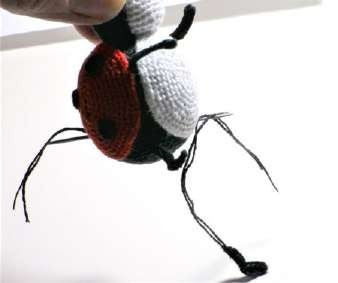
Legs
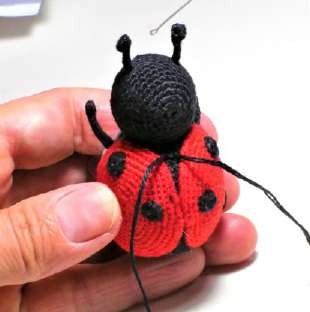
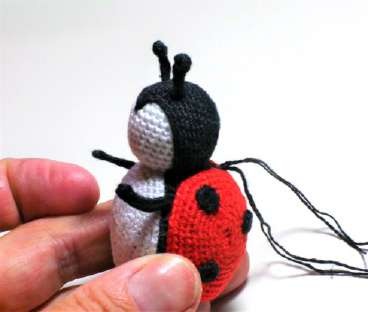
Attach the legs using the same method. Bring the tapestry needle out in the lower black triangle between the wing cases, then secure and hide the tails.
Attaching the Legs: Photo Steps
12. Flatten the Base So the Ladybug Can Sit
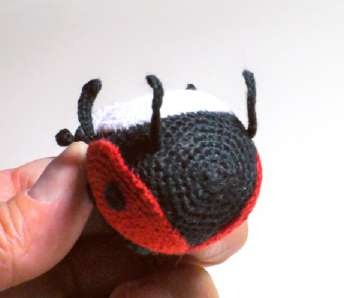
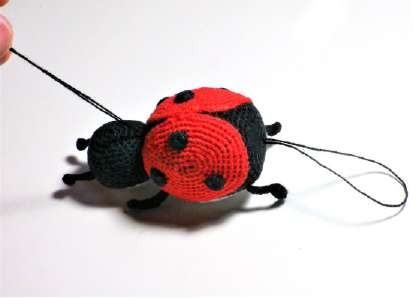
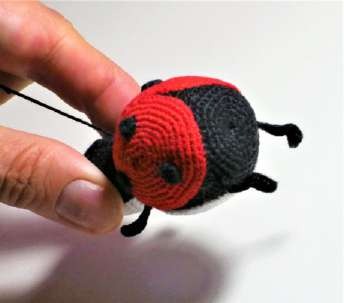
To make the base flatter, pass a needle with black thread through the body from top to bottom. Catch one stitch at the bottom, then pass the needle back up through the body.
Tie the tails firmly. This pulls the bottom inward and creates a flatter sitting surface. Hide the tails with the needle.
Flattening the Base: Photo Steps
13. Add the Face
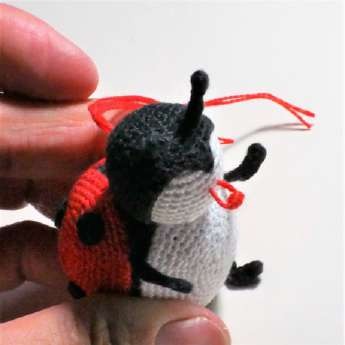
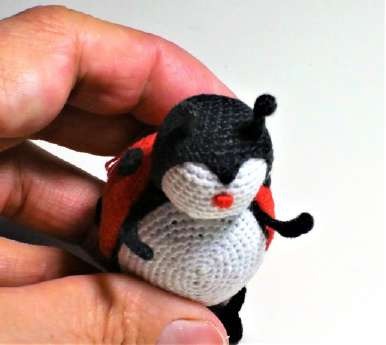
Make and Attach the Red Nose
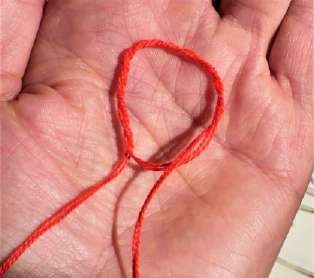
Use doubled red thread. Begin an ordinary knot, but wrap the thread seven times instead of once. Carefully tighten the tails to create a firm red knot.
Making the Nose: Photo Steps
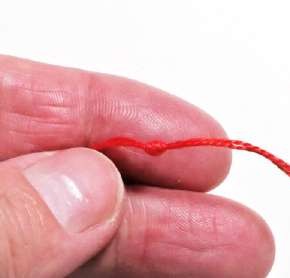
Mark the nose position on the face. Thread one red tail through the needle and bring it out at the central hole in the back of the head. Repeat with the other tail.
Pull the red knot snugly against the face, tie the red tails firmly and hide them with the tapestry needle.
Attaching the Nose: Photo Steps
Embroider the Eyes
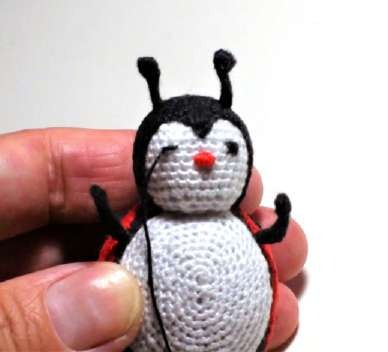
Mark the eye positions. Use black crochet thread to embroider each eye with five stitches, approximately one single crochet stitch wide.
Embroider the Mouth
Use one strand of black embroidery thread and three stitches to create the mouth.
Finishing the Face: Photo Steps
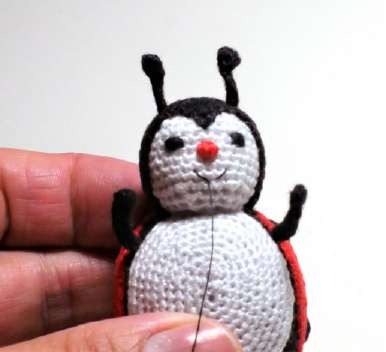
Your cheerful little ladybug is complete!
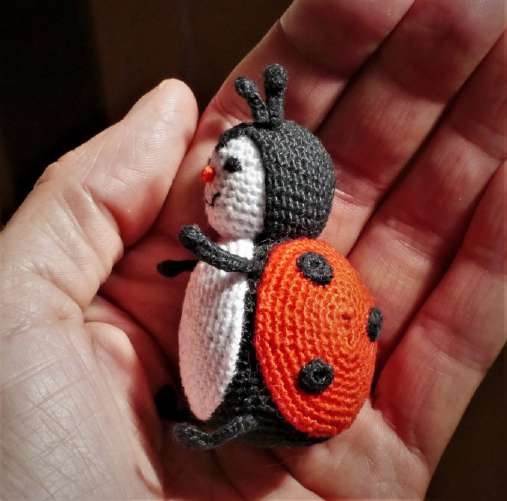
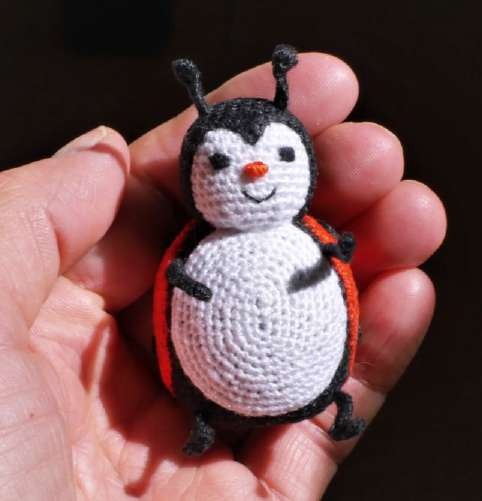
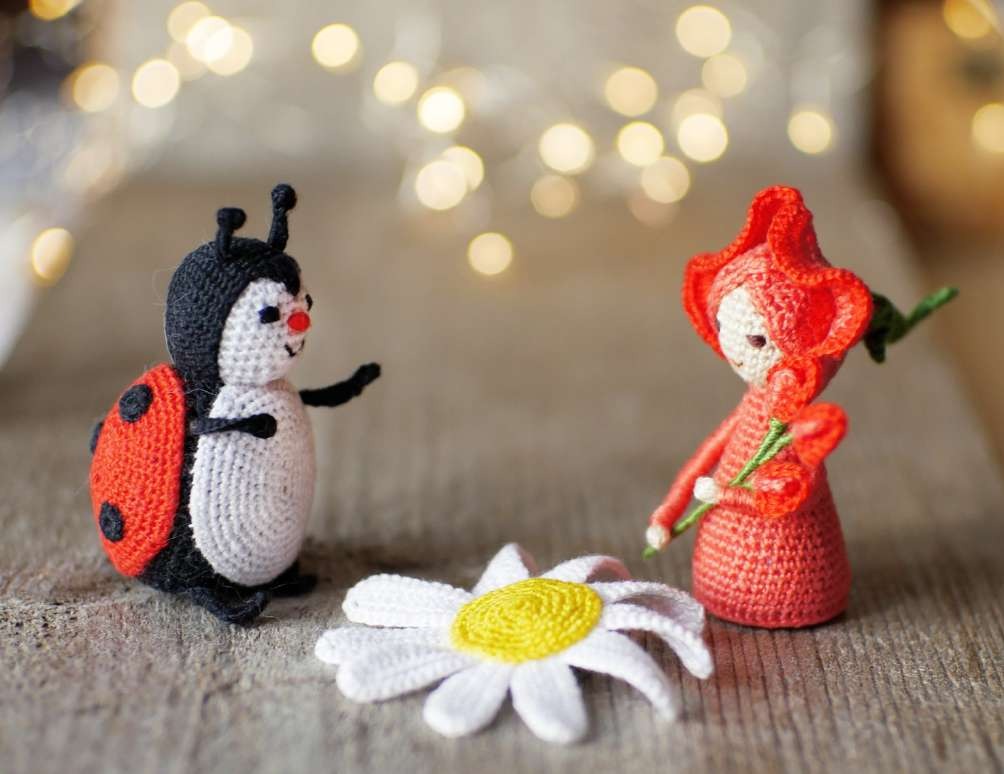
Finished Ladybug: Final Views
Keep the Pattern in an Ad-Free Printable PDF
Enjoyed the free pattern? Keep every step close at hand with the ad-free PDF edition. The 19-page guide brings the complete instructions, original photos and stitch diagrams together in a tidy layout you can print or follow on your tablet.
Print the pages you need or keep the guide on your tablet for a calmer crochet session.
Get My Ad-Free Printable Pattern →
Frequently Asked Questions
Is the full ladybug crochet pattern free on this page?
Yes. The materials, written instructions for every piece, assembly steps and facial details are all available here. The original photographs and diagrams are also included on this page. The optional PDF provides an ad-free, printable layout to keep beside your work.
Is it suitable for a beginner?
The original pattern is rated beginner/intermediate. Its small hook, tiny pieces and careful sewing are easier if you already have some basic crochet experience.
How big is the finished ladybug?
Approximately 5.5 cm / 2.2 inches tall with the original cotton thread and 0.9 mm hook. Materials and tension can change the finished dimensions.
Does it use safety eyes?
No. The eyes and mouth are embroidered, and the red nose is made from a knotted thread.
Why choose the PDF if the written pattern is free?
For convenience: no advertisements, a printable layout and all the instructions, step-by-step photographs and stitch diagrams in one organized file, all together in one guide you can keep beside your crochet work.



