
Get 30+ FREE Crochet Patterns — Join Our Newsletter
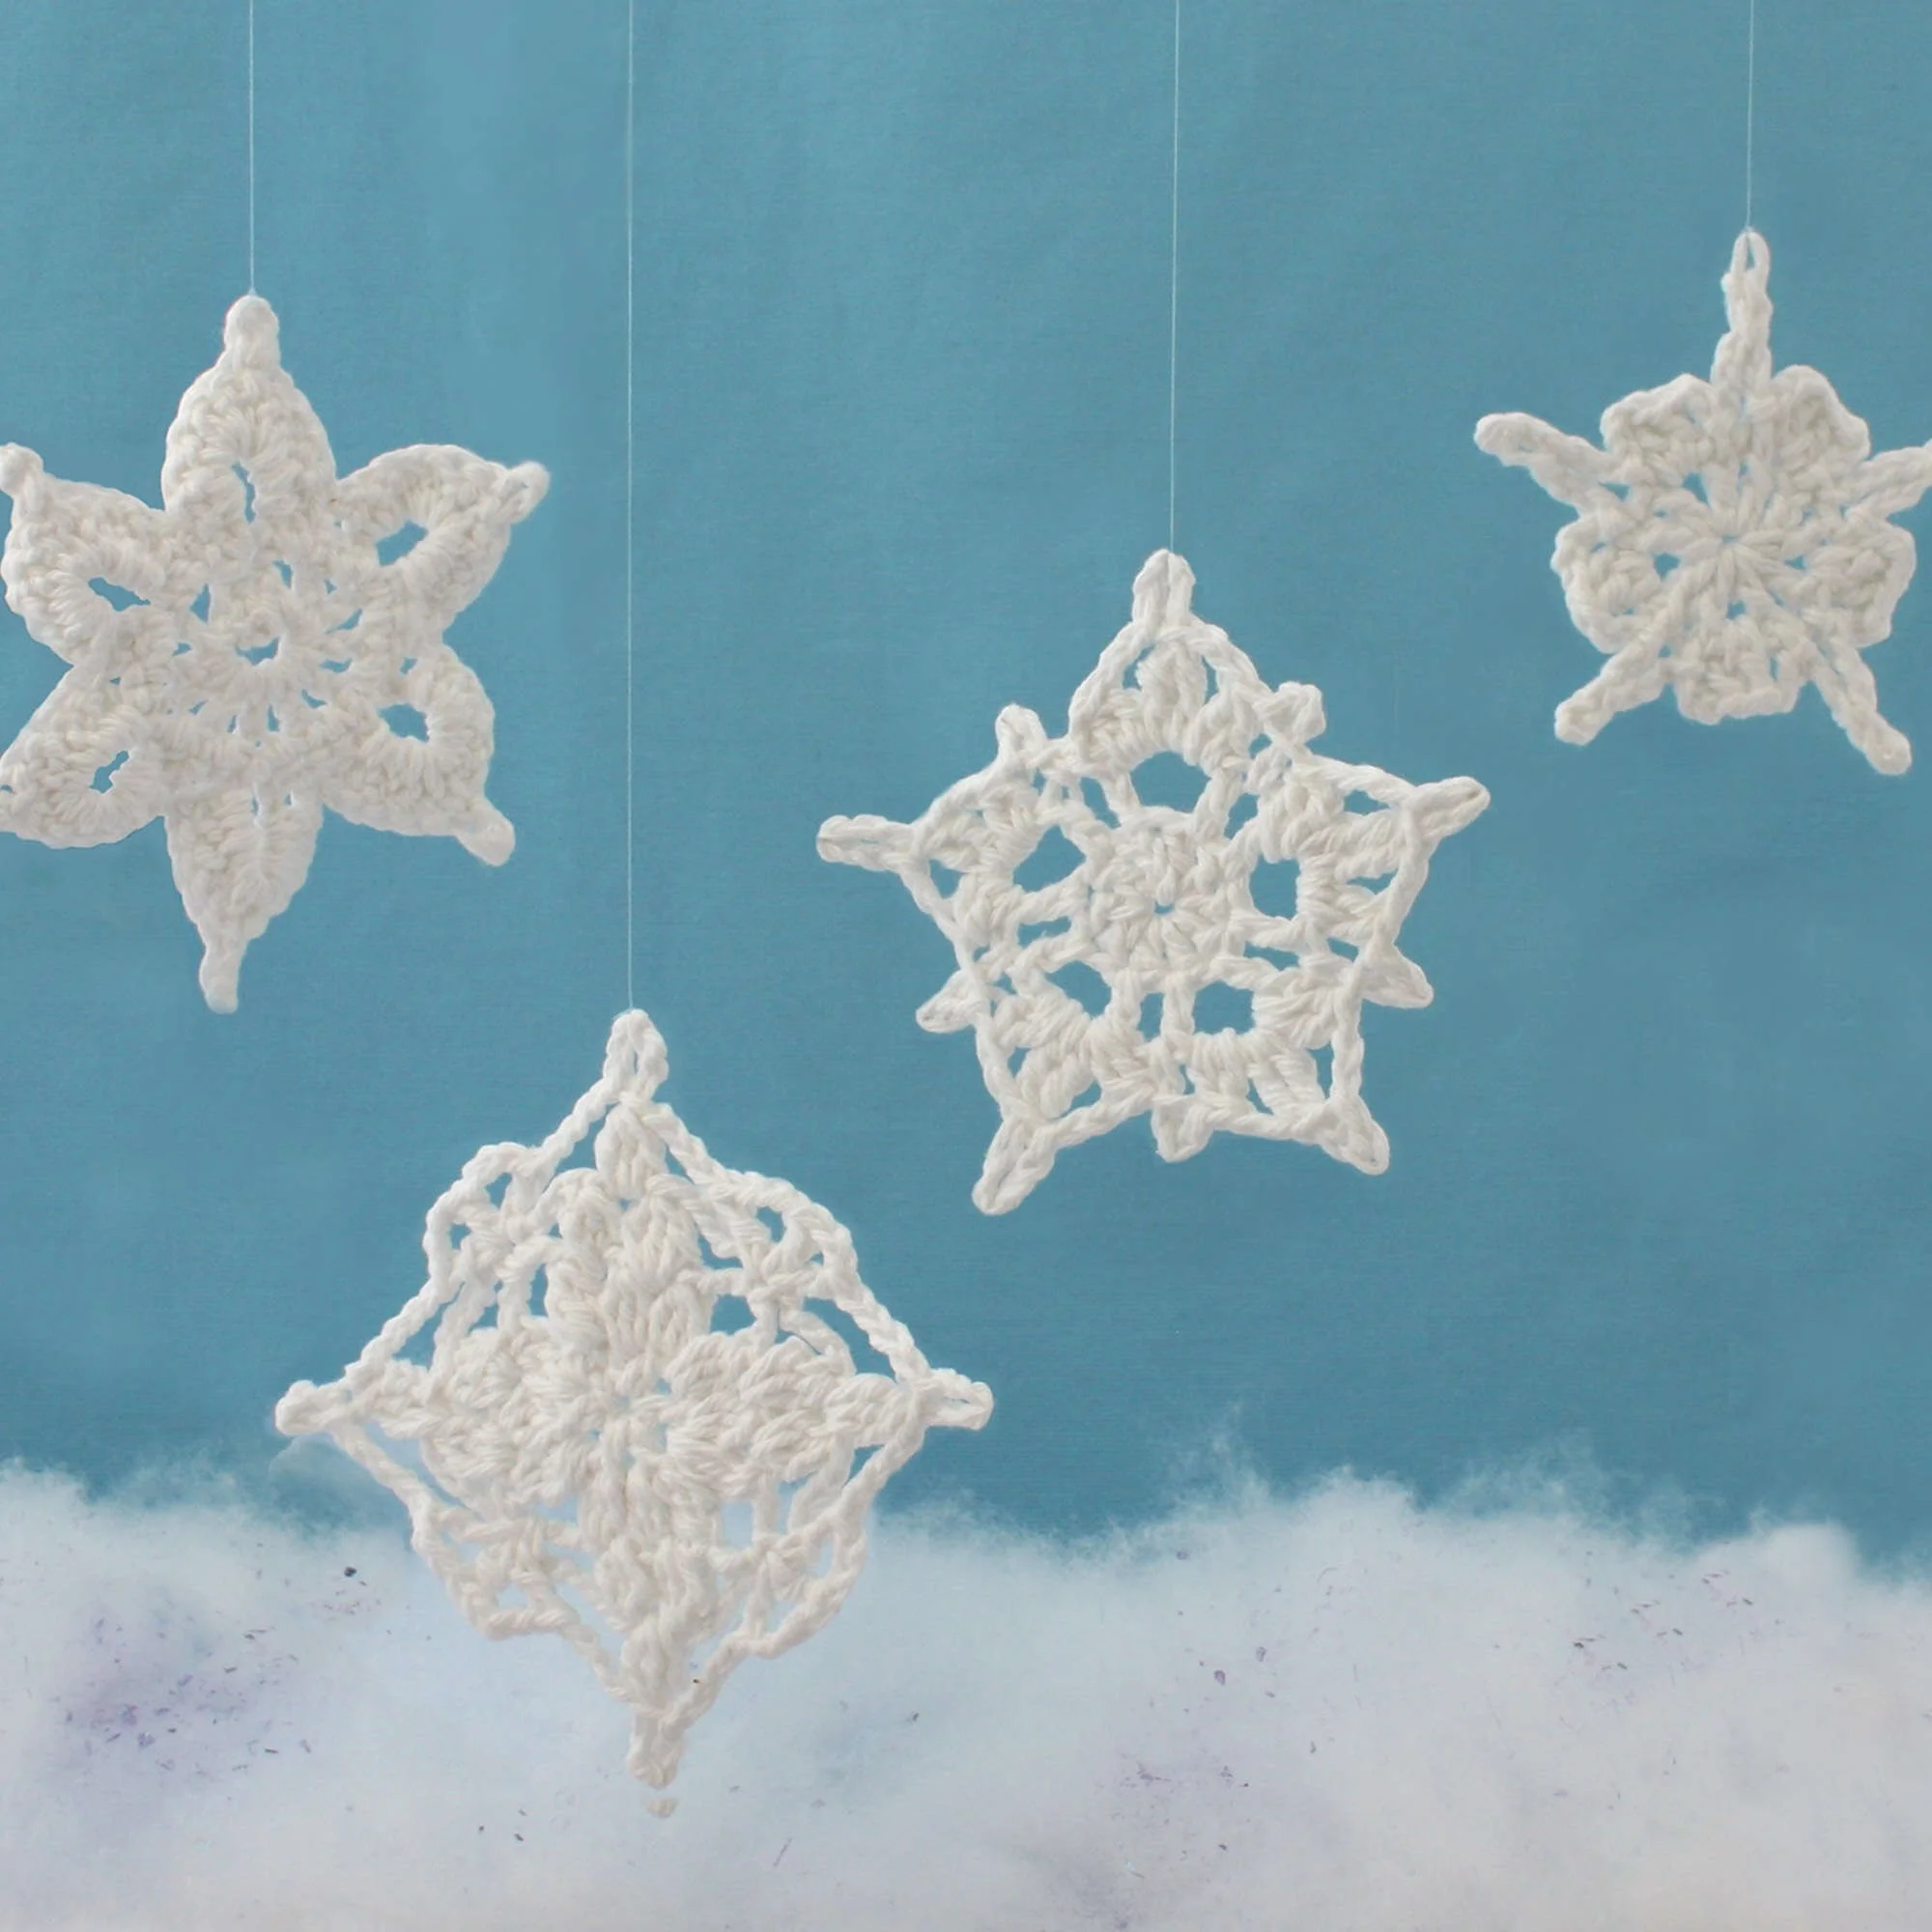
Diverse Snowflakes Pattern Collection
A Tantalizing Crochet Adventure
Crocheting has a magical charm that enchants both beginners and seasoned crafters alike. Diving into the Assorted Snowflakes Pattern offers a delightful way to create beautiful decorations that brighten up your winter season. I fondly remember when I discovered crocheting snowflakes, turning my humble home into a winter wonderland. Each unique piece provides not only a sense of accomplishment but also an opportunity to enhance your skills with various stitches. With the holiday season approaching, these lovely snowflakes make for perfect handmade gifts or charming seasonal decor.
Why you’ll love this pattern
The Assorted Snowflakes Pattern is more than just a project; it’s a gateway to creativity and relaxation. Here are some reasons why you may find this pattern irresistible:
- Beginner-Friendly: These snowflakes are straightforward, making this a great choice for new crocheters.
- Skill-Building: Each snowflake introduces different techniques that help improve your crocheting abilities.
- Quick Completion: You can whip up a batch of snowflakes in no time, making it perfect for last-minute gifts or holiday crafts.
- Handmade Appeal: There’s nothing quite like giving or displaying something made by hand, adding a personal touch to your decorations.
- Great for Scraping Yarn: This project allows you to use leftover yarn, making it environmentally friendly and budget-conscious.
- Portable Project: Grab your materials and take this pattern on the go, whether at the park or while waiting for an appointment.
"I loved making these snowflakes! They are so easy and quick to create. I can’t wait to decorate my home with them!" – A happy crocheter
How this crochet pattern comes together
The Assorted Snowflakes Pattern allows you to create four beautiful snowflakes, each with its unique design. The project starts with basic chains and develops into magical snowflakes through simple and enjoyable rounds. As you progress through the instructions, you will focus on double crochets, single crochets, and clusters, which are fundamental crochet techniques. This project is suitable for all skill levels but is especially rewarding for beginners. Expect to complete your snowflakes in about a couple of hours, depending on your crochet speed.
Materials you’ll need
Gather the following supplies to embark on your snowflake-making journey:
- Lily® Sugar’n Cream® (70.9 g / 2.5 oz; 109 m / 120 yds), 00001 (White)
Note: 1 ball is sufficient for approximately 10 snowflakes in assorted patterns. - Size 3.5 mm (U.S. E or 4) crochet hook or size necessary to achieve the desired gauge.
- Optional: Fabric stiffener for those who want to maintain the shape of their snowflakes.
Material Notes:
- Lily® Sugar’n Cream® yarn offers great durability and softness, ideal for decorative projects.
- Should you wish to add colors, pick shades that evoke a wintry feel, such as icy blues or twinkling golds.
Step-by-step instructions
Stitch Glossary / Abbreviations
- Approx = Approximately
- Ch = Chain(s)
- Dc = Double crochet
- Rem = Remaining
- Rep = Repeat
- Rnd = Round
- Sc = Single crochet
- Sl st = Slip stitch
- Sp(s) = Space(s)
- St(s) = Stitch(es)
- Yoh = Yarn over hook
SNOWFLAKE A
- Ch 5.
- 1st rnd:
- 1 dc in the 5th ch from the hook (counts as 1 dc), ch 1, 1 dc.
- (Ch 1, 1 dc) 10 times in the same sp.
- Ch 1, join with sl st to the 3rd ch.
- This round should have 12 dc + ch-1 sps.
- 2nd rnd:
- Ch 1, 1 sc in the same sp as the last sl st.
- Ch 7, sl st in last sc worked, (1 sc in next ch-1 sp, 1 sc in next dc) twice.
- Rep from * 4 times more.
- Ch 7, sl st in the last sc worked.
- 1 sc in the next ch-1 sp, 1 sc in the next dc.
- Do not join; leave rem st unworked.
- 3rd rnd:
- (6 dc, ch 3, sl st in last dc worked) to make a picot, 5 dc in the next ch-7 sp, miss next sc, 1 sc in next sc, miss next sc.
- Rep from * 5 times more.
- Join with sl st to the last sc of the 2nd rnd.
- Fasten off.
SNOWFLAKE B
- Ch 5.
- 1st rnd:
- 1 dc in 5th ch from hook (counts as 1 dc), ch 1, 1 dc.
- (Ch 1, 1 dc) 8 times in the same sp.
- Ch 1, join with sl st to the 3rd ch.
- This round should have 10 dc + ch-1 sps.
- 2nd rnd:
- Ch 1, 1 sc in the same sp as the last sl st.
- Ch 3, 2 dc in the next ch-1 sp, ch 3, 1 sc in next dc, ch 6, sl st in the 4th ch from the hook, ch 3, miss next ch-1 sp, 1 sc in next dc.
- Rep from * 4 times more, omitting sc at the end of the last rep.
- Join with sl st to the first sc.
- Fasten off.
SNOWFLAKE C
- Ch 4.
- 1st rnd:
- 9 dc in the 4th ch from the hook.
- Join with sl st to the top of ch 3.
- 10 dc.
- 2nd rnd:
- Ch 4 (counts as dc and ch 1).
- 1 dc in next dc.
- *(Ch 3, 1 dc in next dc, ch 1, 1 dc in next dc) 4 times.
- Ch 3, join with sl st to the top of ch 3.*
- 3rd rnd:
- Sl st in next ch-1 sp.
- Ch 1.
- (1 sc, ch 3, sl st in the 3rd ch from hook, making a picot) in the same sp as the last sl st.
- In the next ch-3 sp:
- (Yoh, draw up a loop, yoh and draw through 2 loops on the hook) twice, yoh and draw through all loops on the hook to make a dc cluster, ch 2.
- Yoh twice, draw up a loop, (yoh and draw through 2 loops on the hook) twice.
- Rep from * to * once more, then draw through all loops on the hook to make a tr cluster.
- Ch 5, sl st in the top of tr cluster to create a long picot. Ch 2, dc cluster.
- (1 sc in next ch-1 sp, picot).
- Rep from ** 3 times more, then from ** to *** once.
- Join with sl st to first sc.
- Fasten off.
SNOWFLAKE D
- Ch 5.
- 1st rnd:
- 1 dc in 5th ch from hook (counts as 1 dc, ch 1), 1 dc 4 times in the same sp.
- Ch 1, join with sl st to the 3rd ch.
- This round should have 6 dc plus ch-1 sps.
- 2nd rnd:
- Ch 3.
- *(Yoh and draw up a loop, yoh and draw through 2 loops on hook) twice in the same sp as the last sl st to make a beginning cluster.
- Ch 1.*
- (Yoh and draw up a loop, yoh and draw through 2 loops on the hook) 3 times in the next ch-1 sp to form a cluster.
- Ch 1, cluster in next dc.*
- Ch 5, (cluster in next ch-1 sp or dc, ch 1) 3 times.
- Rep from * twice more.
- Ch 5, join with sl st to the top of the beginning cluster.
- 3rd rnd:
- Sl st in the next ch-1 sp.
- Begin cluster in the same sp, ch 1.
- Cluster in the next ch-1 sp.
- Ch 5, 1 sc in next ch-5 sp, ch 5, cluster in next ch-1 sp, ch 1, cluster in next ch-1 sp.
- Rep from * twice more.
- Ch 5, 1 sc in the last ch-5 sp, ch 5.
- Join with sl st to the top of the beginning cluster.
- 4th rnd:
- Sl st in the next ch-1 sp.
- Begin cluster in the same sp.
- Ch 5.
- Sl st in the top of the beginning cluster to create a long picot.
- Ch 5, [(1 dc, ch 3) twice, 1 dc] in next sc, ch 5.
- Cluster in the next ch-1 sp; long picot in the last cluster.
- Rep from * twice more, then from * to ** once.
- Join with sl st to the top of the beginning cluster.
- Fasten off.
Finishing
For added durability, you can apply a fabric stiffener according to the manufacturer’s instructions, then pin your snowflakes on a flat surface to dry.
Creative ideas
Once you’ve mastered the art of crafting these lovely snowflakes, the possibilities become endless! Here are some fun ways to showcase your finished creations:
- Home Décor: Add a touch of winter magic to your living space by hanging them in windows or displaying them on your mantel.
- Gift Wrapping: Tuck these delicate snowflakes onto gifts as charming embellishments.
- Seasonal Decorations: Use them to adorn your holiday tree or string them together for garlands.
- Handmade Gifts: Perfect for gifting, including as part of a cozy home package with hot cocoa.
- Craft Fair Products: These delightful snowflakes can be a hit at local craft fairs or handmade shops.
How to care for your crochet project
Caring for your newly created snowflakes is essential for maintaining their beauty. Here are some practical care tips:
- Hand Wash: Use cool water and mild detergent. Avoid machine washing to prevent damage.
- Reshape: If needed, reshape gently while damp.
- Flat Dry: Lay them flat on a towel for drying; avoid hanging to prevent stretching.
- Blocking: If you want a crisp finish, consider lightly blocking them after washing, especially if stiffened.
Helpful crochet tips
Crocheting snowflakes can be a delightful experience, but here are some handy tips to ensure your success:
- Even Tension: Aim for consistent tension across your stitches to keep your snowflakes uniform.
- Use Stitch Markers: Place markers at the start of each round to keep track of where you are.
- Count Stitches: Regularly count your stitches to prevent accidental increases or decreases.
- Practice Picots: Practice making picots on scrap yarn to master the technique before integrating them into your snowflakes.
- Securely Weave in Ends: Ensure your yarn ends are woven in securely for a polished look.
Creative variations
Feel free to get creative with your snowflakes! Here are some fun variations to consider:
- Color Choices: Experiment with winter hues or vibrant shades to create themed decorations.
- Size Adjustments: Vary your hook size or adjust yarn weight to create larger or smaller snowflakes.
- Decorative Edging: Add a contrasting border around each snowflake for a playful touch.
- Seasonal Palettes: Create sets for different occasions using a mix of cotton yarns to celebrate holidays year-round.
Frequently asked questions
-
Is this crochet pattern beginner-friendly?
Yes, this pattern is perfect for beginners looking to expand their skills. -
What yarn works best?
Lily® Sugar’n Cream® is recommended for its quality and ease of use. -
Can I use a different hook size?
While a 3.5 mm hook is recommended, you can adjust sizes to fit your tension preference, keeping in mind it could alter the size of your snowflakes. -
How long does the project take?
Expect to spend about 1-2 hours on each snowflake, depending on your familiarity with the stitches. -
How should I wash the finished project?
Hand wash in cool water and lay flat to dry; avoid machine washing for best results. -
Can I sell finished items made from this pattern?
Check the original designer’s usage terms to make sure it’s permitted.
With this guide, you’re ready to create your delightful snowflakes. Enjoy your crocheting journey!



