
Get 30+ FREE Crochet Patterns — Join Our Newsletter
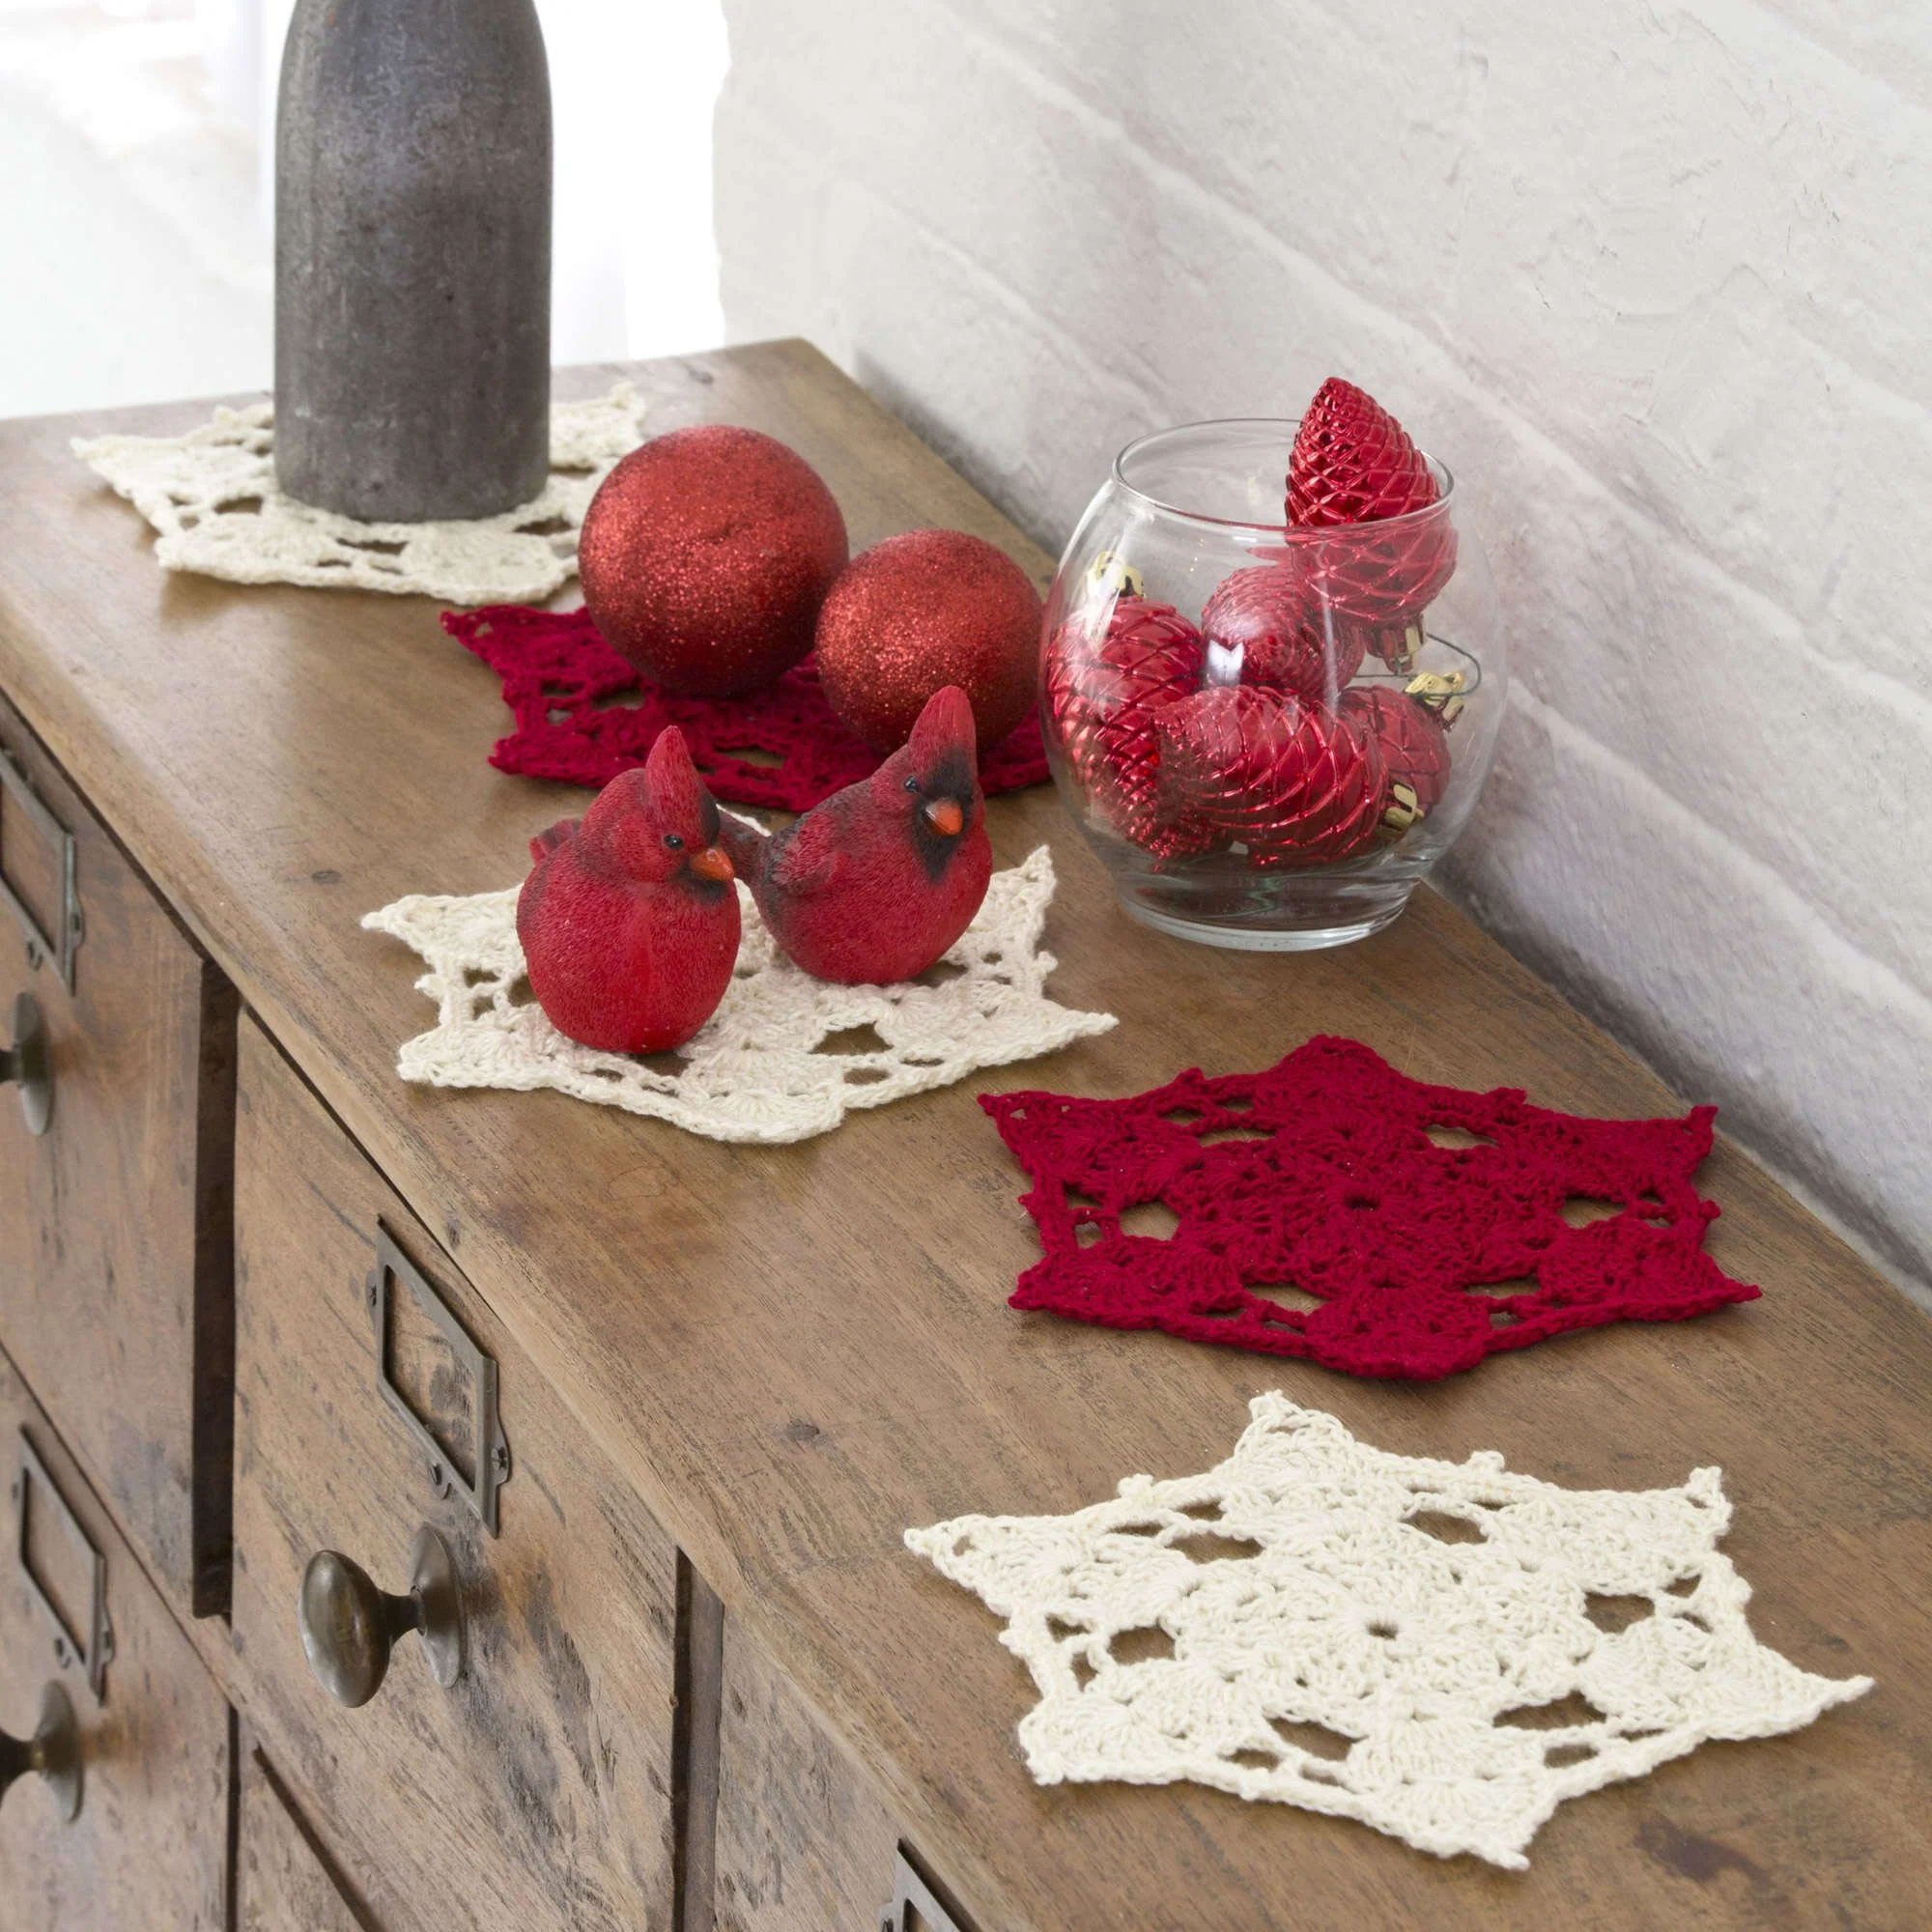
Crochet Large Snowflake Doilies Pattern
Engaging with the Crochet Big Snowflake Doilies Pattern
Crocheting has a way of weaving warmth into our lives. One of my favorite projects to embark on during the holiday season is the lovely Big Snowflake Doilies. They perfectly capture the essence of winter while adding a handmade touch to home décor. Not only are they visually stunning, but they also make for thoughtful gifts that friends and family will cherish. Whether you’re a beginner looking to sharpen your skills or an experienced crocheter seeking a quick and rewarding project, this pattern fits the bill!
Why You’ll Love This Pattern
The Big Snowflake Doilies pattern stands out for several reasons:
- Beginner Friendly: It’s structured enough for beginners yet satisfying for seasoned crocheters.
- Skill-Building Value: You’ll master stitches like the front post double crochet and clusters, enhancing your skills.
- Quick Completion Time: Expect to finish a doily in just a few hours, making them perfect for last-minute gifts.
- Handmade Appeal: These doilies add a personal touch to your home during the holiday season.
- Gift Potential: They are ideal for seasonal decorations or thoughtful gifts for loved ones.
- Scrap-Yarn Suitability: Use up your stash of yarn while creating beautiful pieces.
- Relaxing and Portable: The repetitive nature of the work makes it soothing and easy to take on outings.
“I made several of these doilies as gifts, and everyone was thrilled! The pattern is straightforward yet beautiful.” – A Happy Crocheter
How This Crochet Pattern Comes Together
In this delightful pattern, you will create stunning round snowflake doilies. As you progress through the rounds, you will build intricate layers that showcase various stitches. The primary crochet technique involves repeated clusters and front post stitches, giving the doily a beautiful texture. This project is ideal for those with basic crochet knowledge, and you can expect to complete it in a few relaxing evenings.
Materials You’ll Need
Gather these supplies to get started:
- RED HEART® LusterSheen®:
- 1 ball each in colors 0007 Vanilla (A) and 0915 Cherry Red (B)
- Susan Bates® Crochet Hook: 3.5mm [US E-4]
- Yarn Needle
- Rust Proof Pins
- Starch (if necessary for finishing)
When working with the RED HEART® LusterSheen®, you’re using a lovely acrylic blend that offers both sheen and durability. The hook size is perfect for creating detailed stitches while remaining quite manageable for all skill levels.
Step-by-Step Instructions
Here’s how to crochet your Big Snowflake Doilies:
Special Abbreviations
- fpdc (front post double crochet): Yarn over, insert hook from front to back to front around the post of indicated stitch and draw yarn through, [yarn over and draw through 2 loops on hook] twice.
- beg cl (beginning cluster): Ch 2, [yarn over, draw up a loop in next st, yarn over and draw through 2 loops] twice, yarn over and draw through all 3 loops.
- V st: (dc, ch 1, dc) in the same st.
- cl (cluster): [yarn over, draw up a loop in next st, yarn over and draw through 2 loops] 3 times, yarn over and draw through all 4 loops.
Snowflake Doily
Starting / Rounds 1–4
-
Round 1:
- Ch 8, join with slip st to form a ring.
- Ch 3 (counts as dc), 2 dc in ring, ch 2, [3 dc in ring, ch 2] 5 times; join with a slip st in the top of ch-3.
-
Round 2:
- Ch 3, * fpdc around next dc, dc in next dc, ch 1, dc in ch-2 space, ch 1, dc in next dc; repeat from * around, join.
-
Round 3:
- Beg cl over next 2 dc, * ch 2, skip next ch-1 space, V st in next dc, ch 2, skip next ch-1 space, cl over next 3 dc; repeat from * around, join in top of beg cl.
-
Round 4:
- Ch 1, sc in the same st as joining, * ch 1, skip next ch-2 space, (3 tr, ch 2, 3 tr) in next ch-1 space, ch 1, skip next ch-2 space, sc in next cl; repeat from * around, join with a slip st in the first sc. Fasten off.
Additional Rounds (after Round 4)
-
Round 5:
- Join yarn in any ch-2 space;
- Ch 4 (counts as tr), 8 tr in the same space, ch 4, skip next 2 ch-1 spaces, [9 tr in next ch-2 space, ch 4, skip next 2 ch-1 spaces] 5 times; join in top of ch-4.
-
Round 6:
- Beg cl over next 2 tr, * [ch 3, cl over next 3 tr] twice, ch 4, dc in ch-4 space, ch 4, cl over next 3 tr; repeat from * around, join.
-
Round 7:
- Skip Beg cl, [9 tr in next cl, slip st in next cl, 4 sc in next ch-4 loop, sc in next dc, 4 sc in next ch-4 loop, slip st in next cl] 6 times. Do not join.
-
Round 8:
- [Slip st in next 3 tr, skip next tr, (2 dc, ch 5, slip st in 4th ch from hook, ch 1, 2 dc) in next tr, skip next tr, slip st in next 3 tr, skip next slip st, slip st in next 5 sc, ch 3, slip st in same sc as last slip st, slip st in next 4 sc, skip next slip st] 6 times; join in the first slip st. Fasten off.
Finishing
- Weave in ends.
- Mist well with water and pin to measurements, stretching to block.
- Allow to dry.
- If ends tend to curl, lightly spray starch on the wrong side of the doily.
Creative Ideas
Once you have finished crocheting your Big Snowflake Doily, consider these beautiful ways to display or use them:
- Home Décor: Adorn your coffee table or dining table with snowflake doilies to add a festive touch.
- Handmade Gifts: These doilies make thoughtful gifts for birthdays, holidays, or housewarmings.
- Seasonal Decorations: Use them as beautiful accents in your winter holiday decor.
- Kitchen Accessories: Protect surfaces from hot dishes while adding charm to your kitchen.
- Craft-Fair Products: They can be sold at local craft fairs or added to handmade shop listings.
How to Care for Your Crochet Project
To maintain the beauty and integrity of your doily, follow these care instructions:
- Hand Washing: Wash gently in cool water with mild detergent.
- Reshaping: Reshape the doily while damp to restore its original form.
- Flat Drying: Lay flat to dry, avoiding direct sunlight to prevent fading.
- Blocking: Mist lightly while blocking to keep the shape.
- Long-term Storage: Store in a cool, dry place, ideally flat or rolled to prevent creasing.
Helpful Crochet Tips
To ensure success with your crochet project, here are some valuable tips:
- Maintain Even Tension: Keep your yarn tension consistent for uniform stitches.
- Count Stitches: Regularly count your stitches to avoid mistakes, especially in rounds.
- Use Stitch Markers: Mark the beginning of rounds to help you keep track.
- Avoid Accidental Increases: Be mindful of where you place your stitches to prevent unwanted increases.
- Check Project Size: Measure your work periodically to ensure it matches the pattern’s specifications.
Creative Variations
Feel free to customize your snowflake doily in various ways:
- Different Yarn Colors: Experiment with seasonal palettes or use contrasting colors for accents.
- Contrasting Borders: Add a pop of color with a contrasting border for a unique touch.
- Textured Yarn: Incorporate textured yarn for a different visual effect.
- Seasonal Themes: Adjust colors based on upcoming holidays for themed decorations.
- Embellishments: Consider adding embroidery or appliqués for a personalized finish.
Remember, altering the yarn or stitch types can affect the size and drape of your final piece, so test variations before committing to a full project.
Frequently Asked Questions
Here are some common questions about this crochet pattern:
-
Is this crochet pattern beginner-friendly?
Yes, the pattern builds on basic crochet stitches and is suitable for beginners. -
What yarn works best?
RED HEART® LusterSheen® is recommended for its durability and sheen, but other sport-weight acrylic yarns could also work. -
Can I use a different hook size?
While a 3.5mm hook is ideal, using a larger or smaller hook will alter the size of your doily, so adjust your stitch count as needed. -
How long does the project take?
The doily can typically be completed in a few hours, depending on your skill level. -
How should I wash the finished project?
Hand wash in cool water and lay flat to dry to preserve its shape and texture. -
Can I sell finished items made from this pattern?
Check the original designer’s usage terms as they often dictate whether finished items can be sold. -
How can I make it larger or smaller?
Adjust the yarn weight and hook size, and add additional rounds to increase its size.
By following this guide and putting your personal spin on creations, you’ll surely enjoy crocheting this charming Big Snowflake Doily project! Happy crocheting!



