
Get 30+ FREE Crochet Patterns — Join Our Newsletter
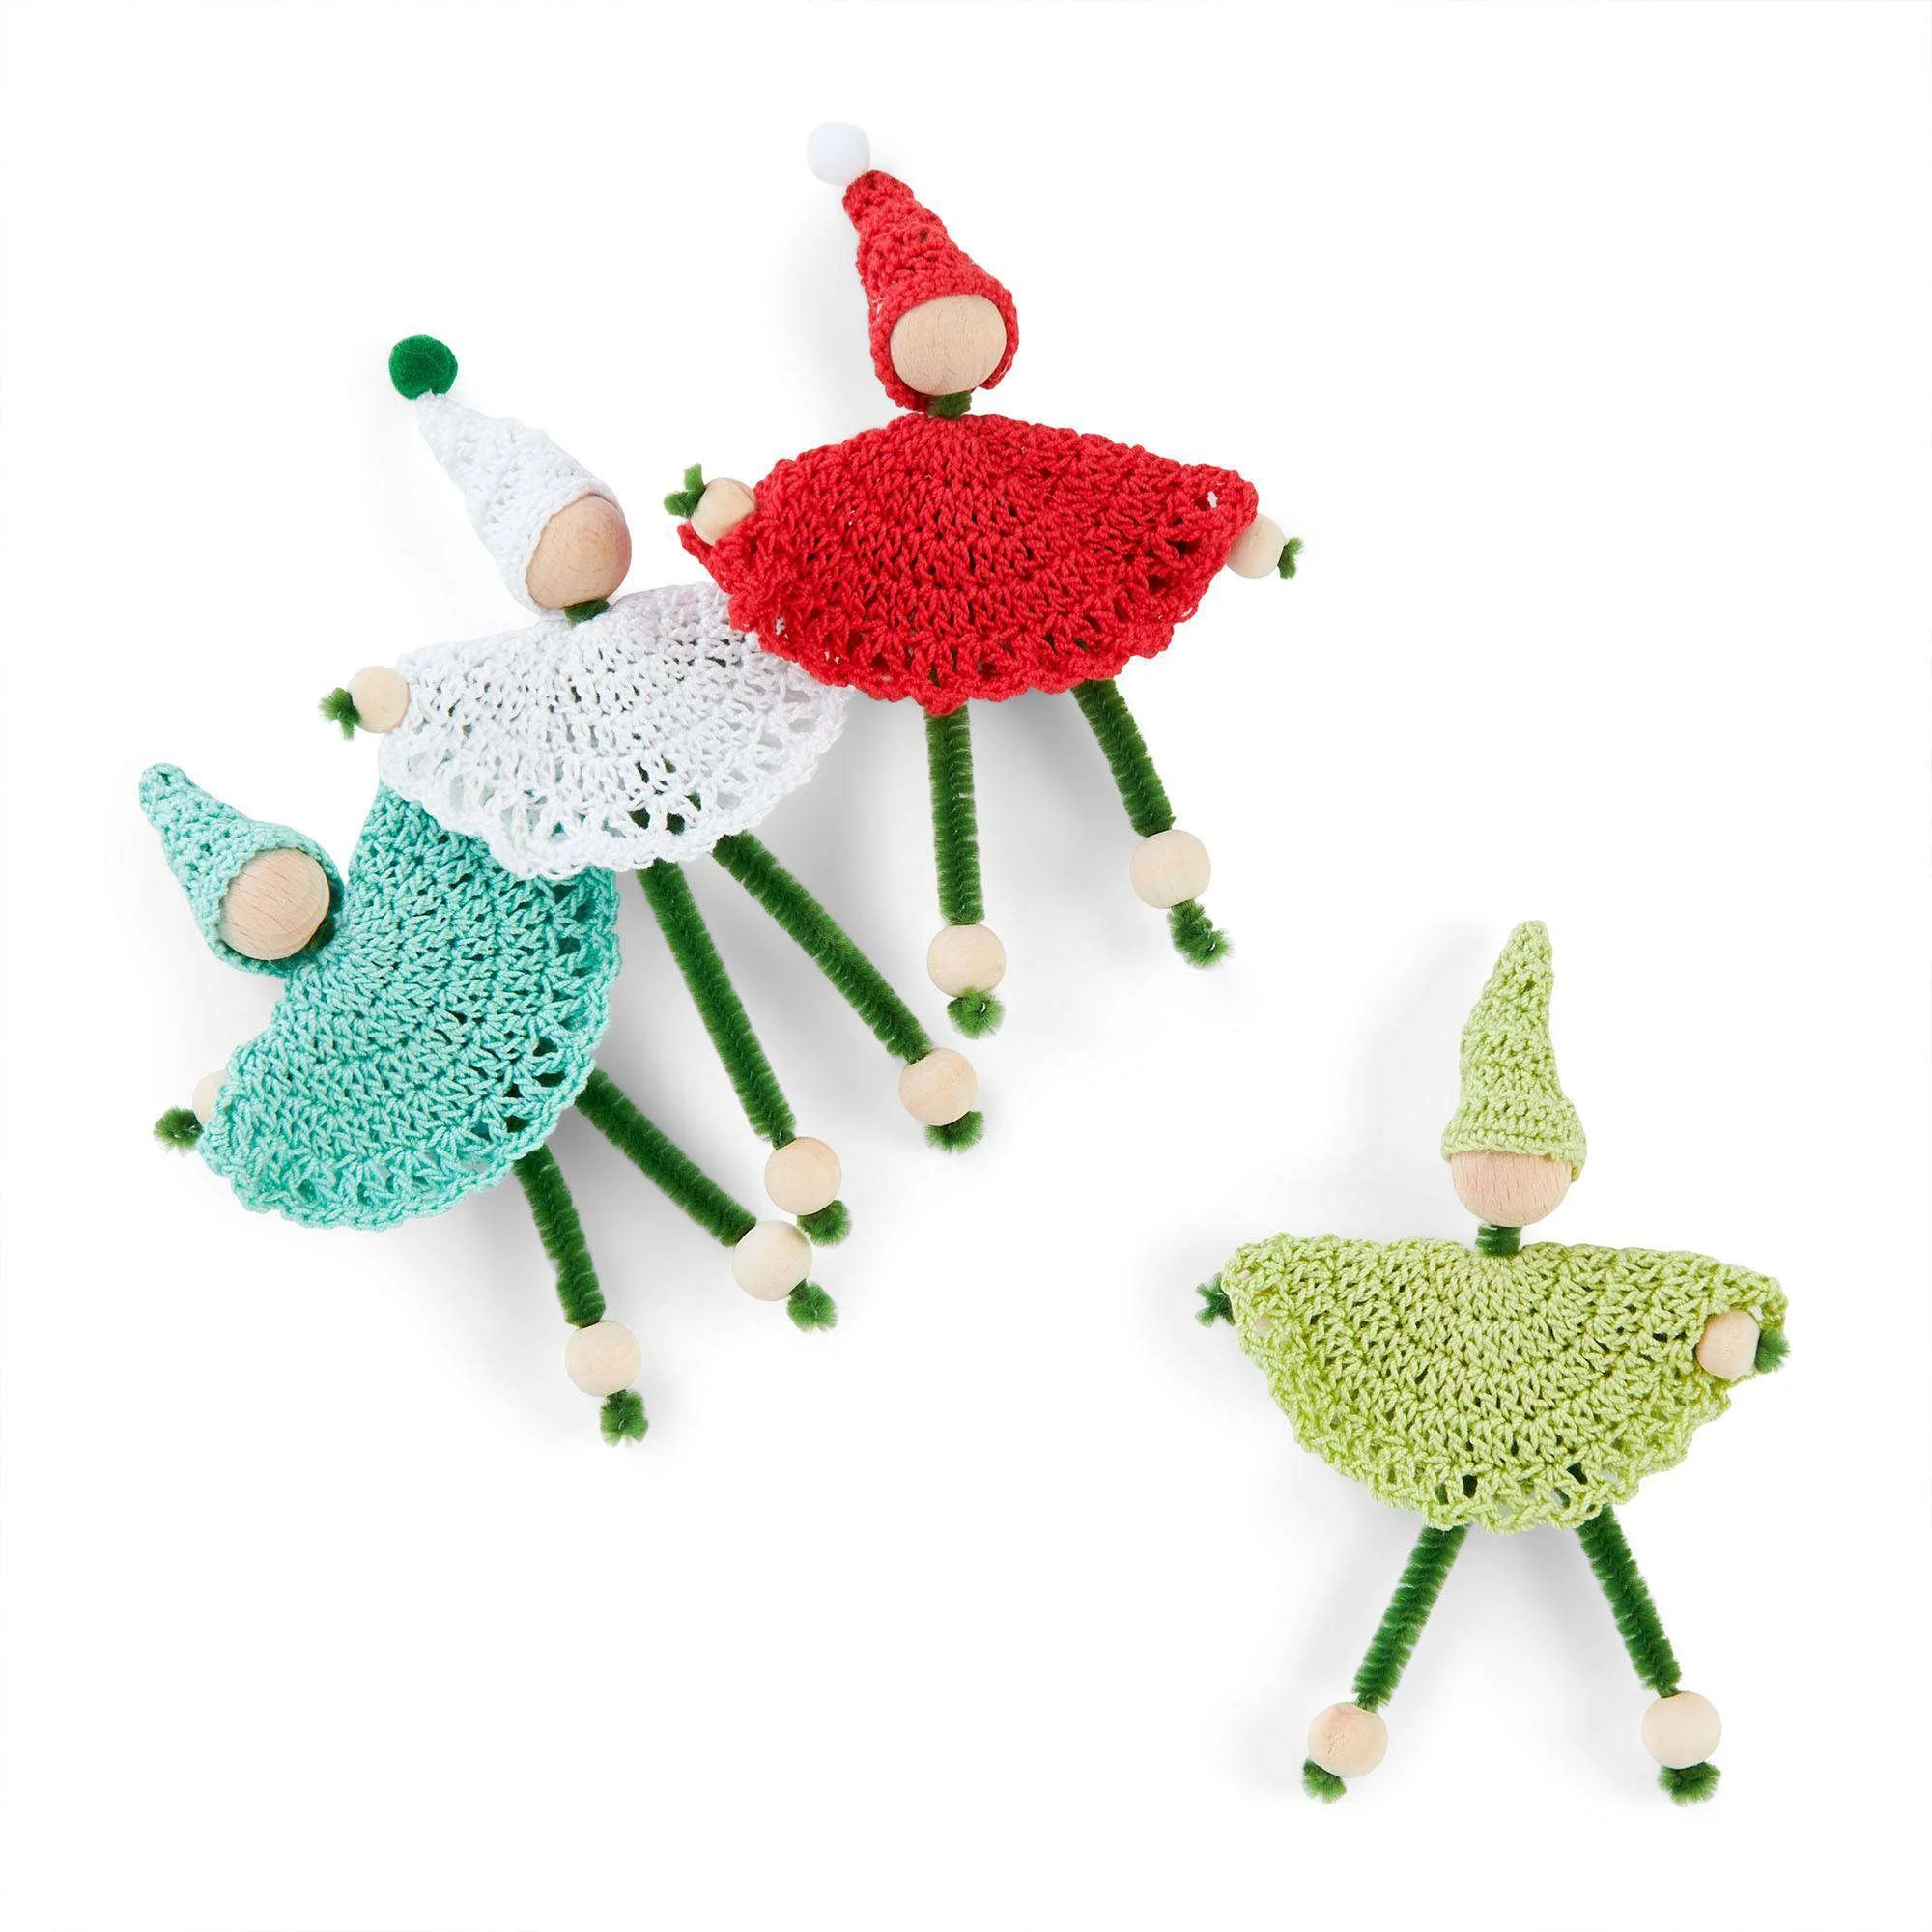
Aunt Lydia Tree Elves Crochet Pattern
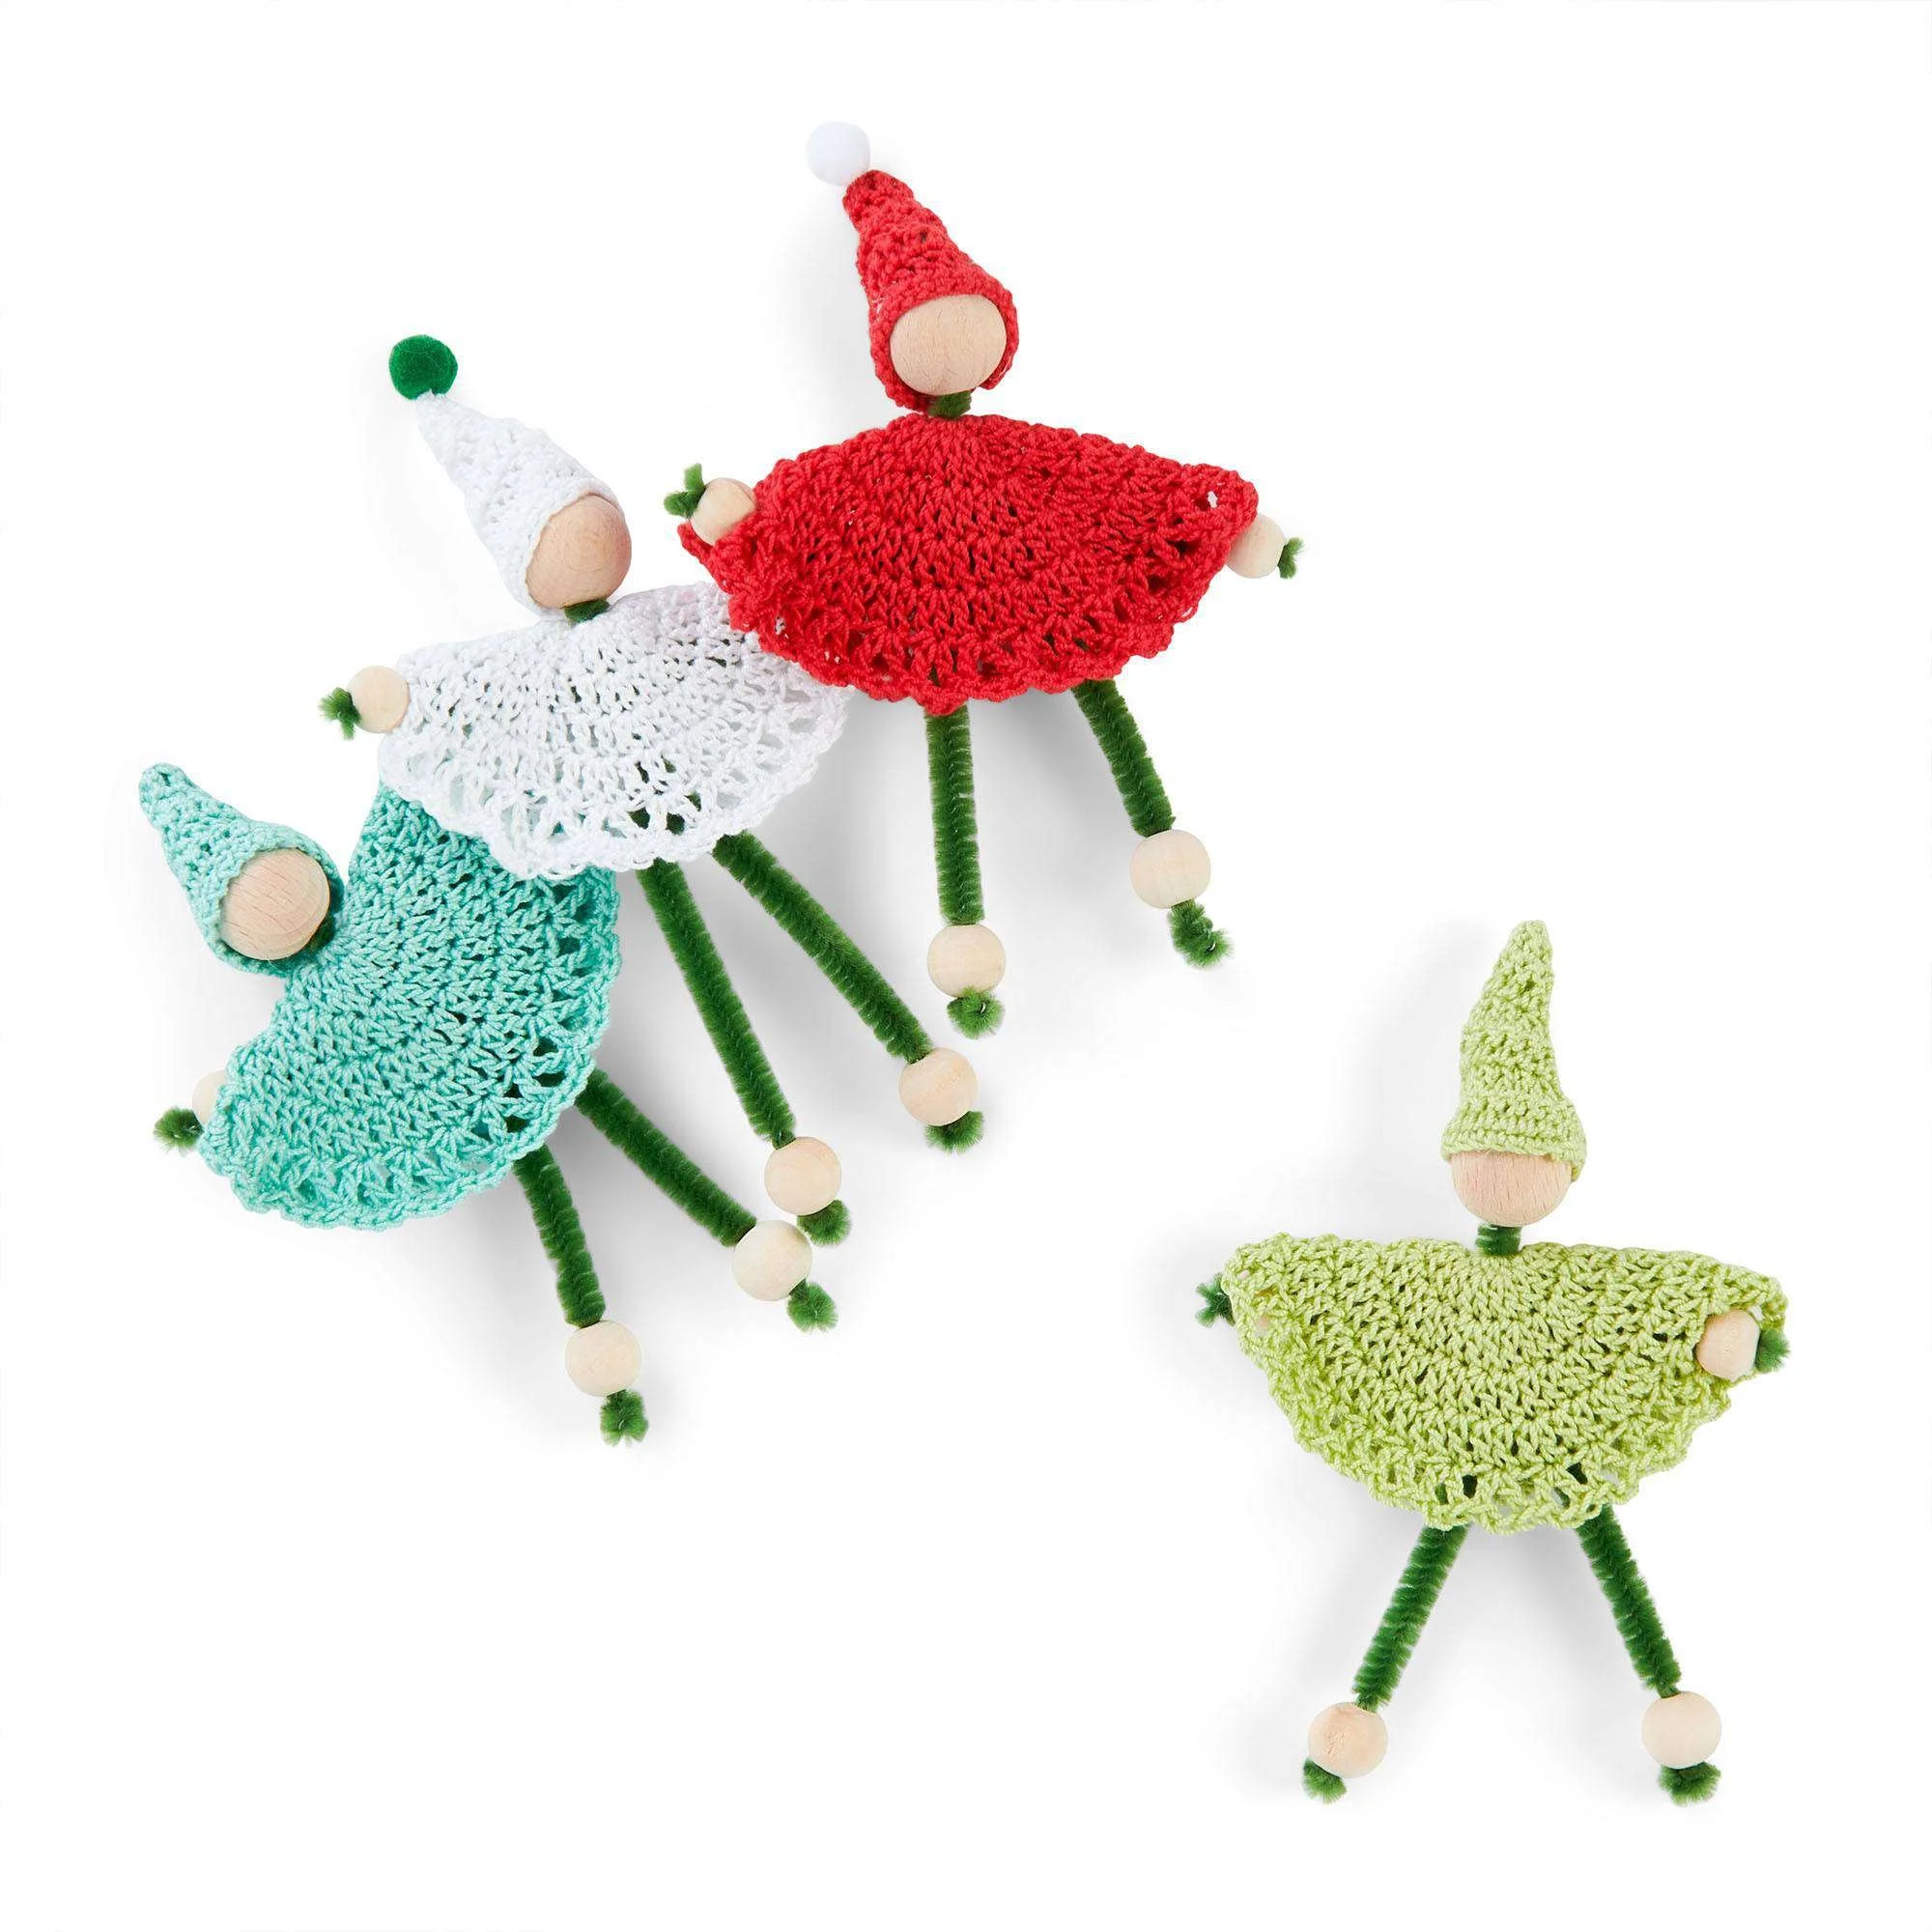
Create adorable decorations for your holiday season with the Aunt Lydia Crochet Tree Elves Pattern. These charming little elves feature vibrant colors and intricate crochet construction, making them a delightful addition to your home decor. Constructed using Aunt Lydia’s Classic Crochet Thread, each elf is unique, bringing warmth and cheer to your Christmas celebrations.
In this tutorial, you’ll learn how to create the elves’ tops and hats using basic crochet stitches. The assembly involves using pipe cleaners and wooden balls to form the elf’s body, adding a touch of whimsy to your holiday crafts. This project is suitable for crocheters who are comfortable with double crochet and basic shaping techniques.
Project Details
- Crochet terminology: US terms
- Skill level: Intermediate
- Finished size: Approximately 5″ [12.7 cm] tall
- Construction method: Worked in rounds and rows
Materials and Tools
| Yarn Option | Yarn and Specifications | Amount |
|---|---|---|
| White | Aunt Lydia’s Classic Crochet Thread size 10 — 400 yds / 366 m | 1 ball for Elf 1 |
| Atom Red (2160) | Aunt Lydia’s Classic Crochet Thread size 10 — 350 yds / 320 m | 1 ball for Elf 2 |
| Wasabi (0397) | Aunt Lydia’s Classic Crochet Thread size 10 — 350 yds / 320 m | 1 ball for Elf 3 |
| Aqua (0450) | Aunt Lydia’s Classic Crochet Thread size 10 — 350 yds / 320 m | 1 ball for Elf 4 |
- U.S. B/1 (2.25 mm) Susan Bates® Silvalume® crochet hook for Elf’s poncho
- U.S. 7 (1.5 mm) Susan Bates® Steelite® crochet hook for Elf’s hat or size needed to obtain gauge
- Pipe cleaner: one 12″ [30.5 cm] long per elf
- 1 medium wooden ball for head: 2¼” [5.5 cm] diameter
- 4 small wooden balls for hands & feet
- Small purchased pom-pom
- Hot glue gun
Note: These decorations contain small parts and are not suitable for children under 8 years of age.
Abbreviations
| Abbreviation | Meaning |
|---|---|
| ch | chain |
| dc | double crochet |
| sc | single crochet |
| sc2tog | single crochet two together |
| PM | place marker |
| sp | space |
Preparation and Techniques
Working in Rounds
This pattern includes continuous rounds for the elf’s top. Begin each round with a chain that counts as a stitch, and do not join each round unless specified. Use a stitch marker to mark the beginning of each round.
Complete Pattern Instructions
Elf’s Top
| Round | Instructions | Stitches |
|---|---|---|
| 1st rnd | Ch 3. 11 dc in magic loop. Join. PM on top of first dc for beg of rnd. | 12 dc |
| 2nd rnd | Ch 3. 1 dc in same sp as sl st. 2 dc in each dc around. Join. | 24 dc |
| 3rd rnd | Ch 3. 1 dc in same sp as sl st. 1 dc in next dc. *2 dc in next dc. 1 dc in next dc. Rep from * around. Join. | 36 dc |
| 4th rnd | Ch 3. 1 dc in same sp as sl st. 1 dc in each of next 2 dc. *2 dc in next dc. 1 dc in each of next 2 dc. Rep from * around. Join. | 48 dc |
| 5th rnd | Ch 3. 1 dc in same sp as sl st. 1 dc in each of next 3 dc. *2 dc in next dc. 1 dc in each of next 3 dc. Rep from * around. Join. | 60 dc |
| 6th rnd | Ch 5 (counts as ch 2 and 1 dc). 1 dc in same sp as sl st. *Skip next dc. (1 dc. Ch 2. 1 dc) in next dc. Rep from * around. Skip last dc. Join with sl st to 3rd ch of ch-5. Fasten off. | — |
Elf’s Hat
| Row | Instructions | Stitches |
|---|---|---|
| 1st row | Ch 23. 1 sc in 2nd ch from hook and each ch to end of chain. Turn. | 22 sc |
| 2nd row | Ch 1. Sc2tog. 1 sc in each sc to last 2 sts. Sc2tog. Turn. | 20 sts |
| 3rd row | Rep last row until 4 sts rem. | — |
| Next row | Ch 1. (Sc2tog) twice. Turn. | — |
| Next row | Ch 1. Sc2tog. Fasten off. Weave in ends. | — |
Assembly and Finishing
Cut the Pipe Cleaners
Cut the pipe cleaners as follows:
- 3″ [7.5 cm] for Body
- 4″ [10 cm] for Arms
- 5″ [12.5 cm] for Legs
Assembly Steps
- Fold Leg pipe cleaner in half.
- Fold up the lower end of the Body pipe cleaner approx ½” [3 mm] to form an “U”.
- Place Legs in the “U” and twist closed.
- Insert top of Body through hole in the center of Elf’s Top and push Elf’s Top down approx 1½” [4 cm].
- Place Head wooden ball on top of Body pipe cleaner. Twist Body pipe cleaner end at top of wooden ball in a knot, ensuring it does not pull back through the hole.
- Fold Arm pipe cleaner in half and wrap it around Body pipe cleaner approx ½” [3 mm] below Elf’s Top.
- Slide Feet wooden balls onto Leg pipe cleaner and secure end. Repeat for 2nd leg.
- Insert the arm through V-stitch edge of Elf’s Top and attach hand wooden ball to Arm pipe cleaner. Secure end. Repeat for 2nd Arm.
- Sew back hat seam. Attach pom-pom to tip of Hat.
- Glue Hat to Head wooden ball, keeping seam at back.
- Insert an ornament hook through 2 sts at top of Hat to hang Tree Elf on Christmas Tree or on a bottle or gift box.
Practical Tips
- Adding Stability: When adding the wooden balls, ensure they are securely attached to prevent the elves from toppling over.
- Color Variations: Experiment with different thread colors to match your holiday decor or personal style.
- Holiday Themes: Consider adding thematic accessories, such as tiny scarves or hats, to the elves for unique decorations.
Troubleshooting
- Incorrect Stitch Count: If you notice a mismatch in stitch count, double-check previous rows for missed increases or decreases.
- Loose Assembly: Ensure pipe cleaners are twisted tightly and that all parts are securely glued to prevent disassembly.
- Hat Fit: If the hat seems too loose, check the stitch count and consider adjusting your tension or using a smaller hook size.
Care
To keep your crochet elves looking their best, follow these care tips:
- Spot clean with a damp cloth if needed.
- Store in a dry place to prevent any moisture damage.
- Keep away from direct sunlight to avoid fading the colors.
Frequently Asked Questions
What materials do I need for the Aunt Lydia Crochet Tree Elves Pattern?
You will need Aunt Lydia’s Classic Crochet Thread (size 10), a couple of sizes of crochet hooks, pipe cleaners, wooden balls, a hot glue gun, and small pom-poms. Be sure to follow the specified yarn amounts for each elf’s colors.
How tall is each elf once completed?
Each completed tree elf will be approximately 5 inches [12.7 cm] tall, making them a perfect size for decorating your tree or gifts without overwhelming other elements.
Can I use a different yarn for this pattern?
While the pattern specifies Aunt Lydia’s Classic Crochet Thread, you can experiment with other similar thread or yarn, keeping in mind that yarn weight and hook size can affect the final size and stability of your elves.
How do I secure the pipe cleanters and wooden balls in place?
Use a hot glue gun to attach the wooden balls to the body and ensure that each joint is twisted tightly. This promotes stability and keeps your elves from falling apart.
What if I want to make larger elves?
To create larger elves, you would need to use thicker yarn and larger hooks. Adjust the number of stitches according to your new yarn choice to achieve the desired size while maintaining the shape.
Choose Your Next Crochet Project
Explore additional fun crochet patterns that are perfect for the holiday season! Browse our collection now!



