
Get 30+ FREE Crochet Patterns — Join Our Newsletter
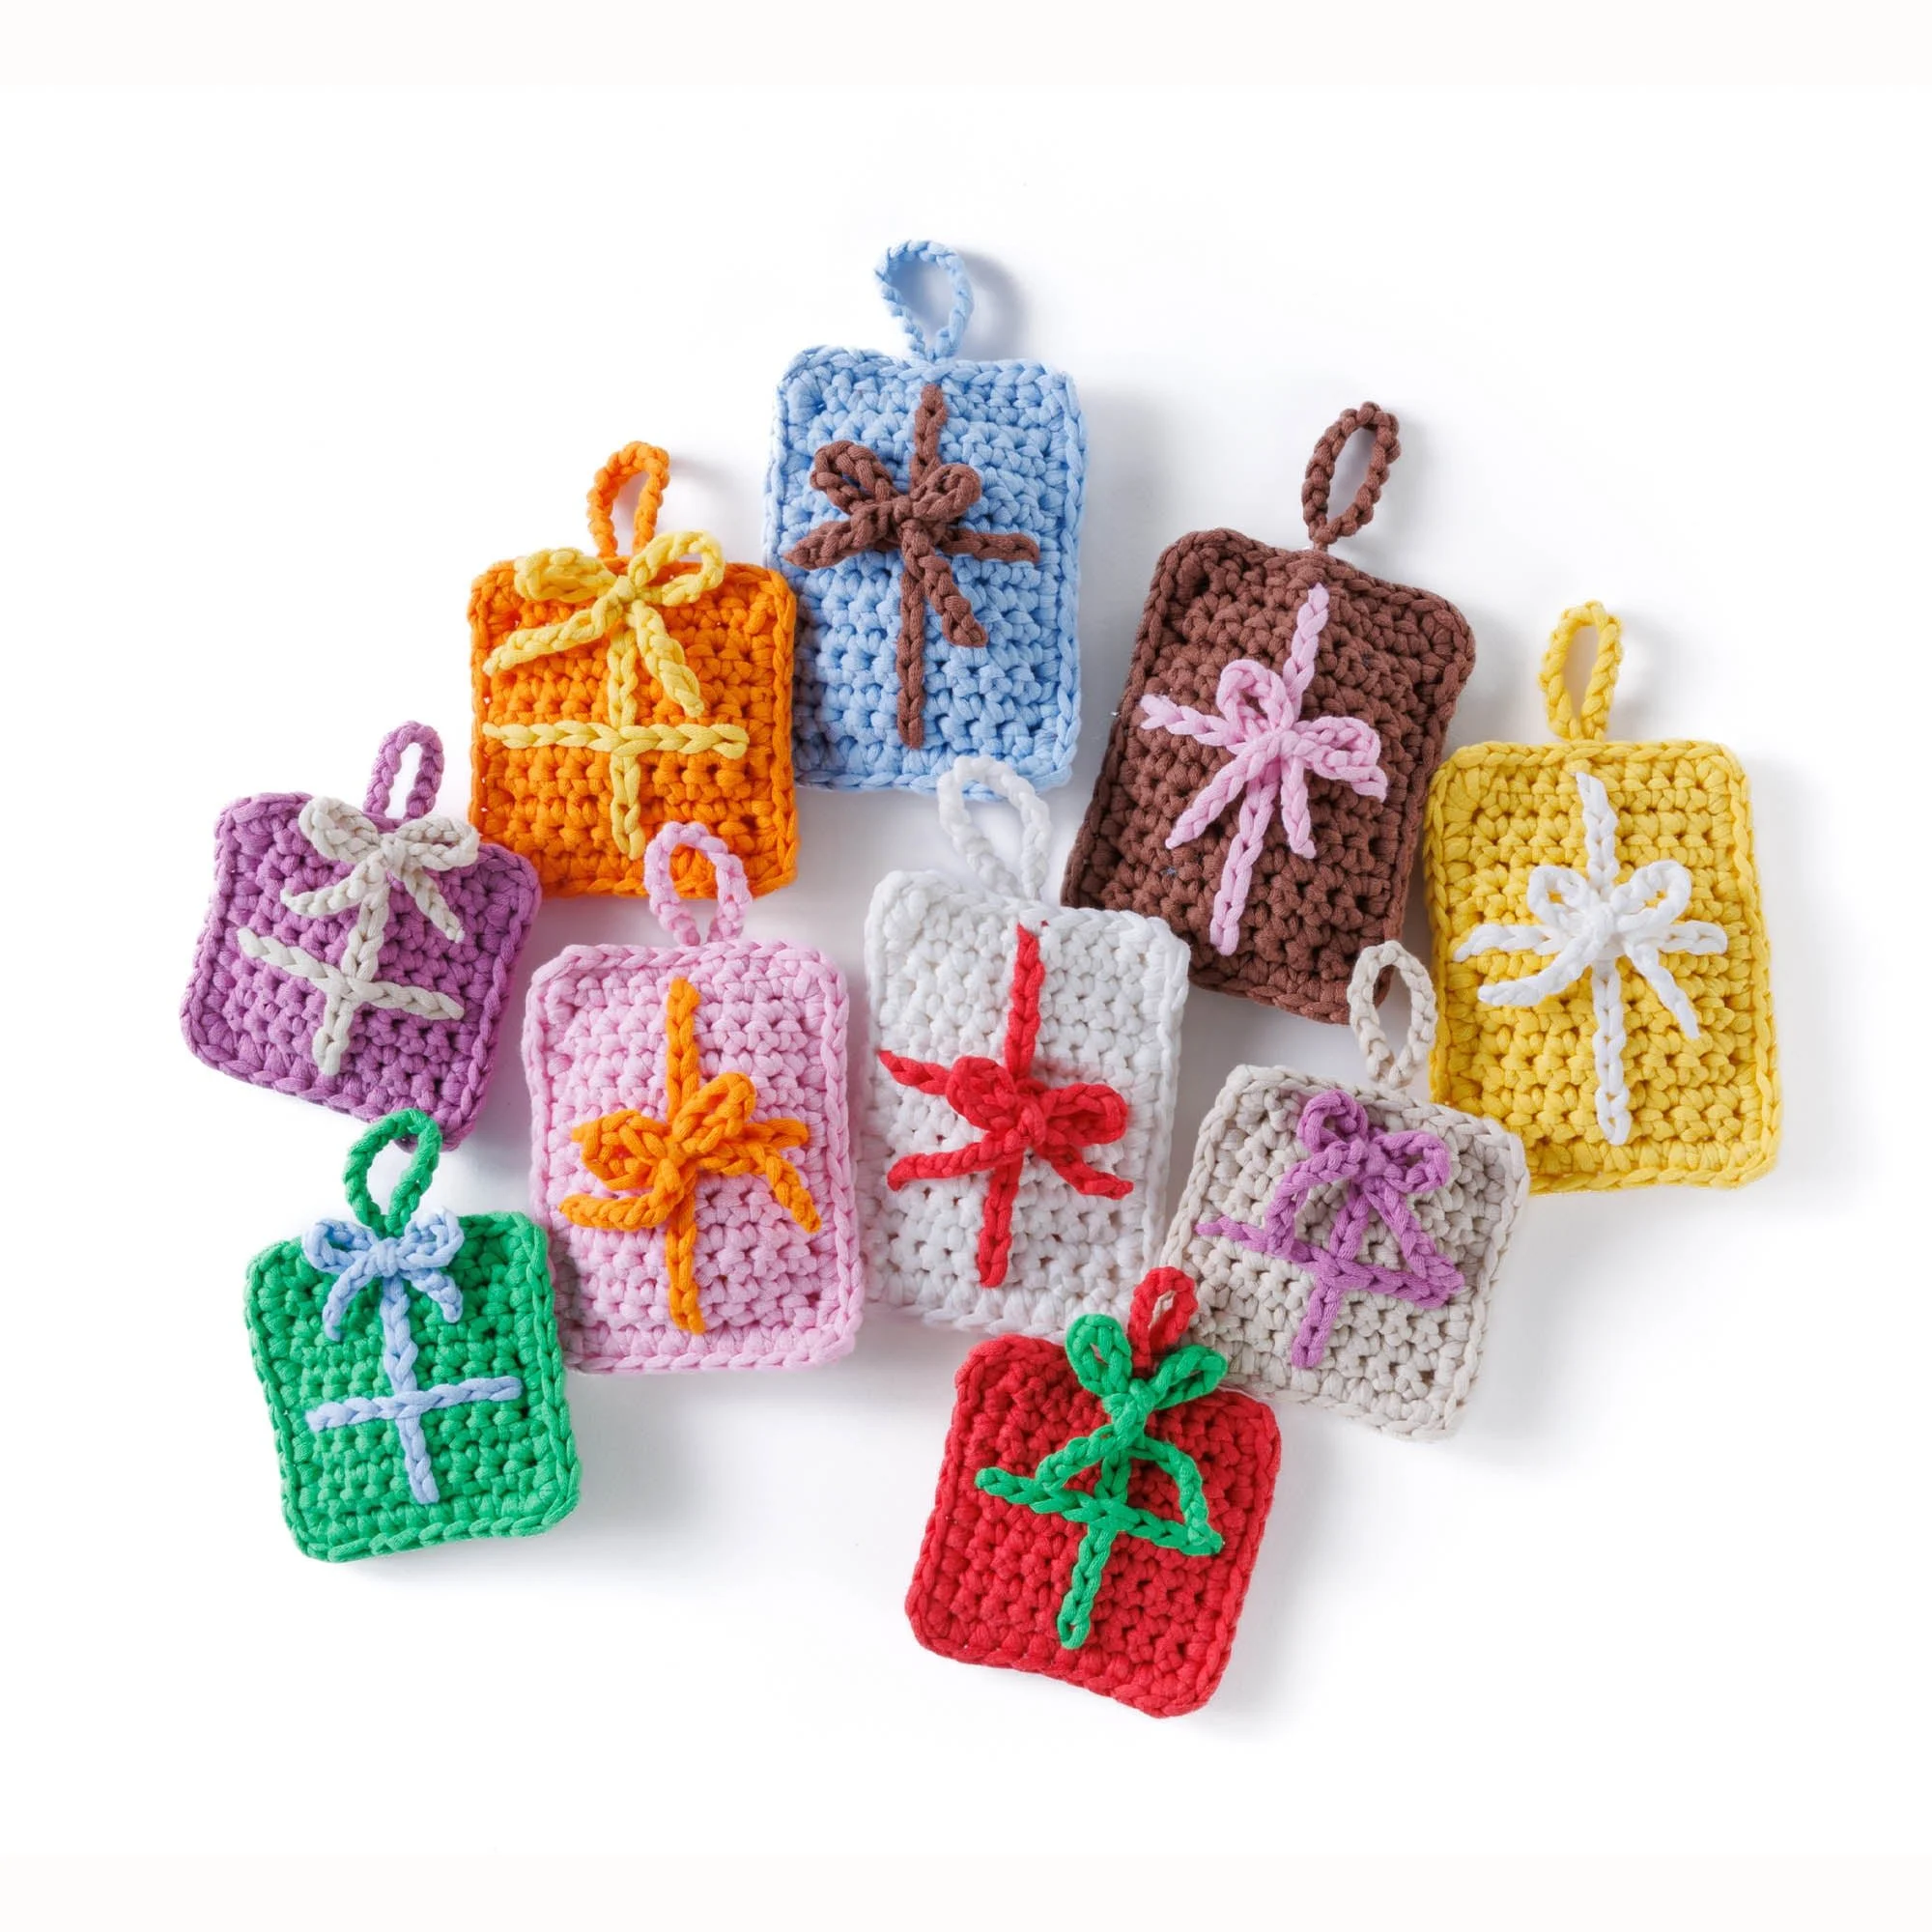
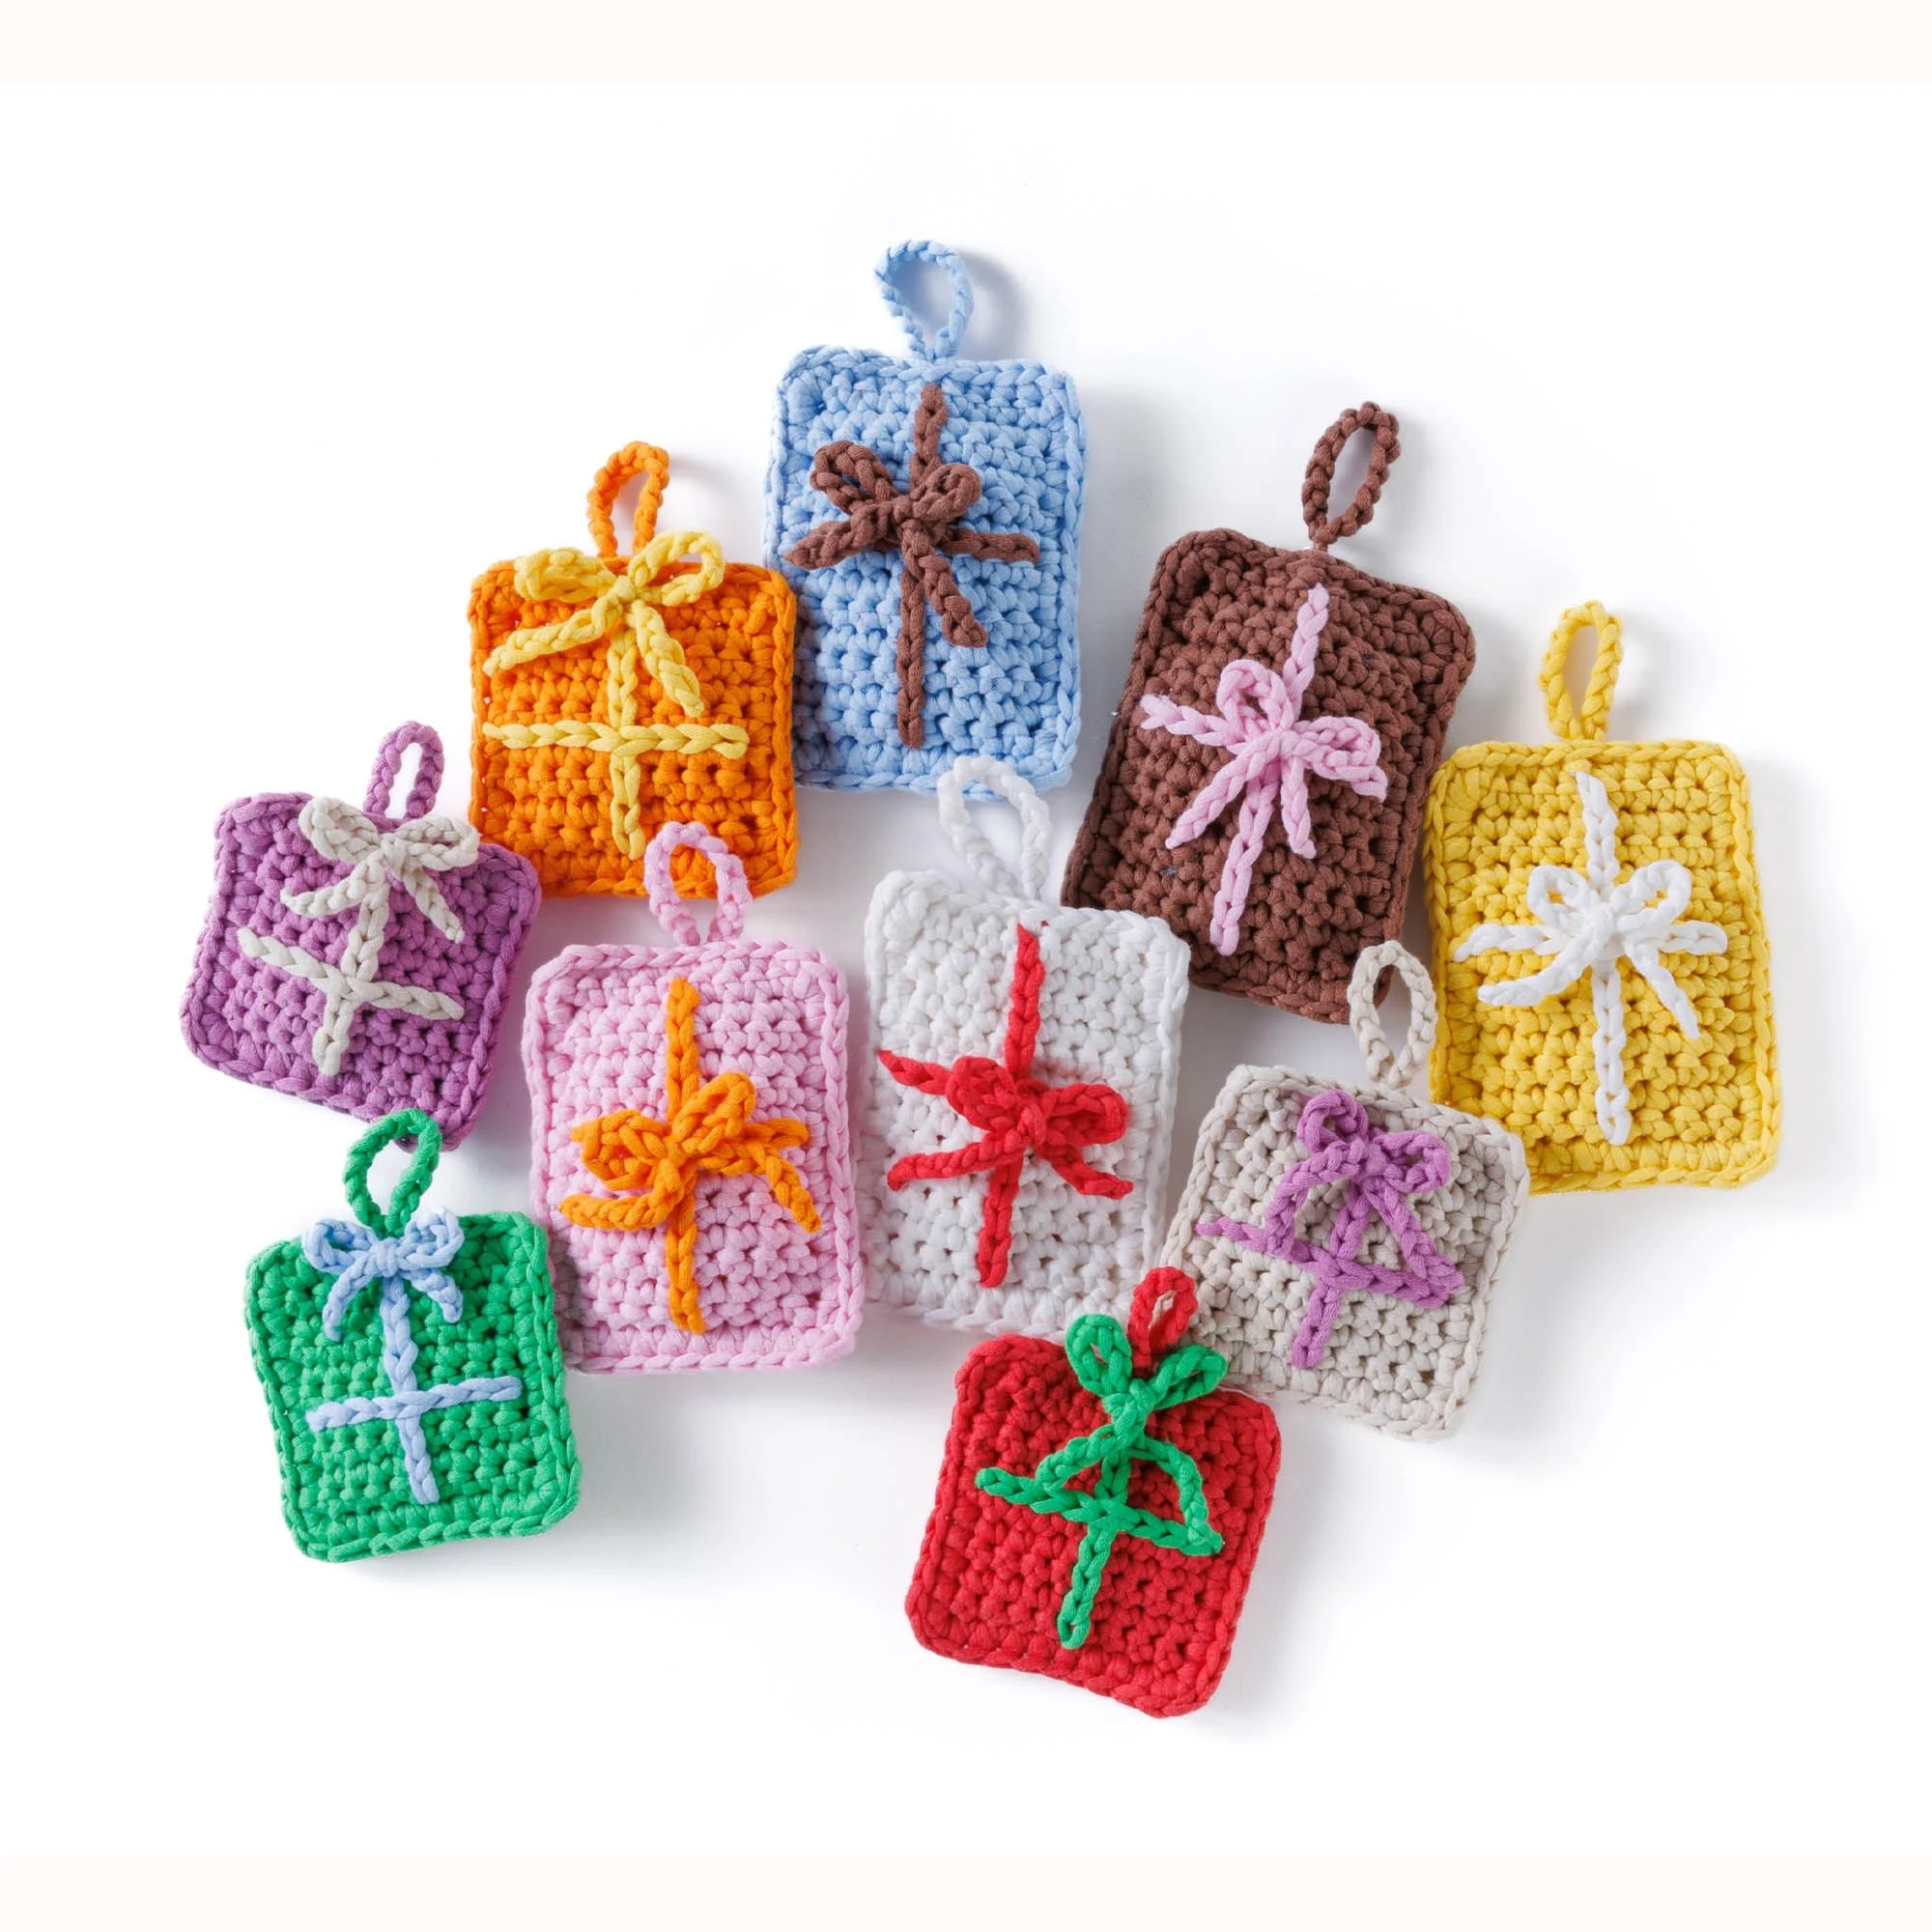
Crochet Ornaments Pattern by Little Gifties
Create delightful Little Gifties crochet ornaments to adorn your home or give as gifts! These charming ornaments can be made in a variety of colors, utilizing Bernat® Maker Minis™ yarn. The project features square and rectangular gift boxes, complete with decorative ribbons and hanging loops. It’s an engaging project suitable for crocheters looking to enhance their skills with various techniques such as surface slip stitching and careful assembly. Follow the technical instructions closely as you stitch these festive items, and take advantage of the images to guide you through the process.
Project Details
- Crochet terminology: US terminology
- Skill level: Intermediate — requires knowledge of basic stitches and techniques
- Finished size: Approximately 4-5 inches for square gift boxes, 5-6 inches for rectangular ones (size will vary based on yarn and tension)
- Construction method: Worked in rows, joined at the sides
Materials and Tools
| Yarn Option | Yarn and Specifications | Amount |
|---|---|---|
| Contrast A | Purple (Bernat® Maker Minis™) | 1 ball or 27.5 yds / 25 m |
| Contrast B | Pink (Bernat® Maker Minis™) | 1 ball or 33 yds / 30 m |
| Contrast C | Blue (Bernat® Maker Minis™) | 1 ball or 33 yds / 30 m |
| Contrast D | Red (Bernat® Maker Minis™) | 1 ball or 27.5 yds / 25 m |
| Contrast E | Green (Bernat® Maker Minis™) | 1 ball or 25 m / 27.5 yds |
| Contrast F | Brown (Bernat® Maker Minis™) | 1 ball or 33 yds / 30 m |
| Contrast G | Yellow (Bernat® Maker Minis™) | 1 ball or 33 yds / 30 m |
| Contrast H | Cream (Bernat® Maker Minis™) | 1 ball or 27.5 yds / 25 m |
| Contrast I | Orange (Bernat® Maker Minis™) | 1 ball or 27.5 yds / 25 m |
| Contrast J | White (Bernat® Maker Minis™) | 1 ball or 33 yds / 30 m |
Additional Tools:
- Size U.S. I/9 (5.5 mm) Susan Bates® Silvalume® crochet hook or size needed to obtain gauge
- Susan Bates® yarn needle
- Susan Bates® stitch markers
- Stuffing
Abbreviations
| Abbreviation | Meaning |
|---|---|
| ch | chain |
| sc | single crochet |
| sl st | slip stitch |
| WS | wrong side |
Preparation and Techniques
Surface Slip Stitch
To work a surface slip stitch, keep the yarn held at the back of the work (on the WS). Insert the hook from front to back into any single crochet along the edge and pull up a loop. Work across each single crochet of edging as follows: *Insert the hook into the next st and draw up a loop through the loop on the hook. Repeat from * around. Fasten off at the end of the round.
Joining Rounds
When joining rounds, hold the front and back pieces together, and join Color 1 with a slip stitch to any corner.
Complete Pattern Instructions
Square Gift Box
Make 1 for each combination:
- A as Color 1 and H as Color 2
- D as Color 1 and E as Color 2
- E as Color 1 and C as Color 2
- H as Color 1 and A as Color 2
- I as Color 1 and G as Color 2
| Row | Instructions | Stitches |
|---|---|---|
| 1 | With Color 1, ch 10. | – |
| 2 | 1st row: 1 sc in 2nd ch from hook. 1 sc in each ch to end of chain. Turn. | 9 sc |
| 3 | 2nd row: Ch 1. 1 sc in each sc to end of row. | – |
| 4 | Repeat row 3, 8 times more. Total 10 rows. | – |
| 5 | Fasten off. | – |
Ribbon Placement on Front
With Color 2, surface slip stitch the ribbon onto the front as shown in the accompanying photo.
Assembly: Join Front and Back
Join the front and back: Holding both together, join Color 1 with a sl st to any corner. Then:
- 1st rnd: Ch 1. Working through both thicknesses, work sc evenly around the edge of the gift box, adding 3 sc in each corner. Lightly stuff before finishing the round.
- Join and fasten off.
Rectangle Gift Box
Make 1 for each combination:
- B as Color 1 and I as Color 2
- C as Color 1 and F as Color 2
- F as Color 1 and B as Color 2
- G as Color 1 and J as Color 2
- J as Color 1 and D as Color 2
| Row | Instructions | Stitches |
|---|---|---|
| 1 | With Color 1, ch 10. | – |
| 2 | 1st row: 1 sc in 2nd ch from hook. 1 sc in each ch to end of chain. Turn. | 9 sc |
| 3 | 2nd row: Ch 1. 1 sc in each sc to end of row. | – |
| 4 | Repeat row 3, 12 times more. Total of 14 rows. | – |
| 5 | Fasten off. | – |
Ribbon Placement on Front (Rectangle)
With Color 2, surface slip stitch the ribbon onto the front (see instructions for Square Gift Box).
Assembly: Join Front and Back (Rectangle)
Holding both pieces together, join Color 1 with a sl st to any corner. Then:
- 1st rnd: Ch 1. Working through both thicknesses, work sc evenly around the edge of the gift box, adding 3 sc in each corner. Lightly stuff before finishing the round.
- Join with sl st to the first sc and fasten off.
Finishing
Bow
With Color 2, ch 30. Fasten off, tie into a bow, and sew to the top of the Square Gift Box as shown in the photo.
Hanging Loop
With Color 1, ch 14. Fasten off and sew the hanging loop to the top of the Square Gift Box as shown in the photo.
Practical Tips
- Choosing Yarn Colors: Consider using a color palette that matches your décor or personal style, as the options are vibrant and versatile!
- Even Tension: Maintain even tension throughout your stitches for a neater finish. If you notice your work is inconsistently tight or loose, adjust your grip on the yarn accordingly.
- Stuffing Techniques: When stuffing your boxes, add small amounts gradually to avoid overfilling and maintain the shape. This helps create a nice firm look.
- Using Stitch Markers: Use stitch markers to keep track of rows and stitches, especially when working on multiple pieces at once. This will help maintain consistency across your ornaments.
Troubleshooting
- Problem: Uneven edges.
Cause: This may result from varying tension.
Solution: Check your grip and try to make each stitch consistent. - Problem: Difficulty keeping stuffing in place.
Cause: If your stitches are too loose, stuffing can escape.
Solution: Tighten your tension or add more rounds to close up gaps. - Problem: Color bleeding.
Cause: Dark colors can sometimes bleed into lighter ones.
Solution: Wash the finished item separately and use color catchers in the wash.
Care
To keep your ornaments looking fresh:
- Cleaning: Spot clean with a damp cloth or hand wash gently in cool water.
- Storage: Store in a cool, dry place away from direct sunlight to prevent fading.
- Handling: Keep away from pets and young children, as the small parts could pose a choking hazard.
Frequently Asked Questions
What size are the finished ornaments?
The ornaments are approximately 4-5 inches for square boxes and 5-6 inches for rectangular boxes, although sizes may vary based on your tensions and yarn.
What yarn should I use?
For best results, use Bernat® Maker Minis™, which are designed to bring vibrancy and ease to your crochet projects. If you’re looking for alternatives, choose a similar weight yarn that suits your project needs.
How can I customize the colors?
Feel free to mix and match colors from the Bernat® Maker Minis™ collection or use your own stash! Just be mindful of how the colors coordinate to achieve the desired aesthetic.
Are there any advanced techniques required?
Some intermediate techniques such as slip stitching and surface slip stitching are used. It’s a great opportunity to sharpen these skills while creating a beautiful piece!
Can I sell items made from this pattern?
Please refer to the designer’s usage terms, as permission for selling can vary. It’s wise to check if any restrictions apply to the pattern you are using.
Choose Your Next Crochet Project
Explore more creative projects by checking out our collection of crochet patterns!



