Get 30+ FREE Crochet Patterns — Join Our Newsletter
Crochet Tree Pattern: Make It Merry
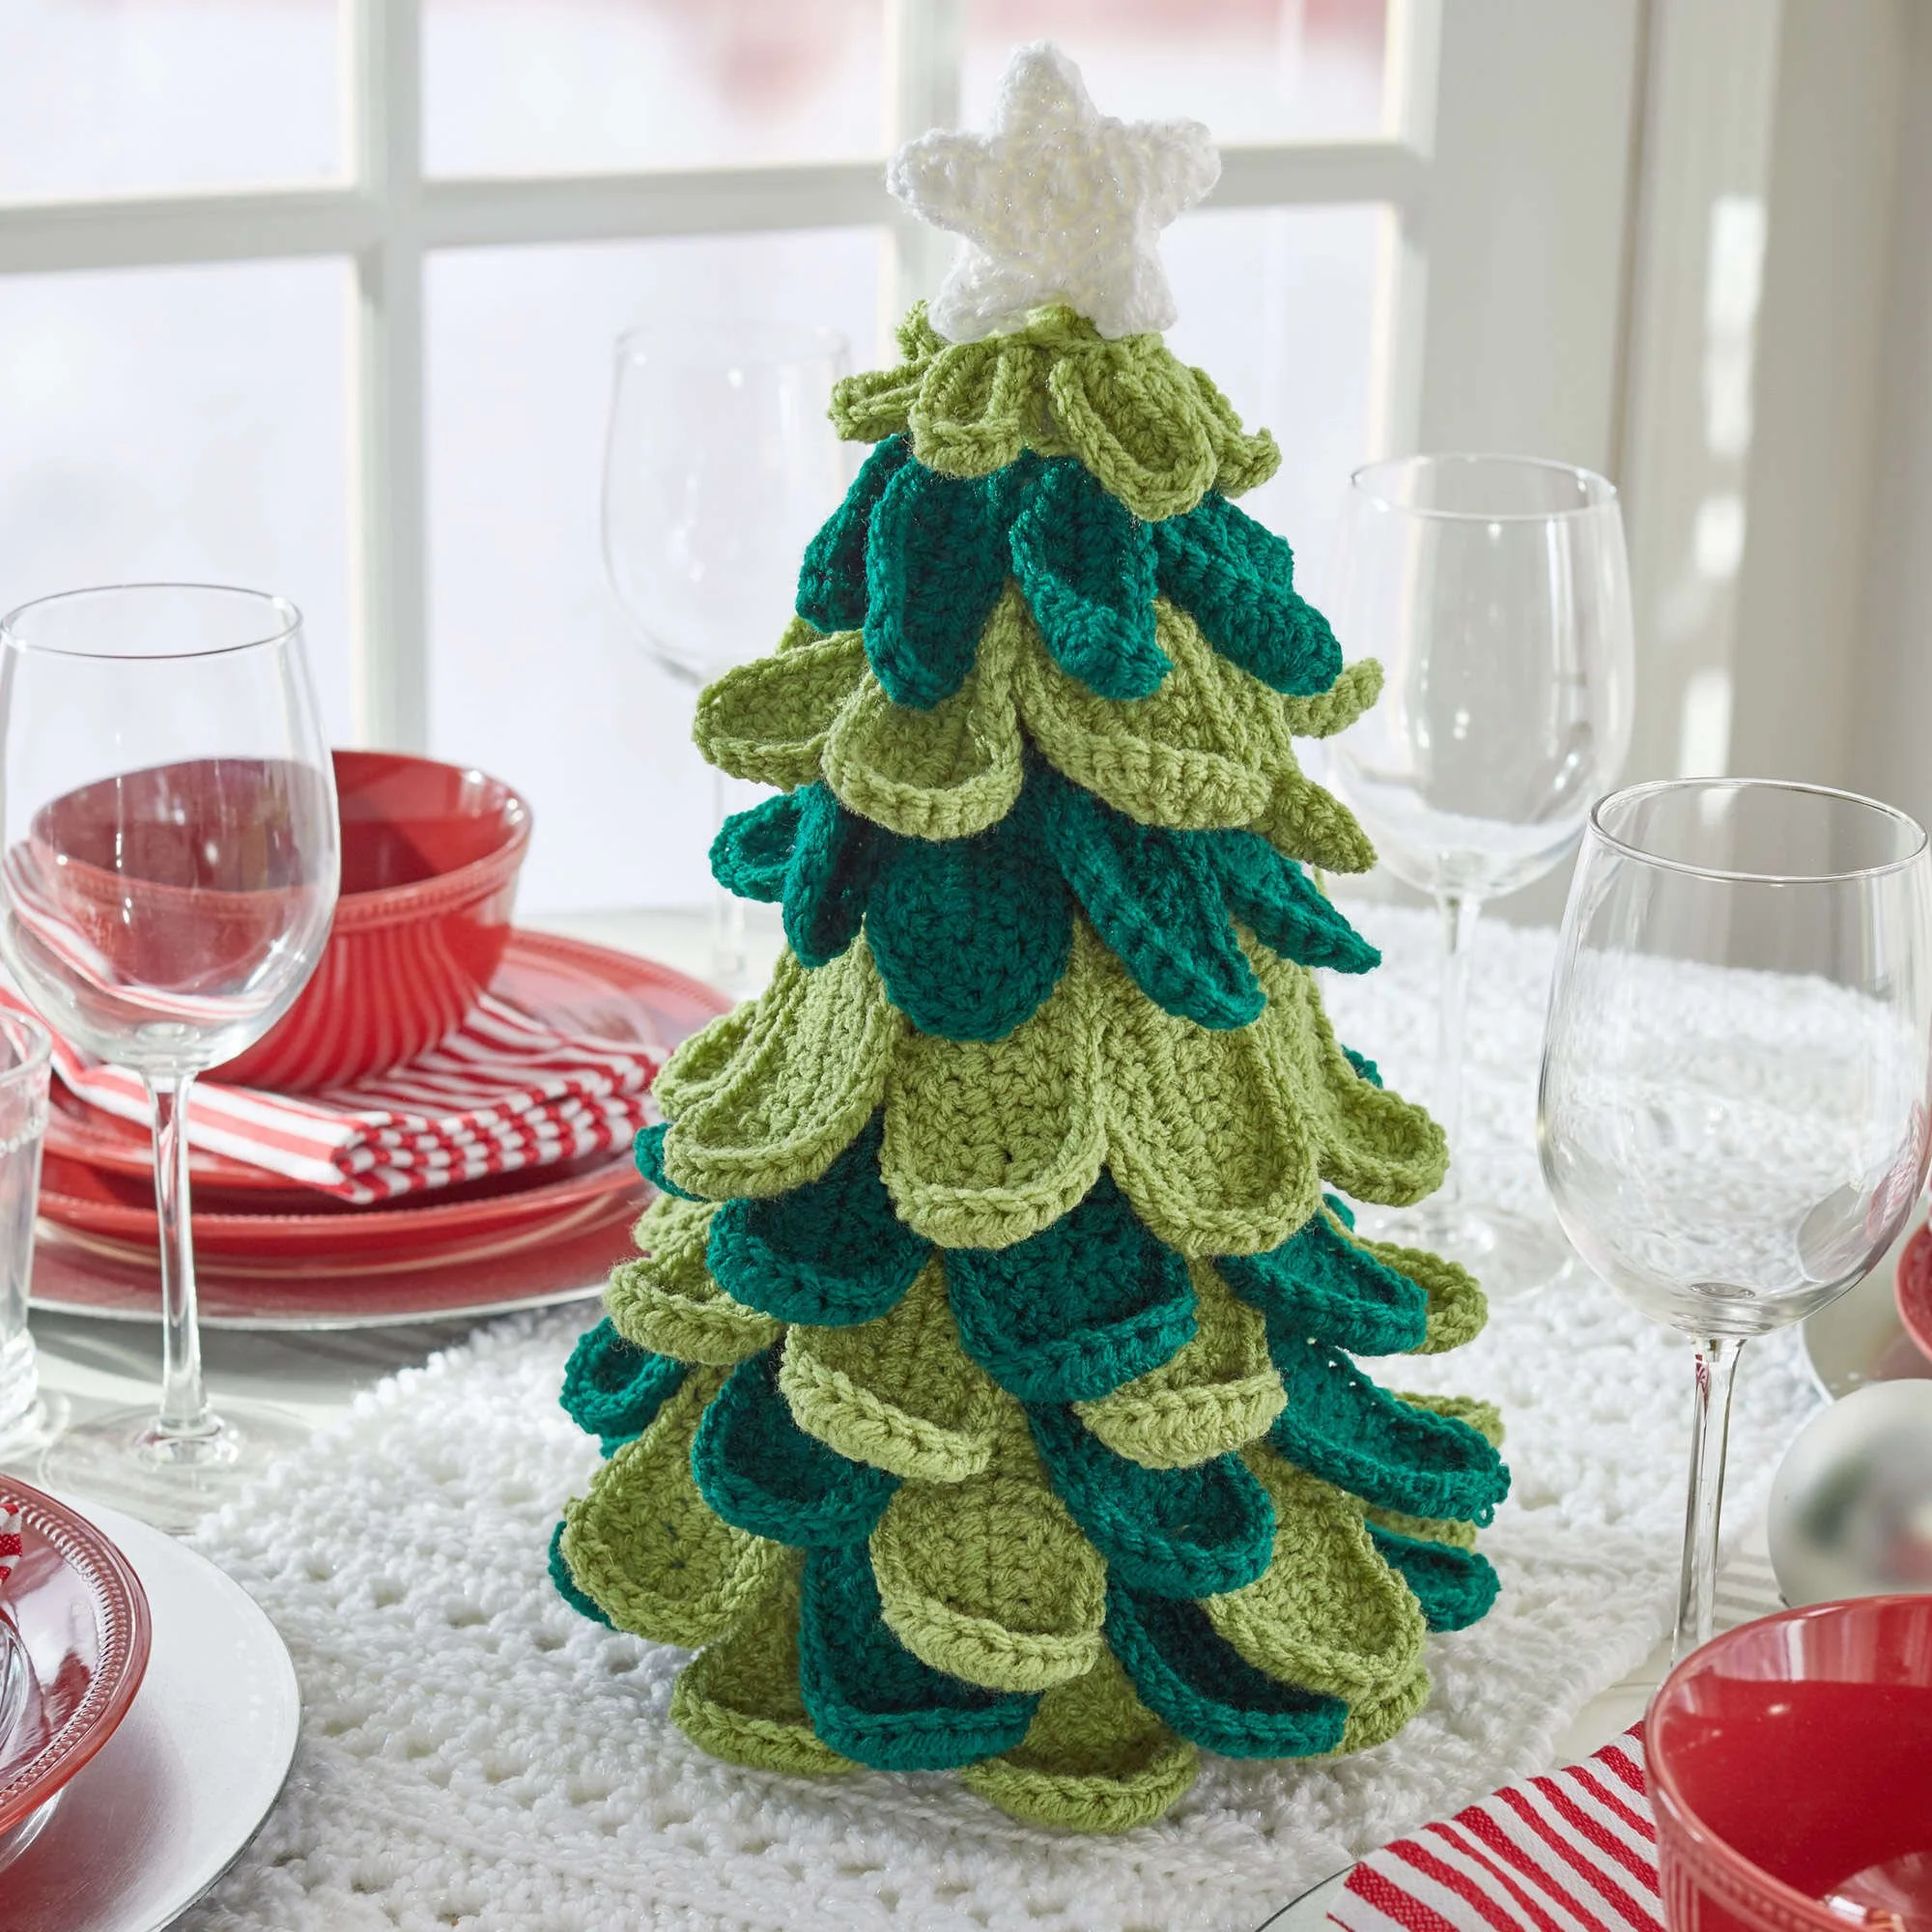
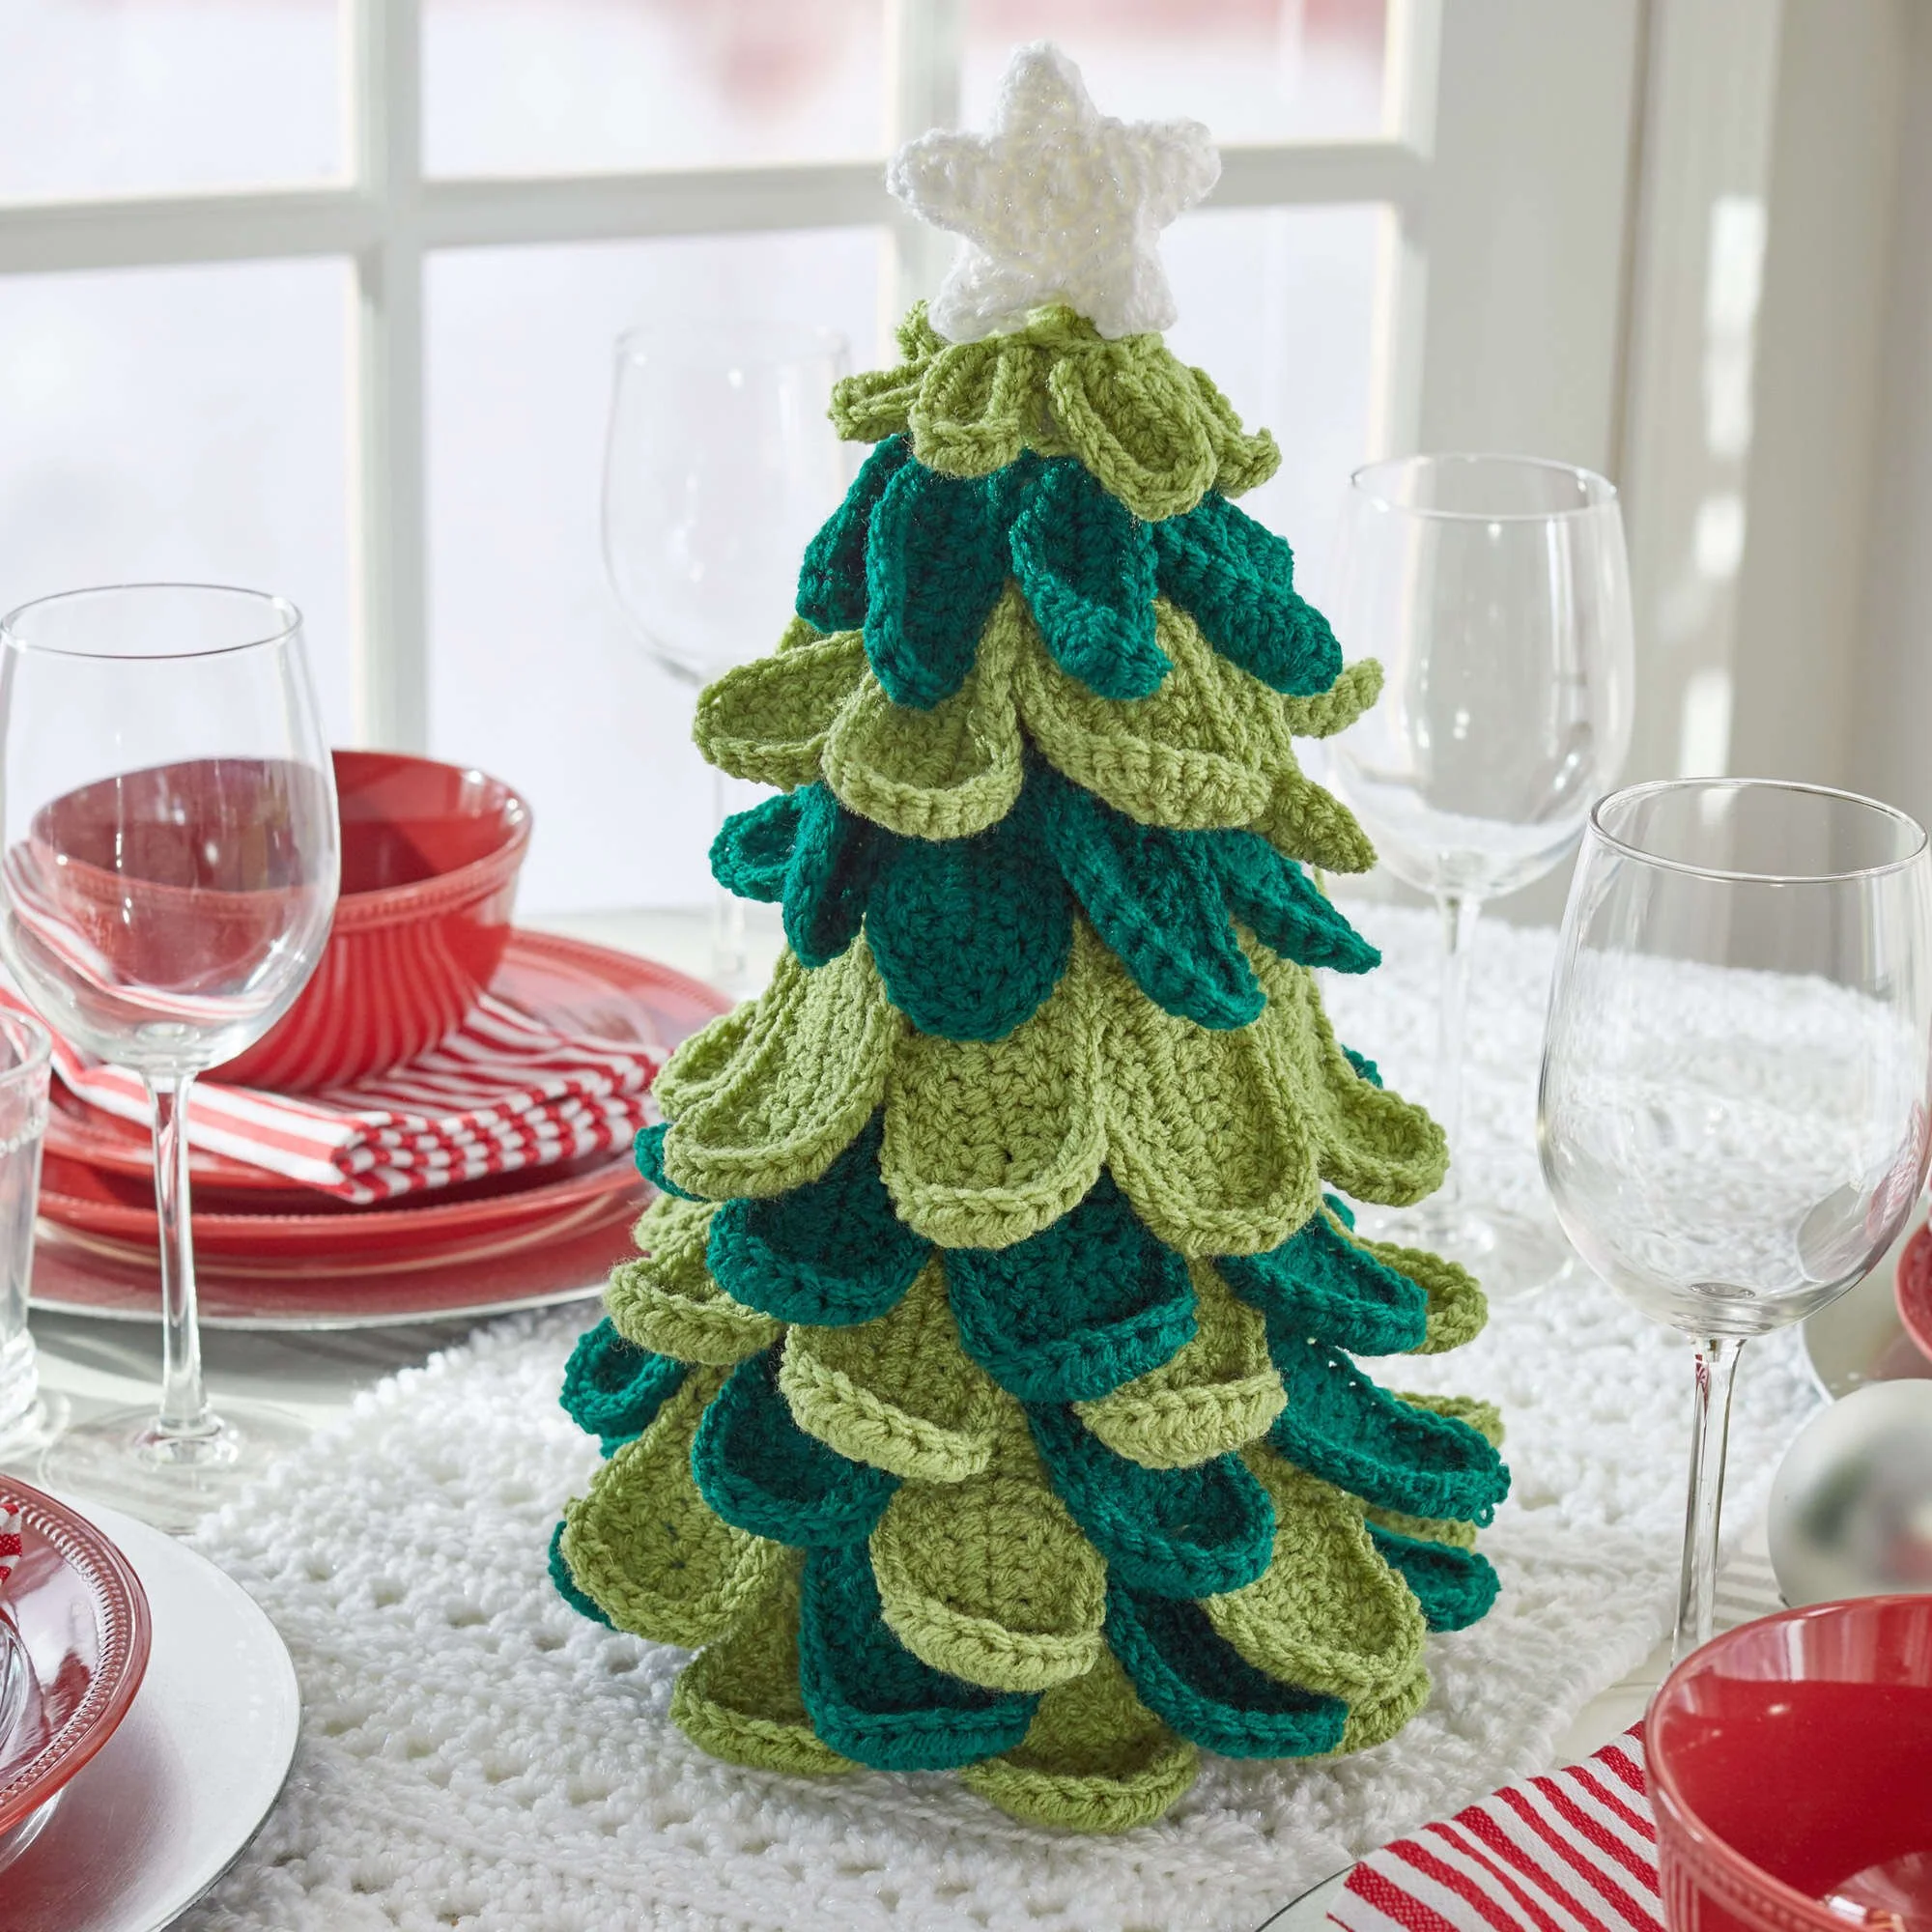
The Make It Merry Crochet Tree is a delightful holiday decoration that you can easily create using basic crochet techniques. This tree features a lovely layered leaf design and a sparkling star on top, giving it a festive touch that will brighten up any space. The project is perfect for those with some crochet experience, as it involves multiple rounds, an array of stitches, and sewing components together. Follow along with the pattern instructions and any accompanying visuals to craft this beautiful centerpiece for your holiday celebrations.
Project Details
- Crochet terminology: US terms
- Skill level: Intermediate
- Finished size: Approximately 12” (30.5 cm) tall
- Construction method: Working in rounds and assembly
Materials and Tools
| Yarn option | Yarn and specifications | Amount |
|---|---|---|
| RED HEART® With Love® | 1601 Lettuce A | 1 skein |
| RED HEART® With Love® | 1621 Evergreen B | 1 skein |
| RED HEART® With Love™ Metallic | 8010 White | 1 ball |
- Susan Bates® Crochet Hook: 4mm (US G-6)
- Foam cone: 4″ (10 cm) diameter base x 12″ (30.5 cm) tall
- 4″ (10 cm) square white peel and stick felt
Abbreviations
| Abbreviation | Meaning |
|---|---|
| ch | chain |
| dc | double crochet |
| sc | single crochet |
| hdc | half double crochet |
| slip st | slip stitch |
Preparation and Techniques
Working in Rounds
This pattern mostly uses joined rounds. Be sure to slip stitch in the correct joining point for each round to maintain an even spiral to your work.
Complete Pattern Instructions
Centerpiece Cover
| Round | Instructions | Stitches |
|---|---|---|
| 1 | Work 11 dc in 4th ch from hook, slip st in top of skipped ch-3 to join. | 12 dc |
| 2 | Ch 1, working in back loops only, sc in same dc as joining, sc in each dc around, slip st in first sc. | 12 sc |
| 3 | Ch 3, working in back loops only, dc in each sc around, slip st in top of beginning ch-3. | 12 dc |
| 4 | Ch 1, working in back loops only, sc in same dc as joining, 2 sc in next dc, [sc in next dc, 2 sc in next dc] 5 times, slip st in first sc. | 18 sc |
| 5 | Ch 3, working in back loops only, dc in each sc around, slip st in top of beginning ch-3. | 18 dc |
| 6 | Ch 1, working in back loops only, sc in same dc as joining, sc in next dc, 2 sc in next dc, [sc in next 2 dc, 2 sc in next dc] 5 times, slip st in first sc. | 24 sc |
| 7 | Ch 3, working in back loops only, dc in each sc around, slip st in top of beginning ch-3. | – |
| 8 | Ch 1, working in back loops only, sc in same dc as joining, sc in next 2 dc, 2 sc in next dc, [sc in next 3 dc, 2 sc in next dc] 5 times, slip st in first sc. | 30 sc |
| 9 | Ch 3, working in back loops only, dc in each sc around, slip st in top of beginning ch-3. | – |
| 10 | Ch 1, working in back loops only, sc in each dc around, slip st in first sc. | – |
| 11 | Ch 3, working in back loops only, dc in each sc around, slip st in top of beginning ch-3. | – |
| 12–13 | Repeat Rounds 10-11. | – |
| 14 | Ch 1, working in back loops only, sc in same dc as joining, sc in next 3 dc, 2 sc in next dc, [sc in next 4 dc, 2 sc in next dc] 5 times, slip st in first sc. | 36 sc |
| 15 | Ch 3, working in back loops only, dc in each sc around, slip st in top of beginning ch-3. | – |
| 16–25 | Repeat Rounds 10-11. | – |
Fasten off and carefully slip it over the foam cone, keeping the rows straight.
Leaves
Large Leaves (Make 28 with A and 21 with B)
| Row | Instructions | Stitches |
|---|---|---|
| 1 | Ch 12, sc in 2nd ch from hook, hdc in next ch, dc in next 8 ch, 6 dc in last ch, turn to work along opposite edge, dc in next 8 ch, hdc in next ch, sc in last ch. | 26 sts |
| 2 | Ch 1, turn, sc in first sc, hdc in next 10 sts, 2 hdc in each of next 4 sts, hdc in next 10 sts, sc in last st. | – |
Medium Leaves (Make 7 with A and 7 with B)
| Row | Instructions | Stitches |
|---|---|---|
| 1 | Ch 9, sc in 2nd ch from hook, hdc in next ch, dc in next 5 ch, 6 dc in last ch, turn to work along opposite edge, dc in next 5 ch, hdc in next ch, sc in last ch. | 20 sts |
| 2 | Ch 1, turn, sc in next 8 sts, 2 sc in each of next 4 sts, sc in next 8 sts. | – |
Small Leaves (Make 7 with A)
| Row | Instructions | Stitches |
|---|---|---|
| 1 | Ch 6, sc in 2nd ch from hook, hdc in next 3 ch, 6 hdc in last ch, turn to work along opposite edge, hdc in next 3 ch, sc in last ch. | 14 sts |
| 2 | Ch 1, turn, sc in next 5 sts, 2 sc in each of next 4 sts, sc in next 5 sts. | – |
Smallest Leaves (Make 7 with A)
| Row | Instructions | Stitches |
|---|---|---|
| 1 | Ch 6, sc in 2nd ch from hook, hdc in next 3 ch, 5 hdc in last ch, turn to work along opposite edge, hdc in next 3 ch, sc in last ch. | 13 sts |
| 2 | Ch 1, turn, sc in next 5 sts, 2 sc in each of next 4 sts, sc in next 5 sts. | – |
Star (Make 2 with White)
| Round | Instructions | Stitches |
|---|---|---|
| 1 | Ch 2, work 5 sc in 2nd ch from hook. | 5 sc |
| 2 | Working in continuous rounds, 2 sc in each sc around. | 10 sc |
| 3 | Slip st in next sc, ch 4, sc in 2nd ch from hook, hdc in next ch, dc in next ch, skip next sc on Round 2; repeat 5 times. | – |
Assembly and Finishing
Weave in ends. Using the sc rounds of the Cone Cover, attach the leaves starting from the lower edge with the Large Leaves and working towards the top. Alternate colors and overlap the placement of leaves on each row.
- Beginning along Round 22, place 7 A Large Leaves around the Cone Cover so that the side edges touch. Sew in place.
- Repeat with 7 B Large Leaves around Round 20, overlapping the placement of the previous row.
- Continue to attach leaves through Rounds 18, 16, 14, and 12, alternating colors correspondingly between A and B Large Leaves.
- Use the Medium and Small Leaves around Rounds 8, 6, and 4 respectively, continuing to overlap and ease to fit.
- Finish with Smallest Leaves around Round 2, ensuring a tight fit.
For the stars, with the wrong sides together, sew two stars together and position them on top of the Cone Cover. Finally, cut a felt circle to fit the bottom edge of the foam cone and secure it in place.
Practical Tips
- Maintain Even Tension: When crocheting, keep a steady tension in your stitches to produce an even texture throughout the piece. This will enhance the overall appearance of your tree.
- Mark Your Rounds: Use stitch markers at the beginning of each round to avoid losing track of where you are, especially in rounds with no specified stitch count.
- Utilize Blocking: Once your tree is finished, consider blocking the leaves to give them a nice shape. This creates a neat look and emphasizes your work.
- Experiment with Colors: Feel free to mix and match different colors to create a unique vision of your crochet tree, adding personal flair to each piece.
Troubleshooting
If you find yourself with an incorrect stitch count, check the following:
- Count After Each Round: If your count differs significantly, recount after each round if unsure.
- Stitch Placement: Ensure that you are inserting your stitches in the specified stitches and not skipping any, especially during increases.
- Evaluate the Joining Stitches: Verify that your slip stitch joins are done into the right places to maintain the round shape correctly.
Care Instructions
To maintain your finished crochet tree:
- Spot clean with a damp cloth for any dust or spills.
- Avoid submerging your decoration in water as it can retain moisture; if necessary, use a fabric-safe cleaner.
- Store the tree in a dry place away from direct sunlight to prevent color fading.
Frequently Asked Questions
What is the finished size of the tree?
The completed Make It Merry Crochet Tree is approximately 12 inches (30.5 cm) tall, making it a delightful centerpiece or a charming ornament for your holiday décor.
Can I use a different yarn weight?
You can use a different yarn weight, but keep in mind that it may alter the final size and shape of the tree. If changing yarns, adjust your hook size to match the desired tension for best results.
What if I’m missing a stitch in a round?
If you suspect you’re missing a stitch, count as you go along each round. It may help to use a marker to track the completion of each round, ensuring you don’t lose your place.
How do I attach the leaves securely?
For a more secure attachment of the leaves, consider using a whip stitch to sew them onto the Cone Cover, ensuring they lay flat and do not twist out of place.
Are there any recommended substitutions for the felt?
While the pattern calls for a peel and stick felt, you can also use regular felt and attach it with fabric glue or a hot glue gun for the bottom of the foam cone if stickiness isn’t available.