Get 30+ FREE Crochet Patterns — Join Our Newsletter
Front Door Stocking Crochet Pattern
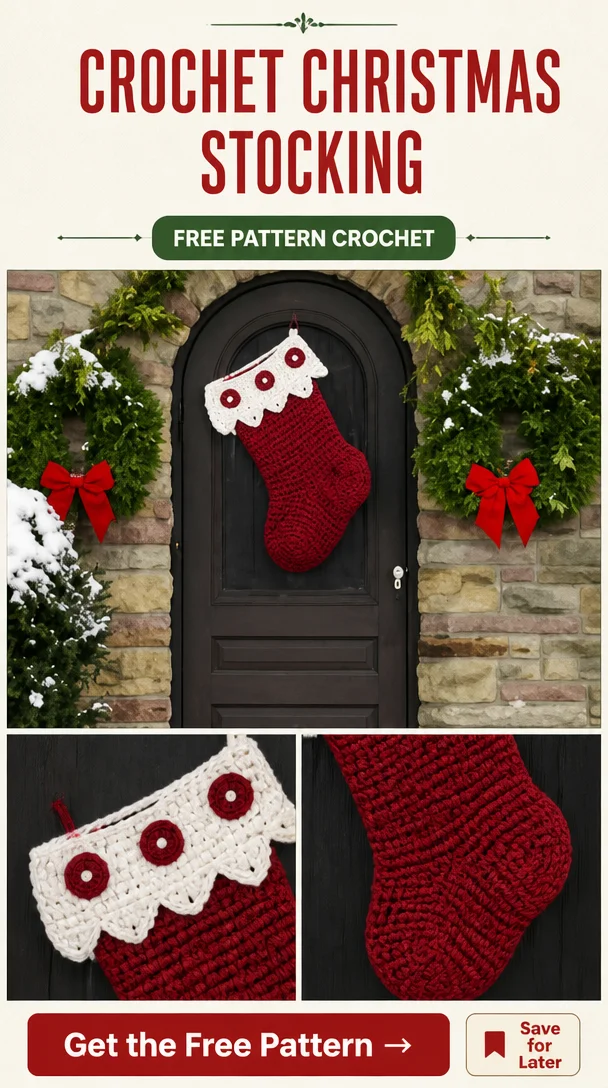
Welcome to our tutorial for the Crochet Front Door Stocking Pattern, a festive project that will add charm to your holiday decor. This beautiful stocking is made using two contrasting yarn colors, allowing for a striking design that’ll stand out in your entryway. The construction involves working in rounds and back-and-forth rows, and you’ll learn how to shape the heel and create an intricate cuff with decorative elements.
This project is suitable for intermediate crocheters who are comfortable with basic stitches and techniques. Follow along with the written instructions and any provided photographs to guide you through each step. Let’s get started!
Project Details
- Crochet terminology: US terminology
- Skill level: Intermediate
- Finished size: Approximately 18 inches (45.7 cm) in height
- Construction method: Worked in rounds and rows
Materials and Tools
| Yarn Option | Yarn Specifications | Amount |
|---|---|---|
| Contrast A Claret (0562) | One Pound (454 g / 16 oz; 742 m / 812 yds) | 1 |
| Contrast B White (0501) | One Pound (454 g / 16 oz; 742 m / 812 yds) | 1 |
- One size US J/10 (6 mm) crochet hook
- Stitch markers
- Yarn needle
Abbreviations
| Abbreviation | Meaning |
|---|---|
| ch | Chain |
| sc | Single crochet |
| hdc | Half double crochet |
| dc | Double crochet |
| tr | Triple crochet |
| sc3tog | Single crochet three together (decrease) |
| hdc2tog | Half double crochet two together (decrease) |
| 2-hdc Cl | Two half double crochet cluster |
Preparation and Techniques
Working in a Spiral
This project involves both working in continuous rounds and back-and-forth rows. Keep track of your rounds to maintain stitch counts, especially when shaping the heel.
Changing Yarn Colors
When changing from Contrast A to Contrast B, complete the last stitch of the round but finish it with the new color for a smooth transition.
Complete Pattern Instructions
Stocking
With A, ch 75; ensuring the chain is not twisted, join with a slip stitch in the first ch to form a ring.
| Round | Instructions | Stitches |
|---|---|---|
| 1 | Ch 1, sc in each ch around; do not join. | 75 sc |
| 2–4 | Sc in each sc around. | 75 sc for each round |
| 5–42 | Hdc in each st around. | 75 hdc for each round |
Next, we shape the heel:
| Row | Instructions | Stitches |
|---|---|---|
| 43 | Sc in next 3 sts; leave remaining sts unworked, turn. | 3 sc |
| 44 | Ch 1, sc in next 4 sts; leave remaining sts unworked, turn. | 4 sc |
| 45 | Ch 1, sc in next 2 sts, 3 sc in next st, sc in next st, 2-hdc Cl in next unworked st of Round 42, turn. | 7 sts |
Cuff
With B, ch 75; ensuring the chain is not twisted, join with a slip stitch in the first ch to form a ring.
| Round | Instructions | Stitches |
|---|---|---|
| 1 | Ch 1, sc in each ch around; do not join. | 75 sc |
| 2 | [Hdc in next 2 sc, 2 hdc in next sc] 25 times. | 100 sc |
Finishing
With right side facing, place the cuff around the top of the stocking and align the stitches of the foundation chain with the top of the stocking. Join B with sc about 1″/2.5 cm from the center back of the stocking (above the heel); ch 20 for a decorative loop.
Assembly and Finishing
Sew hidden hanging loops and buttons onto the cuff as described in the pattern. Use a yarn needle to weave in all ends for a clean finish.
Practical Tips
- Keep tension even when switching between yarn colors to maintain a consistent look.
- Using stitch markers can help track the beginning and end of rounds, especially during decreases.
- For a looser stocking, consider going up a hook size.
- Experiment with embellishments, like embroidery or appliqués, for an extra personal touch.
Troubleshooting
- If your stocking is smaller than expected, check your gauge and stitch count at each round.
- Uneven edges may be the result of inconsistent tension; slow down and ensure each stitch is consistent.
- If your heel isn’t forming as expected, review the rows shaping it and ensure proper turns are made.
Care
To maintain your stocking, hand wash with mild soap and lay flat to dry. Avoid hanging it when wet to preserve its shape.
Frequently Asked Questions
What size is the finished stocking?
The finished stocking measures approximately 18 inches (45.7 cm) in height, making it a perfect decorative piece for your front door.
Can I use a different yarn for this pattern?
Yes, you can substitute with other worsted-weight yarns. Just ensure to match the weight for similar results in size and drape.
How long will this project take to complete?
Completion time varies based on experience, but dedicating a few hours over one or two days is a reasonable estimate.
Are there any techniques I should be familiar with?
This pattern requires comfort with basic crochet stitches, working in rounds, and shaping. Familiarity with increases and decreases will be helpful.
Can I make this stocking larger or smaller?
To resize, you can adjust the number of chains in the foundation and modify the stitch counts accordingly. However, keep the shaping consistent for best results.
Is this pattern suitable for beginners?
This pattern is designed for intermediate crocheters due to the shaping and techniques involved, making it primarily suited for those with some experience.