
Get 30+ FREE Crochet Patterns — Join Our Newsletter
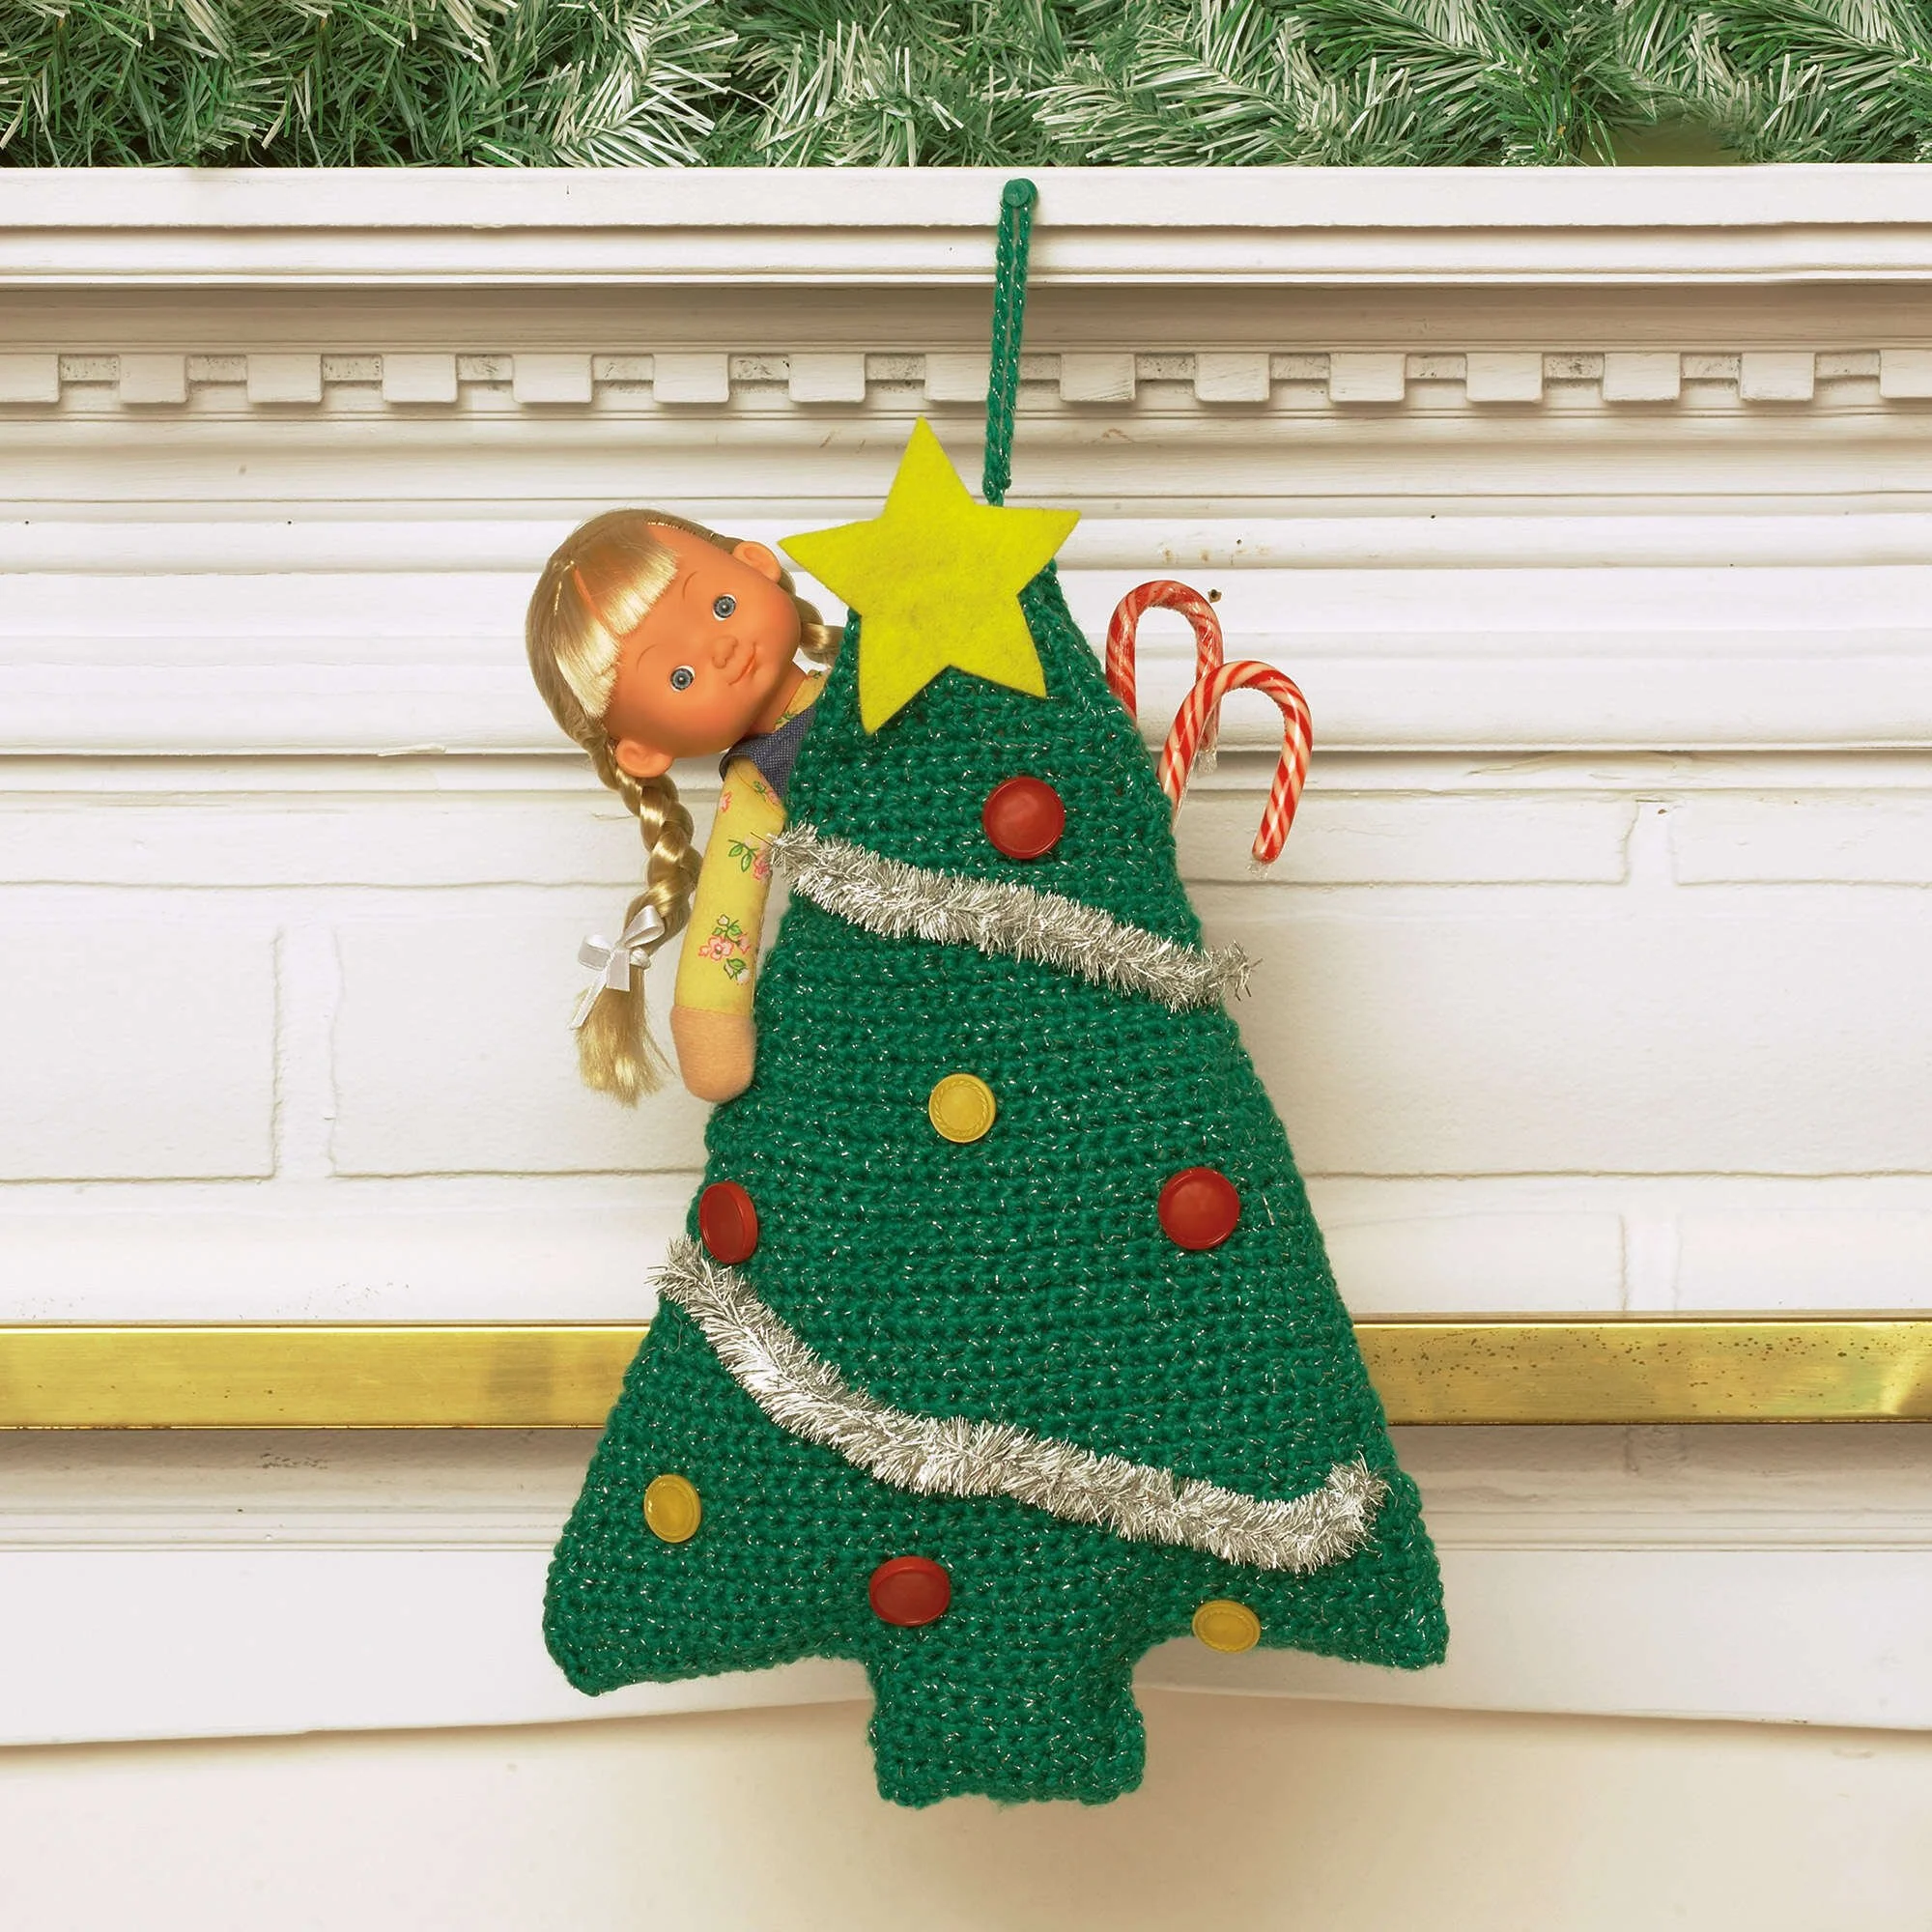
Simple Tree Stocking Pattern
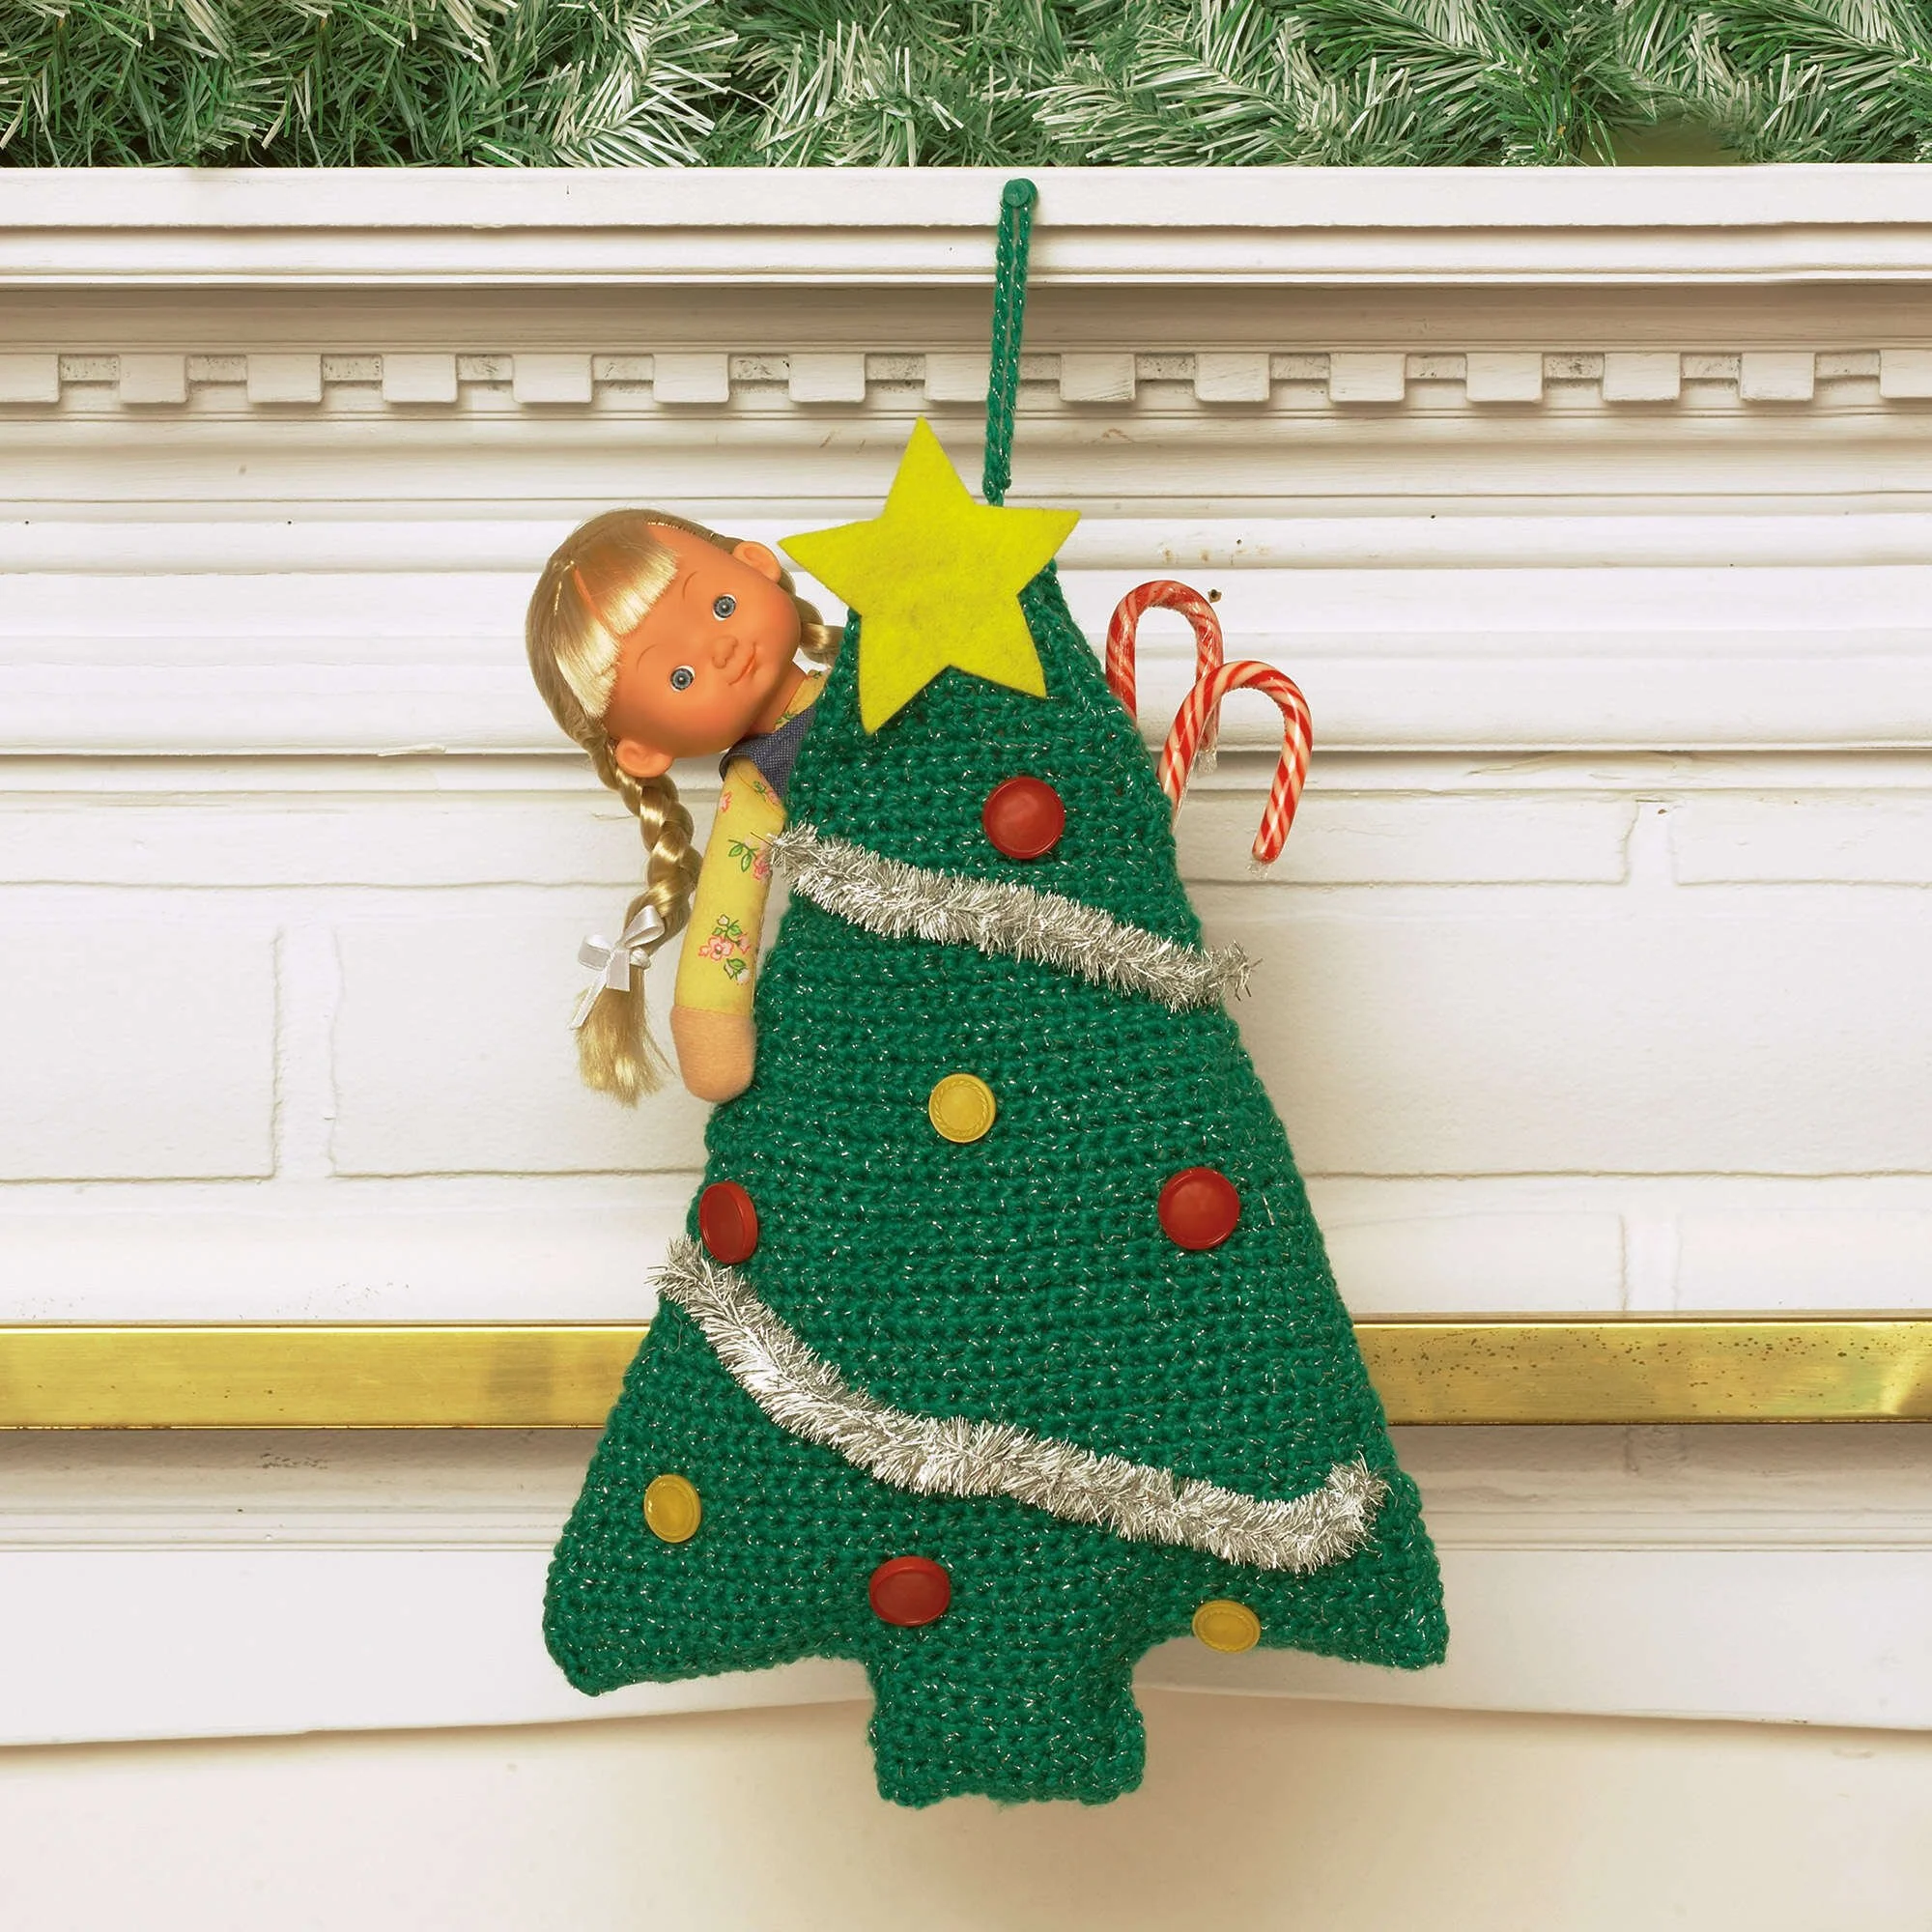
The Easy Tree Stocking Pattern is a delightful and festive crochet project that adds a touch of holiday spirit to your home. This charming stocking features a lovely tree design, complete with buttons for ornaments and a sparkling garland for that extra touch of cheer. The stocking is constructed by crocheting both the front and back panels alike, starting from the trunk and working your way up to create the tree’s shape.
This project is perfect for crocheters looking to create a memorable decoration or gift for the holiday season. Follow the written instructions along with any accompanying photographs to ensure your stocking comes out just right.
Project Details
- Crochet terminology: US terminology
- Skill level: Intermediate—requires knowledge of single crochet and decreases
- Finished size: Approximately 16 inches [40.5 cm] tall
- Construction method: Panels (front and back) sewn together
Materials and Tools
| Yarn option | Yarn and specifications | Amount |
|---|---|---|
| Bernat® Happy Holidays | 100 g / 3.5 oz | 1 ball |
| Bernat® Happy Holidays (#31708 Green Sparkle) | Weight: 100 g / 3.5 oz | 4 balls |
- Crochet hook: Size 5 mm (U.S. H or 8), or size needed to obtain gauge
- Buttons: 7 buttons, ½ inch [15 mm] diameter
- Yellow craft felt
- Silver garland: 1 yard [90 cm]
Abbreviations
| Abbreviation | Meaning |
|---|---|
| ch | Chain |
| sc | Single crochet |
| sl st | Slip stitch |
| yoh | Yarn over hook |
| sts | Stitches |
Preparation and Techniques
Working in Rows
This pattern uses rows to create the stocking panels. Review the instructions carefully to ensure proper shaping and construction throughout.
Complete Pattern Instructions
Back and Front (Make Alike)
Begin at the bottom of the trunk.
- Chain 11.
- 1st row: 1 sc in 2nd ch from hook, 1 sc in each ch to end of ch. Turn. 10 sc
- 2nd to 6th rows: Chain 1. 1 sc in each sc to end of row. Turn.
- 7th row: Chain 15. 1 sc in 2nd ch from hook, 1 sc in each of next 13 ch, 1 sc in each of next 10 sc. Turn. 24 sc
- 8th row: Chain 15. 1 sc in 2nd ch from hook, 1 sc in each of next 13 ch, 1 sc in each sc to end of row. Turn. 38 sc
- 9th and 10th rows: Chain 1. 1 sc in each sc to end of row. Turn.
- 11th row (Dec row): Chain 1. Draw up a loop in each of first 2 sts. Yarn over and draw through all 3 loops on hook — sc2tog made. 1 sc in each sc to last 2 sts. Sc2tog over last 2 sts. Turn.
- 12th to 14th rows: Chain 1. 1 sc in each st to end of row. Turn. Repeat last 4 rows 8 times more. 20 sc
- Next row: As 11th row.
- Next 2 rows: Chain 1. 1 sc in each st to end of row. Turn. Repeat last 3 rows twice more. 14 sts
- Next row: As 11th row.
- Next row: Chain 1. 1 sc in each sc to end of row. Turn. Repeat last 2 rows 4 times more. 4 sts
- Work 2 rows even. Do not fasten off.
- Chain 1. Work 1 round of sc around outside edge of piece. Join with a sl st to the first sc. Fasten off.
Assembly and Finishing
Finishing Touches
- Using a tracing diagram, cut a star from the yellow felt and sew it as shown in the picture.
- Sew the silver garland as shown in the picture.
- Sew the buttons randomly to the right side of the front of the tree for ornaments.
- Place a marker 4 inches [10 cm] down from the top of the tree on each side of the Front and Back.
- Sew the outside edges of Front and Back together between the markers.
Hanging Loop
- With the right side facing, join yarn with a sl st at the top of the Back.
- Chain 24.
- Slip stitch in the same space as the joining stitch. Fasten off.
Practical Tips
- Use a stitch marker to keep track of your rows, especially during the decrease rows, to maintain accuracy.
- Keep your tension consistent to ensure an even finish and avoid any tight or loose sections in the stocking.
- When sewing on buttons, choose a thread that complements your yarn to maintain the aesthetic of your stocking.
Troubleshooting
- If your stocking shape isn’t as expected, check your stitch counts for any missed decreases or incorrect row executions.
- If the fabric feels stiff, consider adjusting your hook size for better flexibility with your yarn choice.
- In case of uneven edges, ensure you’re not tightly crocheting and that you follow the turning chain properly for each row.
Care
To care for your finished tree stocking, follow these guidelines:
- Hand wash gently in cool water with mild detergent.
- Lay flat to dry, reshaping if necessary to maintain the design.
Frequently Asked Questions
What skill level is required for this stocking pattern?
The Easy Tree Stocking Pattern is classified as intermediate crochet due to the skills required in executing decreases and shaping. Familiarity with single crochet stitches is important to complete this pattern successfully.
How large will my finished stocking be?
The finished stocking will measure approximately 16 inches [40.5 cm] tall, making it a great size for decorative purposes or as a gift holder during the holiday season.
Can I use a different type of yarn for this pattern?
Yes, while the pattern specifies Bernat® Happy Holidays, you can substitute with other yarns of similar weight and fiber content. Just keep in mind that the finished size and texture may vary based on your choice.
What can I do if my stitches are too tight?
If you find your stitches are too tight, consider changing to a larger hook size. This will provide more flexibility and may help you achieve a more consistent tension throughout your stocking.
What kind of buttons can I use as ornaments on the tree?
You can use any type of buttons that match your desired aesthetic. Consider using colorful, festive buttons for a fun effect or choose metallic buttons for a more elegant look. Just ensure they are securely sewn on to prevent them from coming off.
How should I store my stocking once it’s finished?
Store your finished stocking flat in a cool, dry place to prevent it from losing its shape. Avoid folding it to maintain its appearance and opt for a breathable fabric bag if needed.
Choose Your Next Crochet Project
Explore more exciting patterns and enhance your crochet skills! Get inspired here!



