
Get 30+ FREE Crochet Patterns — Join Our Newsletter
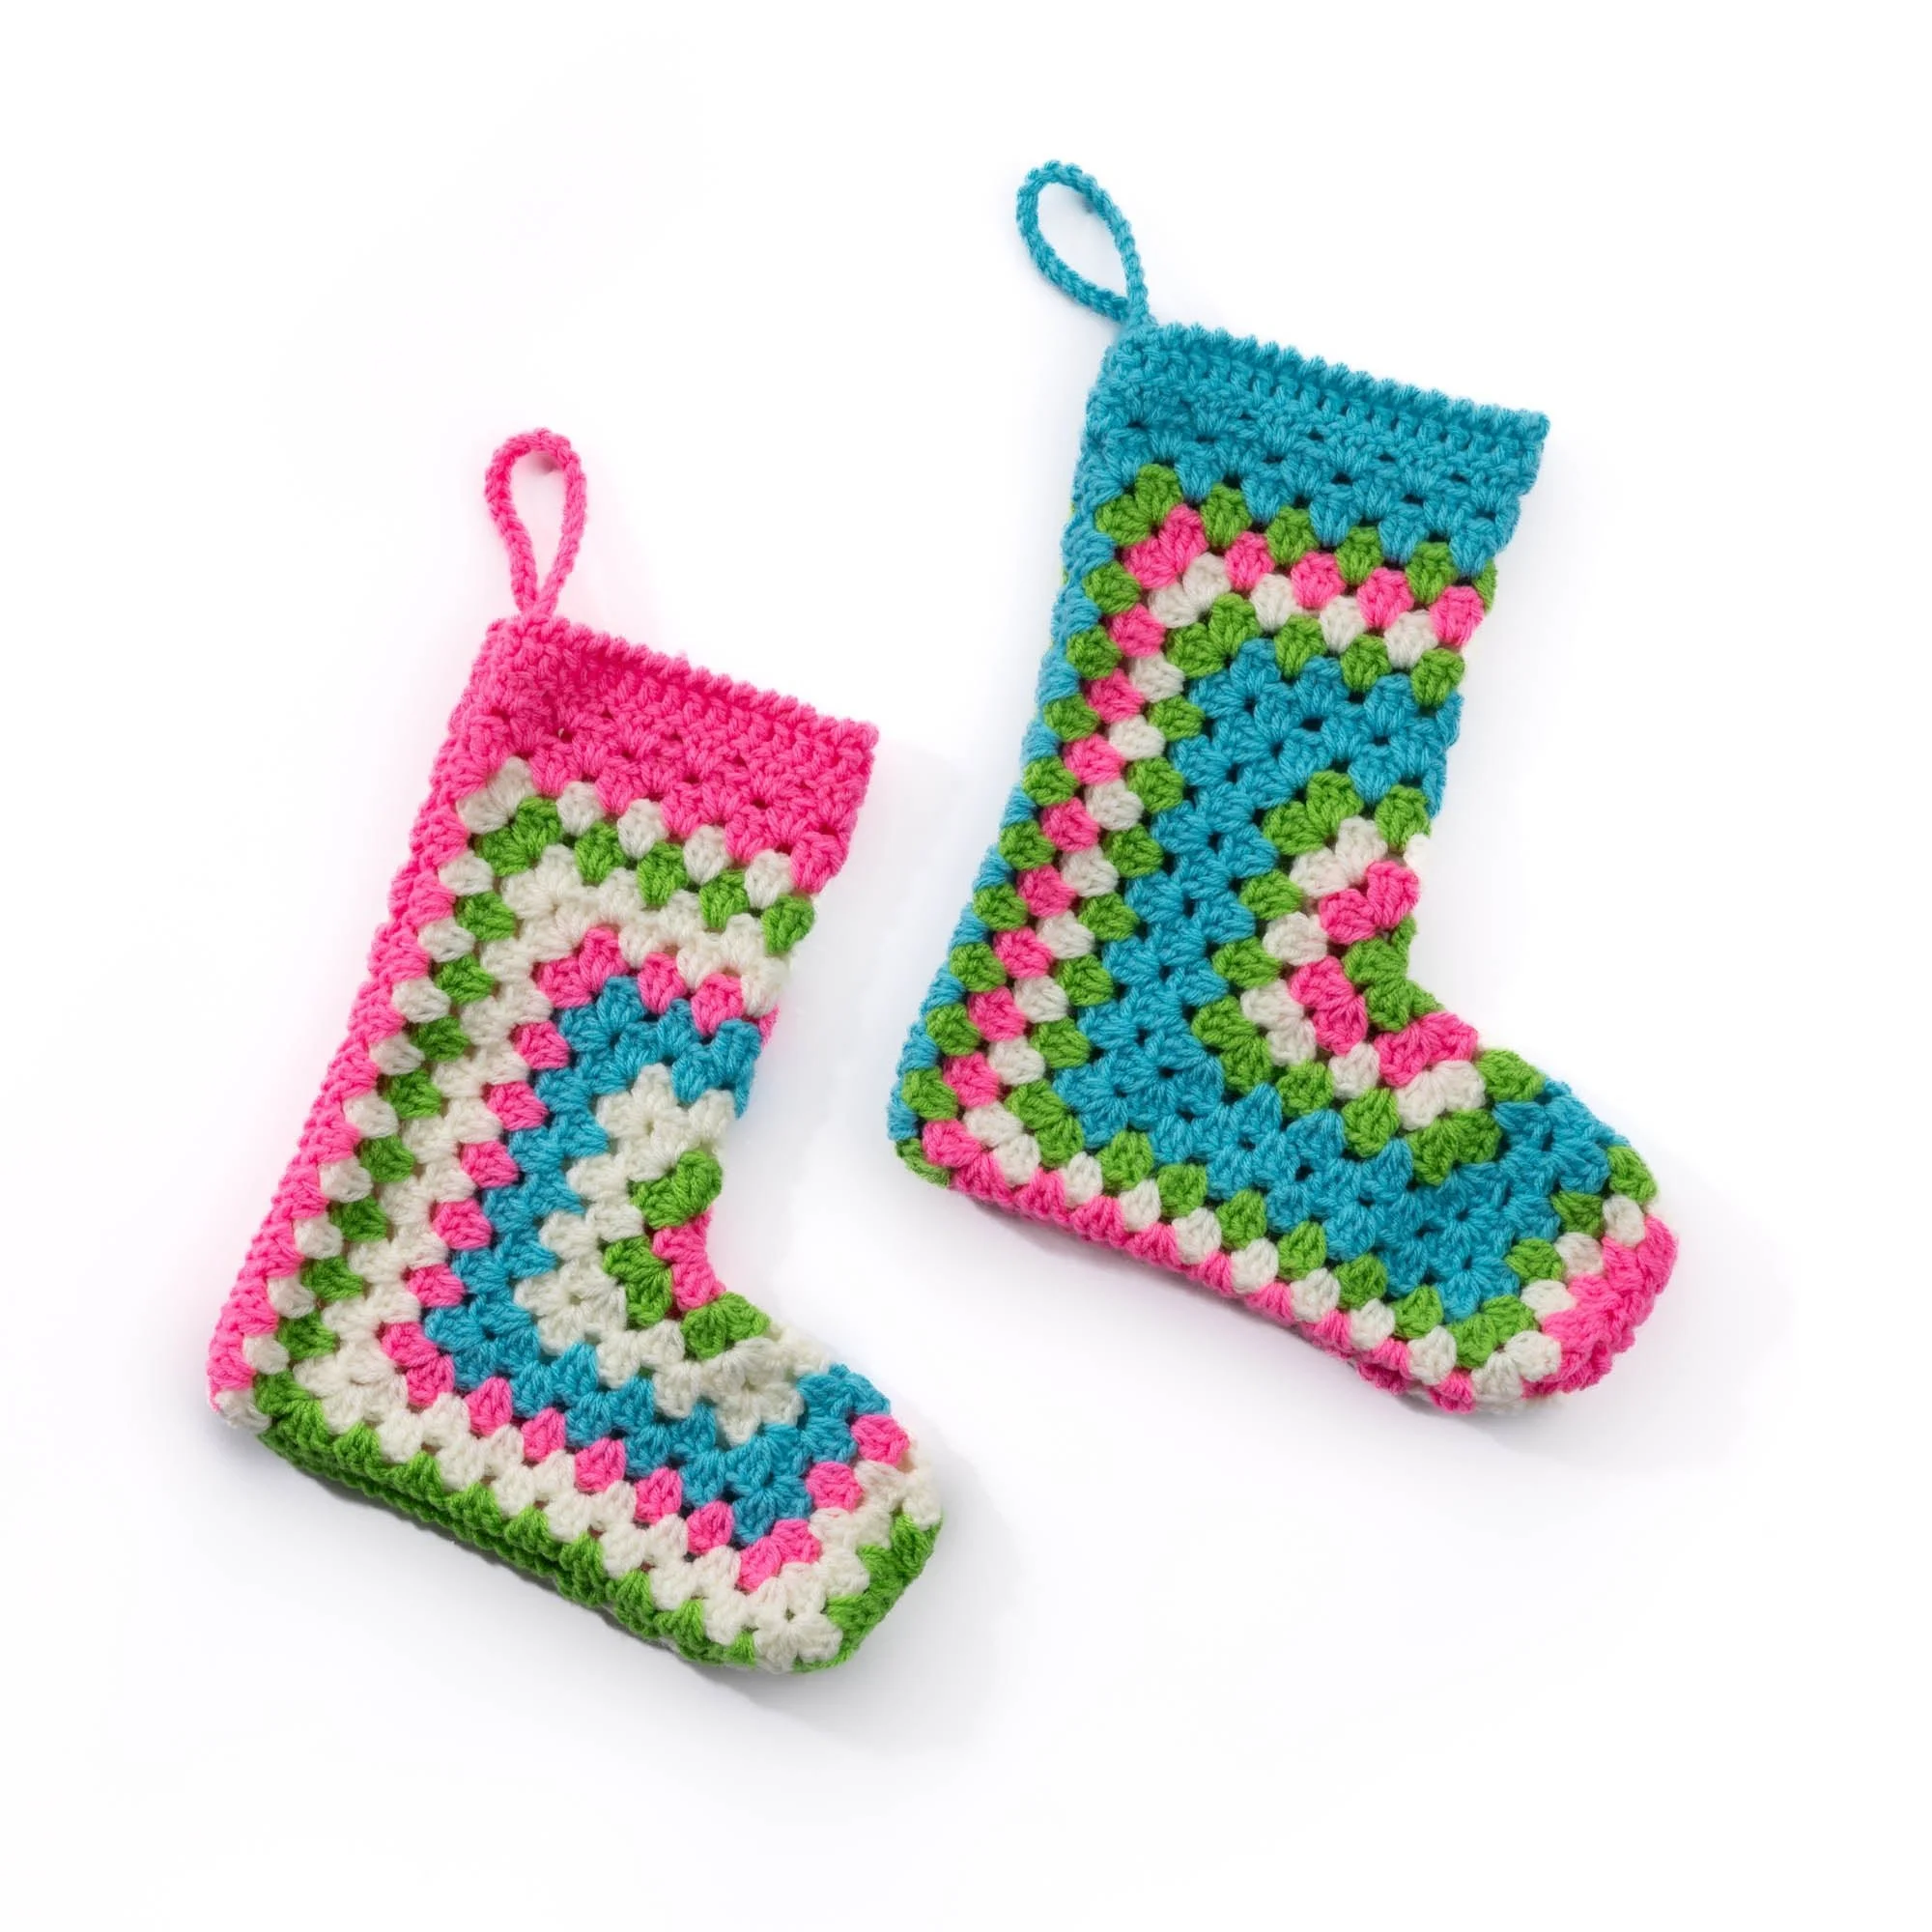
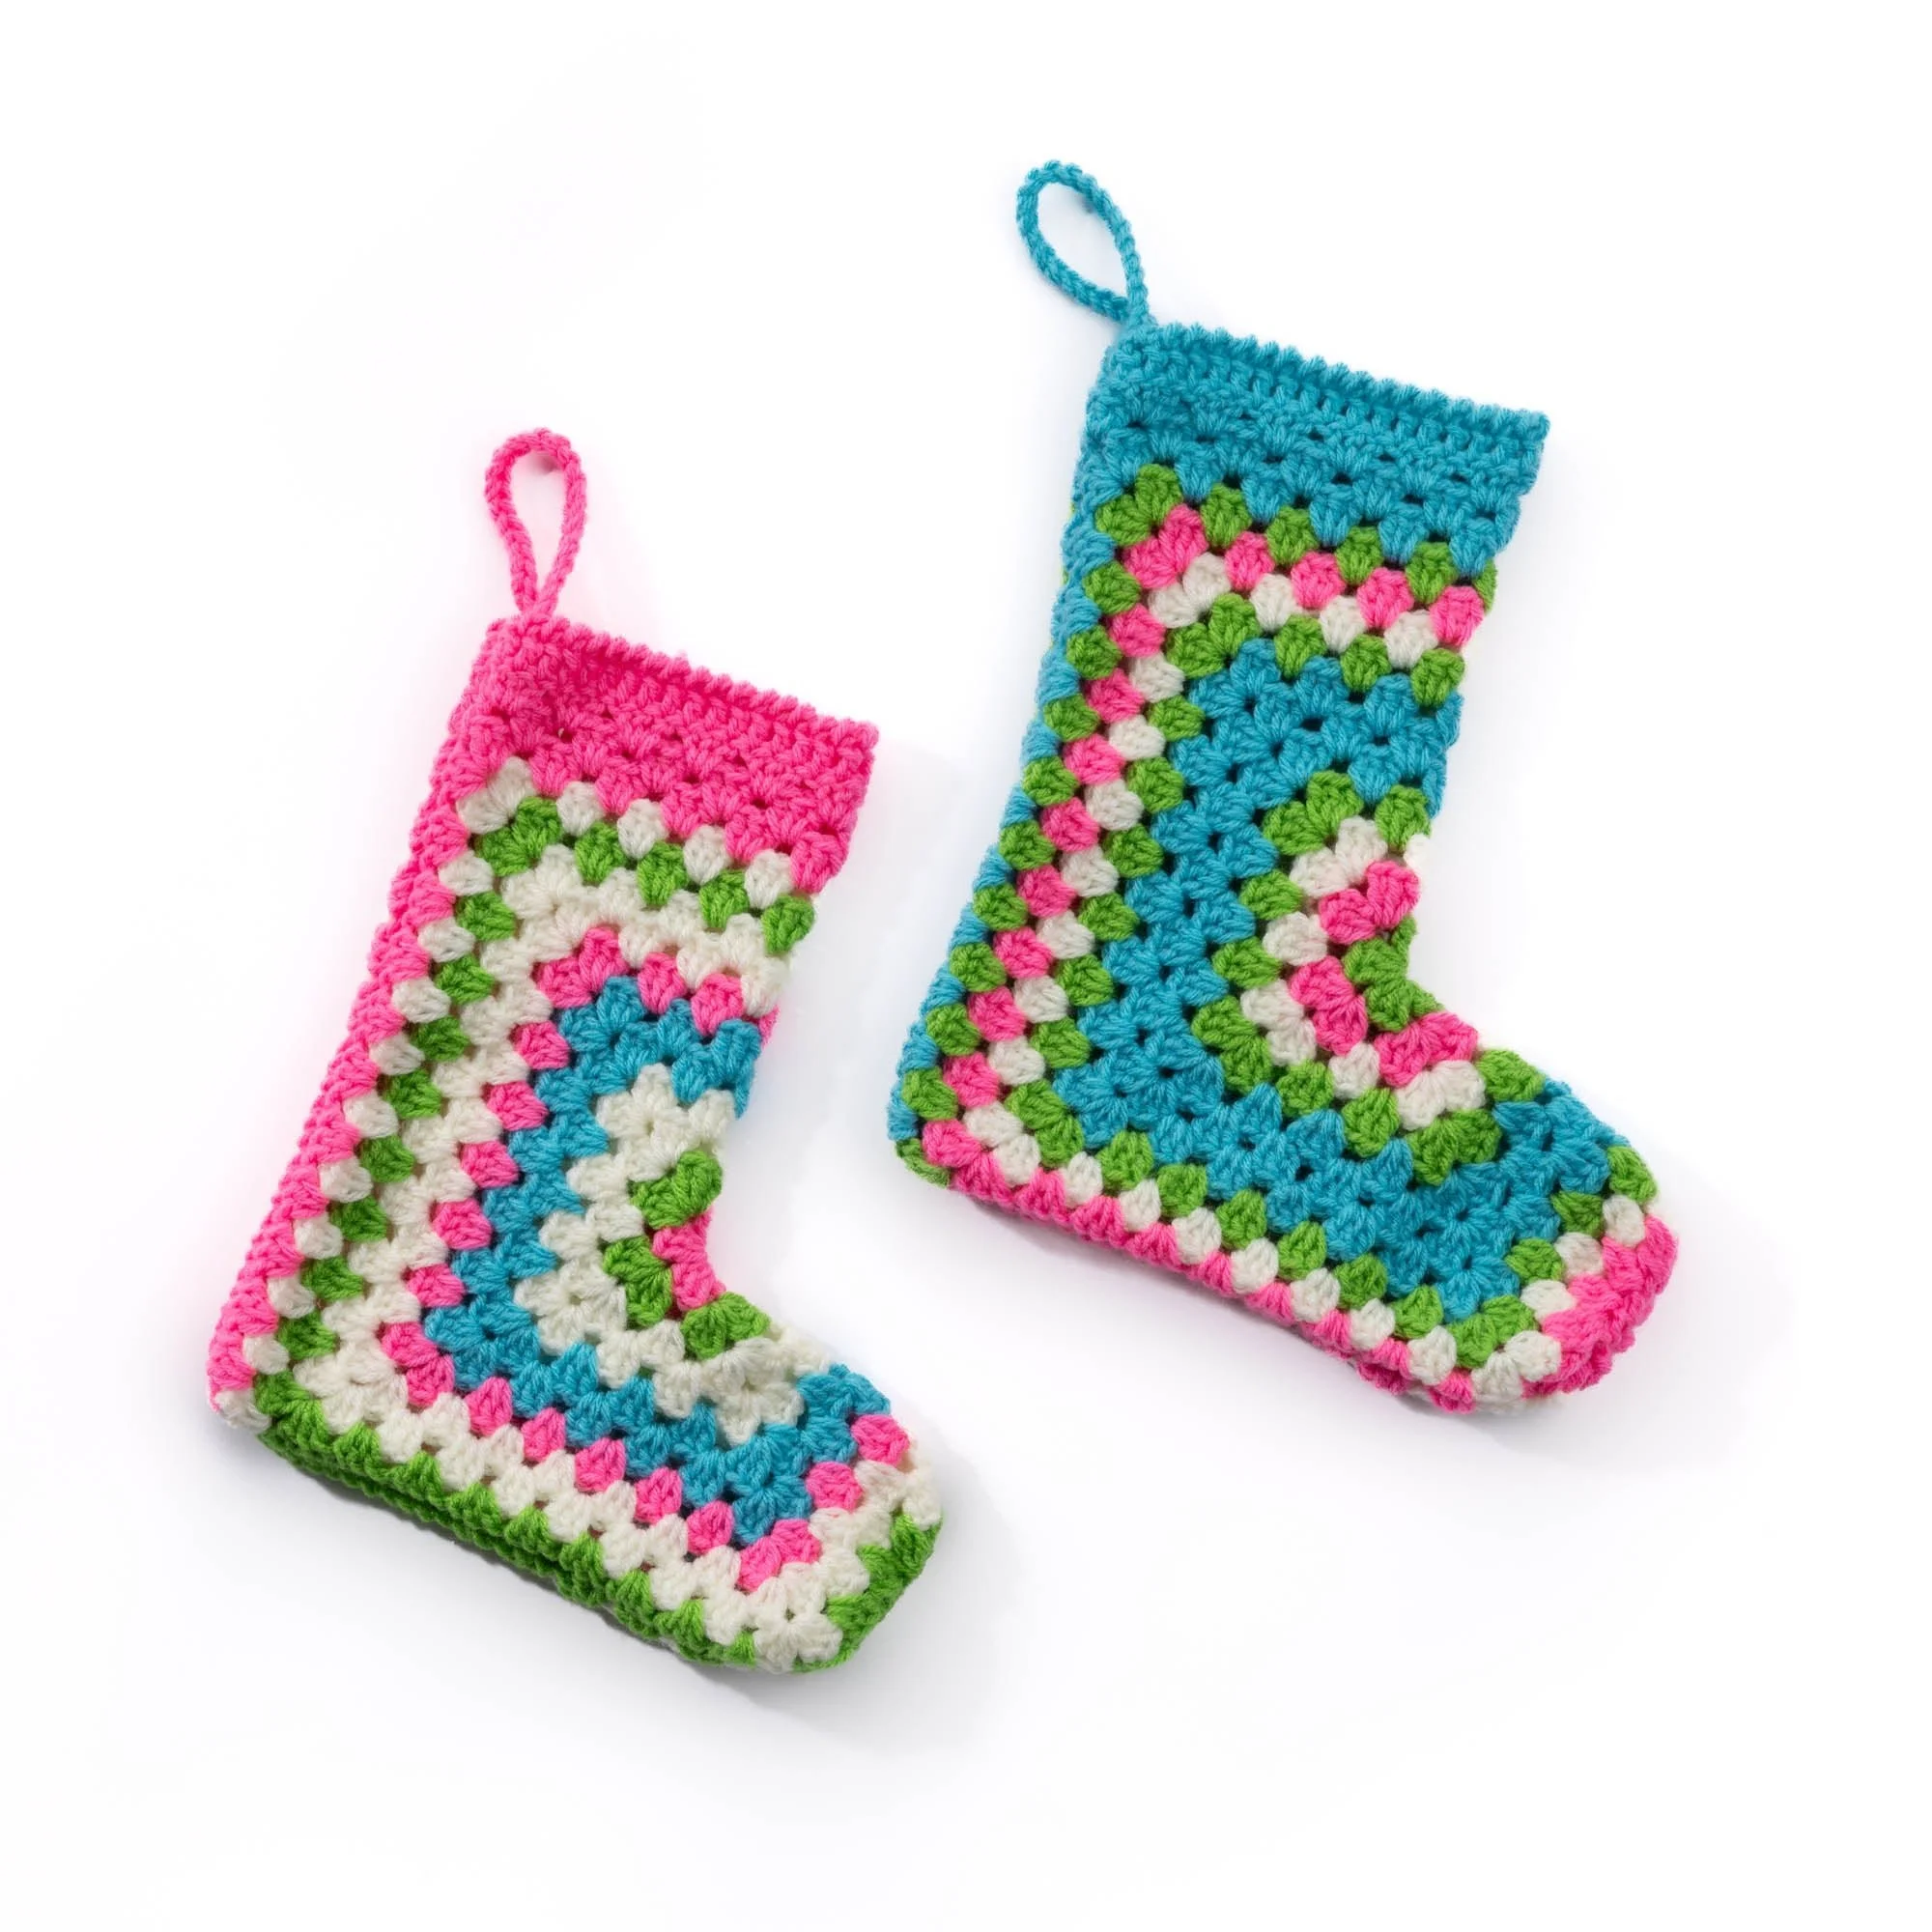
Hexi Crochet Christmas Stocking Pattern
Get ready for Christmas with this delightful Crochet Hexi Christmas Stocking Pattern! This charming stocking features an eye-catching hexagon design that’s perfect for hanging by the fireplace. It can be made using vibrant colors that capture the holiday spirit, making it not only a functional piece for holding gifts but also a festive decoration for your home. The project involves creating hexagons and then shaping the stocking, using classic crochet techniques to ensure lasting quality. Follow along with the instructions and your project photos to make your own unique holiday stocking!
Project Details
- Crochet terminology: U.S.
- Skill level: Intermediate
- Finished size: Approximately 12 inches tall
- Construction method: Motif-based
Materials and Tools
| Yarn Option | Yarn and Specifications | Amount |
|---|---|---|
| Version 1 | Red Heart® Super Saver™ | 1 ball Contrast A Turqua (0512): 94 yds/85.5 m 1 ball Contrast B Pretty n’ Pink (0722): 24 yds/22 m 1 ball Contrast C Spring Green (0672): 32 yds/29 m 1 ball Contrast D Soft White (0316): 24 yds/22 m |
| Version 2 | Red Heart® Super Saver™ | 1 ball Contrast A Turqua (0512): 32 yds/29 m 1 ball Contrast B Spring Green (0672): 32 yds/29 m 1 ball Contrast C Pretty n’ Pink (0722): 80 yds/73 m 1 ball Contrast D Soft White (0316): 80 yds/73 m |
- Crochet hook: U.S. H/8 (5 mm) or size needed to obtain gauge
- Stitch markers: Susan Bates® stitch markers
- Needle: Susan Bates® steel yarn needle
Abbreviations
| Abbreviation | Meaning |
|---|---|
| ch | chain |
| dc | double crochet |
| sl st | slip stitch |
| sp | space |
| *…* | repeat from |
Preparation and Techniques
Working in a Spiral
This pattern predominantly uses joined rounds for creating hexagons. Pay close attention to the join points to maintain clean edges.
Complete Pattern Instructions
Version 1 Hexagon
| Round | Instructions | Stitches |
|---|---|---|
| 1st rnd | With C, ch 4. Join with sl st to first ch to form ring. Ch 3 (counts as dc at beg of this and subsequent rnds). 2 dc in ring. (Ch 2. 3 dc) 5 times in ring. Ch 2. Join with sl st to top of ch 3. Completes: 6 groups of 3 dc and 6 ch-2 sps. Break C. | — |
| 2nd rnd | Join B with sl st in first ch-2 sp. Ch 3. (2 dc. Ch 2. 3 dc) in same sp as last sl st. *Skip next 3 dc. (3 dc. Ch 2. 3 dc) in next ch-2 sp. Rep from * 4 times more. Join with sl st to top of ch 3. Break B. | — |
| 3rd rnd | Join D with sl st in first ch-2 sp. Ch 3. (2 dc. Ch 2. 3 dc) in same sp as last sl st. *Skip next 3 dc. 3 dc in sp between next 2 groups of 3-dc. Skip next 3 dc. (3 dc. Ch 2. 3 dc) in next corner ch-2 sp. Rep from * 4 times more. Skip next 3 dc. 3 dc in sp between next 2 groups of 3-dc. Skip last 3 dc. Join with sl st to top of ch 3. Break D. | — |
| 4th rnd | Join C with sl st in first ch-2 sp. Ch 3. (2 dc. Ch 2. 3 dc) in same sp as last sl st. * (Skip next 3 dc 3 dc in sp between next 2 groups of 3-dc) twice. Skip next 3 dc. (3 dc. Ch 2. 3 dc) in next corner ch-2 sp. Rep from * 4 times more. (Skip next 3 dc 3 dc in sp between next 2 groups of 3-dc) twice. Skip last 3 dc. Join with sl st to top of ch 3. Break C. | — |
| 5th rnd | Join A with sl st in first ch-2 sp. Ch 3. (2 dc. Ch 2. 3 dc) in same sp as last sl st. * Skip next 3 dc. 3 dc in sp between next 2 groups of 3-dc. Rep from * to next corner ch-2 sp. Skip next 3 dc. (3 dc. Ch 2. 3 dc) in next corner ch-2 sp. Rep from * to end of rnd. Skip last 3 dc. Join with sl st to top of ch 3. | — |
| 6th and 7th rnds | Sl st in each of next 2 dc and next ch-2 sp. Ch 3. (2 dc. Ch 2. 3 dc) in same sp as last sl st. *Skip next 3 dc. 3 dc in sp between next 2 groups of 3-dc. Rep from * to next corner ch-2 sp. Skip next 3 dc. (3 dc. Ch 2. 3 dc) in next corner ch-2 sp. Rep from * to end of rnd. Skip last 3 dc. Join with sl st to top of ch 3. Break A at end of 7th rnd. | — |
| 8th rnd | With C, as 5th rnd. Break C. | — |
| 9th rnd | Join D with sl st in first ch-2 sp. Ch 3. (2 dc. Ch 2. 3 dc) in same sp as last sl st. * (Skip next 3 dc. 3 dc in sp between next 2 groups of 3-dc) 7 times. Skip next 3 dc. (3 dc. Ch 2. 3 dc) in next corner ch-2 sp – PM in ch-2 sp just worked. Rep from * once more. (Skip next 3 dc. 3 dc in sp between next 2 groups of 3-dc) 7 times. Skip next 3 dc. (3 dc. Ch 2. 3 dc) in next corner ch-2 sp. Rep from twice more. (Skip next 3 dc. 3 dc in sp between next 2 groups of 3-dc) 7 times. Skip last 3 dc. Join with sl st to top of ch 3. Break D. | — |
Version 1 Toe Shaping and Marker Placement
| Round | Instructions | Stitches |
|---|---|---|
| 10th rnd | Join B with sl st in first ch-2 sp. Ch 3. (2 dc. Ch 2. 3 dc) in same sp as last sl st. (Skip next 3 dc. 3 dc in sp between next 2 groups of 3-dc) 8 times. (3 dc. Ch 2. 3 dc) in next marked corner ch-2 sp. (Dc3tog in sp between next 2 groups of 3 dc) 8 times. (3 dc. Ch 2. 3 dc) in next marked corner ch-2 sp. * (Skip next 3 dc. 3 dc in sp between next 2 groups of 3-dc) 8 times. Skip next 3 dc. (3 dc. Ch 2. 3 dc) in next corner ch-2 sp. Rep from * twice more. (Skip next 3 dc. 3 dc in sp between next 2 groups of 3-dc) 8 times. Skip last 3 dc. Join with sl st to top of ch 3. Break B. PM in 4th corner ch-2 sp of 10th rnd. | — |
Version 1 Stocking Sides
| Row | Instructions | Stitches |
|---|---|---|
| 1st row | With RS of Hexagon facing, join C with sl st in marked 4th corner ch-2 sp. Ch 3. 2 dc in same sp. *(3 dc in sp between next 2 groups of 3-dc) 9 times. (3 dc. Ch 2. 3 dc) in next corner ch-2 sp. Rep from * once more. (3 dc in sp between next 2 groups of 3-dc) 9 times. 3 dc in next corner ch-2 sp. Break C. Leave rem sts unworked. | — |
| 2nd row | (RS) Join A with sl st in top of ch 3 at beg of 1st row. Ch 3. *(3 dc in sp between next 2 groups of 3-dc) 10 times. (3 dc. Ch 2. 3 dc) in next corner ch-2 sp. Rep from * once more. (3 dc in sp between next 2 groups of 3-dc) 10 times. Skip next 2 dc. 1 dc in last dc. Break A. | — |
Version 1 Stocking Top Edge
| Row | Instructions | Stitches |
|---|---|---|
| 1st row | With RS of Stocking facing, join A with sl st in first marked corner ch-2 sp. Ch 3. 2 dc in same sp. (3 dc in sp between next 2 groups of 3-dc) 11 times. 3 dc in second marked corner ch-2 sp. Turn. | — |
| 2nd row | (WS) Ch 3. (3 dc in sp between next 2 groups of 3-dc) 12 times. Skip next 2 dc. 1 dc in top of ch 3. Turn. | — |
| 3rd row | Ch 3. 1 dc in each dc to end of row. Do not turn. | — |
| 4th row | Ch 1. Working from left to right instead of from right to left, as usual, work 1 reverse sc in each dc to end of row. Fasten off. | — |
Version 1 Finishing and Assembly
Fold Stocking with sides, bottom and toe edges aligned. Using a matching shade, join sides, bottom edge and toe seams.
Hanging Loop: Using 2 strands of A held together, join with sl st to top edge at side seam. Ch 24. Join with sl st in seam. Fasten off.
Version 2 Hexagon
| Round | Instructions | Stitches |
|---|---|---|
| 1st rnd | With C, ch 4. Join with sl st to first ch to form ring. Ch 3 (counts as dc at beg of this and subsequent rnds). 2 dc in ring. (Ch 2. 3 dc) 5 times in ring. Ch 2. Join with sl st to top of ch 3. Completes: 6 groups of 3 dc and 6 ch-2 sps. Break C. | — |
| 2nd rnd | Join B with sl st in first ch-2 sp. Ch 3. (2 dc. Ch 2. 3 dc) in same sp as last sl st. *Skip next 3 dc. (3 dc. Ch 2. 3 dc) in next ch-2 sp. Rep from * 4 times more. Join with sl st to top of ch 3. Break B. | — |
| 3rd rnd | Join D with sl st in first ch-2 sp. Ch 3. (2 dc. Ch 2. 3 dc) in same sp as last sl st. *Skip next 3 dc. 3 dc in sp between next 2 groups of 3-dc. Skip next 3 dc. (3 dc. Ch 2. 3 dc) in next corner ch-2 sp. Rep from * 4 times more. Skip next 3 dc. 3 dc in sp between next 2 groups of 3-dc. Skip last 3 dc. Join with sl st to top of ch 3. Break D. | — |
| 4th rnd | Sl st in each of next 2 dc and first ch-2 sp. Ch 3. (2 dc. Ch 2. 3 dc) in same sp as last sl st. *(Skip next 3 dc. 3 dc in sp between next 2 groups of 3-dc) twice. Skip next 3 dc. (3 dc. Ch 2. 3 dc) in next corner ch-2 sp. Rep from * 4 times more. (Skip next 3 dc. 3 dc in sp between next 2 groups of 3-dc) twice. Skip last 3 dc. Join with sl st to top of ch 3. Break D. | — |
| 5th rnd | Join A with sl st in first ch-2 sp. Ch 3. (2 dc. Ch 2. 3 dc) in same sp as last sl st. *Skip next 3 dc. 3 dc in sp between next 2 groups of 3-dc. Rep from * to next corner ch-2 sp. Skip next 3 dc. (3 dc. Ch 2. 3 dc) in next corner ch-2 sp. Rep from * to end of rnd. Skip last 3 dc. Join with sl st to top of ch 3. | — |
Practical Tips
- For a more vivid color interplay, switch the contrast colors at your discretion while following the listed rounds.
- Ensure that your tension is consistent, especially in the first few rounds, as this sets the foundation for the entire stocking.
- Use stitch markers to mark the beginning of rounds for easier tracking.
Troubleshooting
- Issue: The edges of the stocking are uneven.
Cause: Inconsistent tension or skipped stitches.
Solution: Check your tension while crocheting, and recount your stitches in each round to ensure none are skipped. - Issue: The stocking is too small.
Cause: Using a smaller hook or tighter tension than specified.
Solution: Verify your hook size and yarn tension. Consider using the size recommended in this pattern.
Care Instructions
To care for your finished stocking:
- Hand wash in cold water with a gentle detergent.
- Avoid bleach or harsh chemicals to preserve color.
- Lay flat to dry to maintain shape.
Frequently Asked Questions
What is the finished size of the crochet stocking?
The finished size of the Crochet Hexi Christmas Stocking is approximately 12 inches tall, making it a perfect size for hanging by the chimney filled with treats!
Can I substitute the yarn used in this pattern?
Yes, you can substitute yarn, but ensure it is of similar weight to maintain the size and shape of the stocking. Keep in mind that different yarns can affect the appearance and texture.
How do I change colors in this pattern?
To change colors, simply finish the last stitch of the current color but do not finish the last yarn over. Instead, yarn over with the new color, pull it through, and proceed. Ensure to weave in ends to secure the color changes.
What techniques should I know before starting?
Familiarity with double crochet, joining rounds, and color changes will be beneficial for completing this crochet stocking pattern. It’s also helpful to know how to work in rounds.
Is the stocking pattern suitable for beginners?
This pattern is categorized as intermediate due to the hexagon construction and multiple color changes. Beginners may find it challenging but can try simpler patterns first.
How should I hang my crochet stocking?
Once completed, you can hang your crochet stocking using the attached loop or a decorative hanger. Ensure it is securely positioned for stability.
Can I sell finished stockings made from this pattern?
Check the original designer’s terms of use for this pattern regarding selling. Respecting copyright and usage rights is important when crafting from a specific pattern.



