
Get 30+ FREE Crochet Patterns — Join Our Newsletter
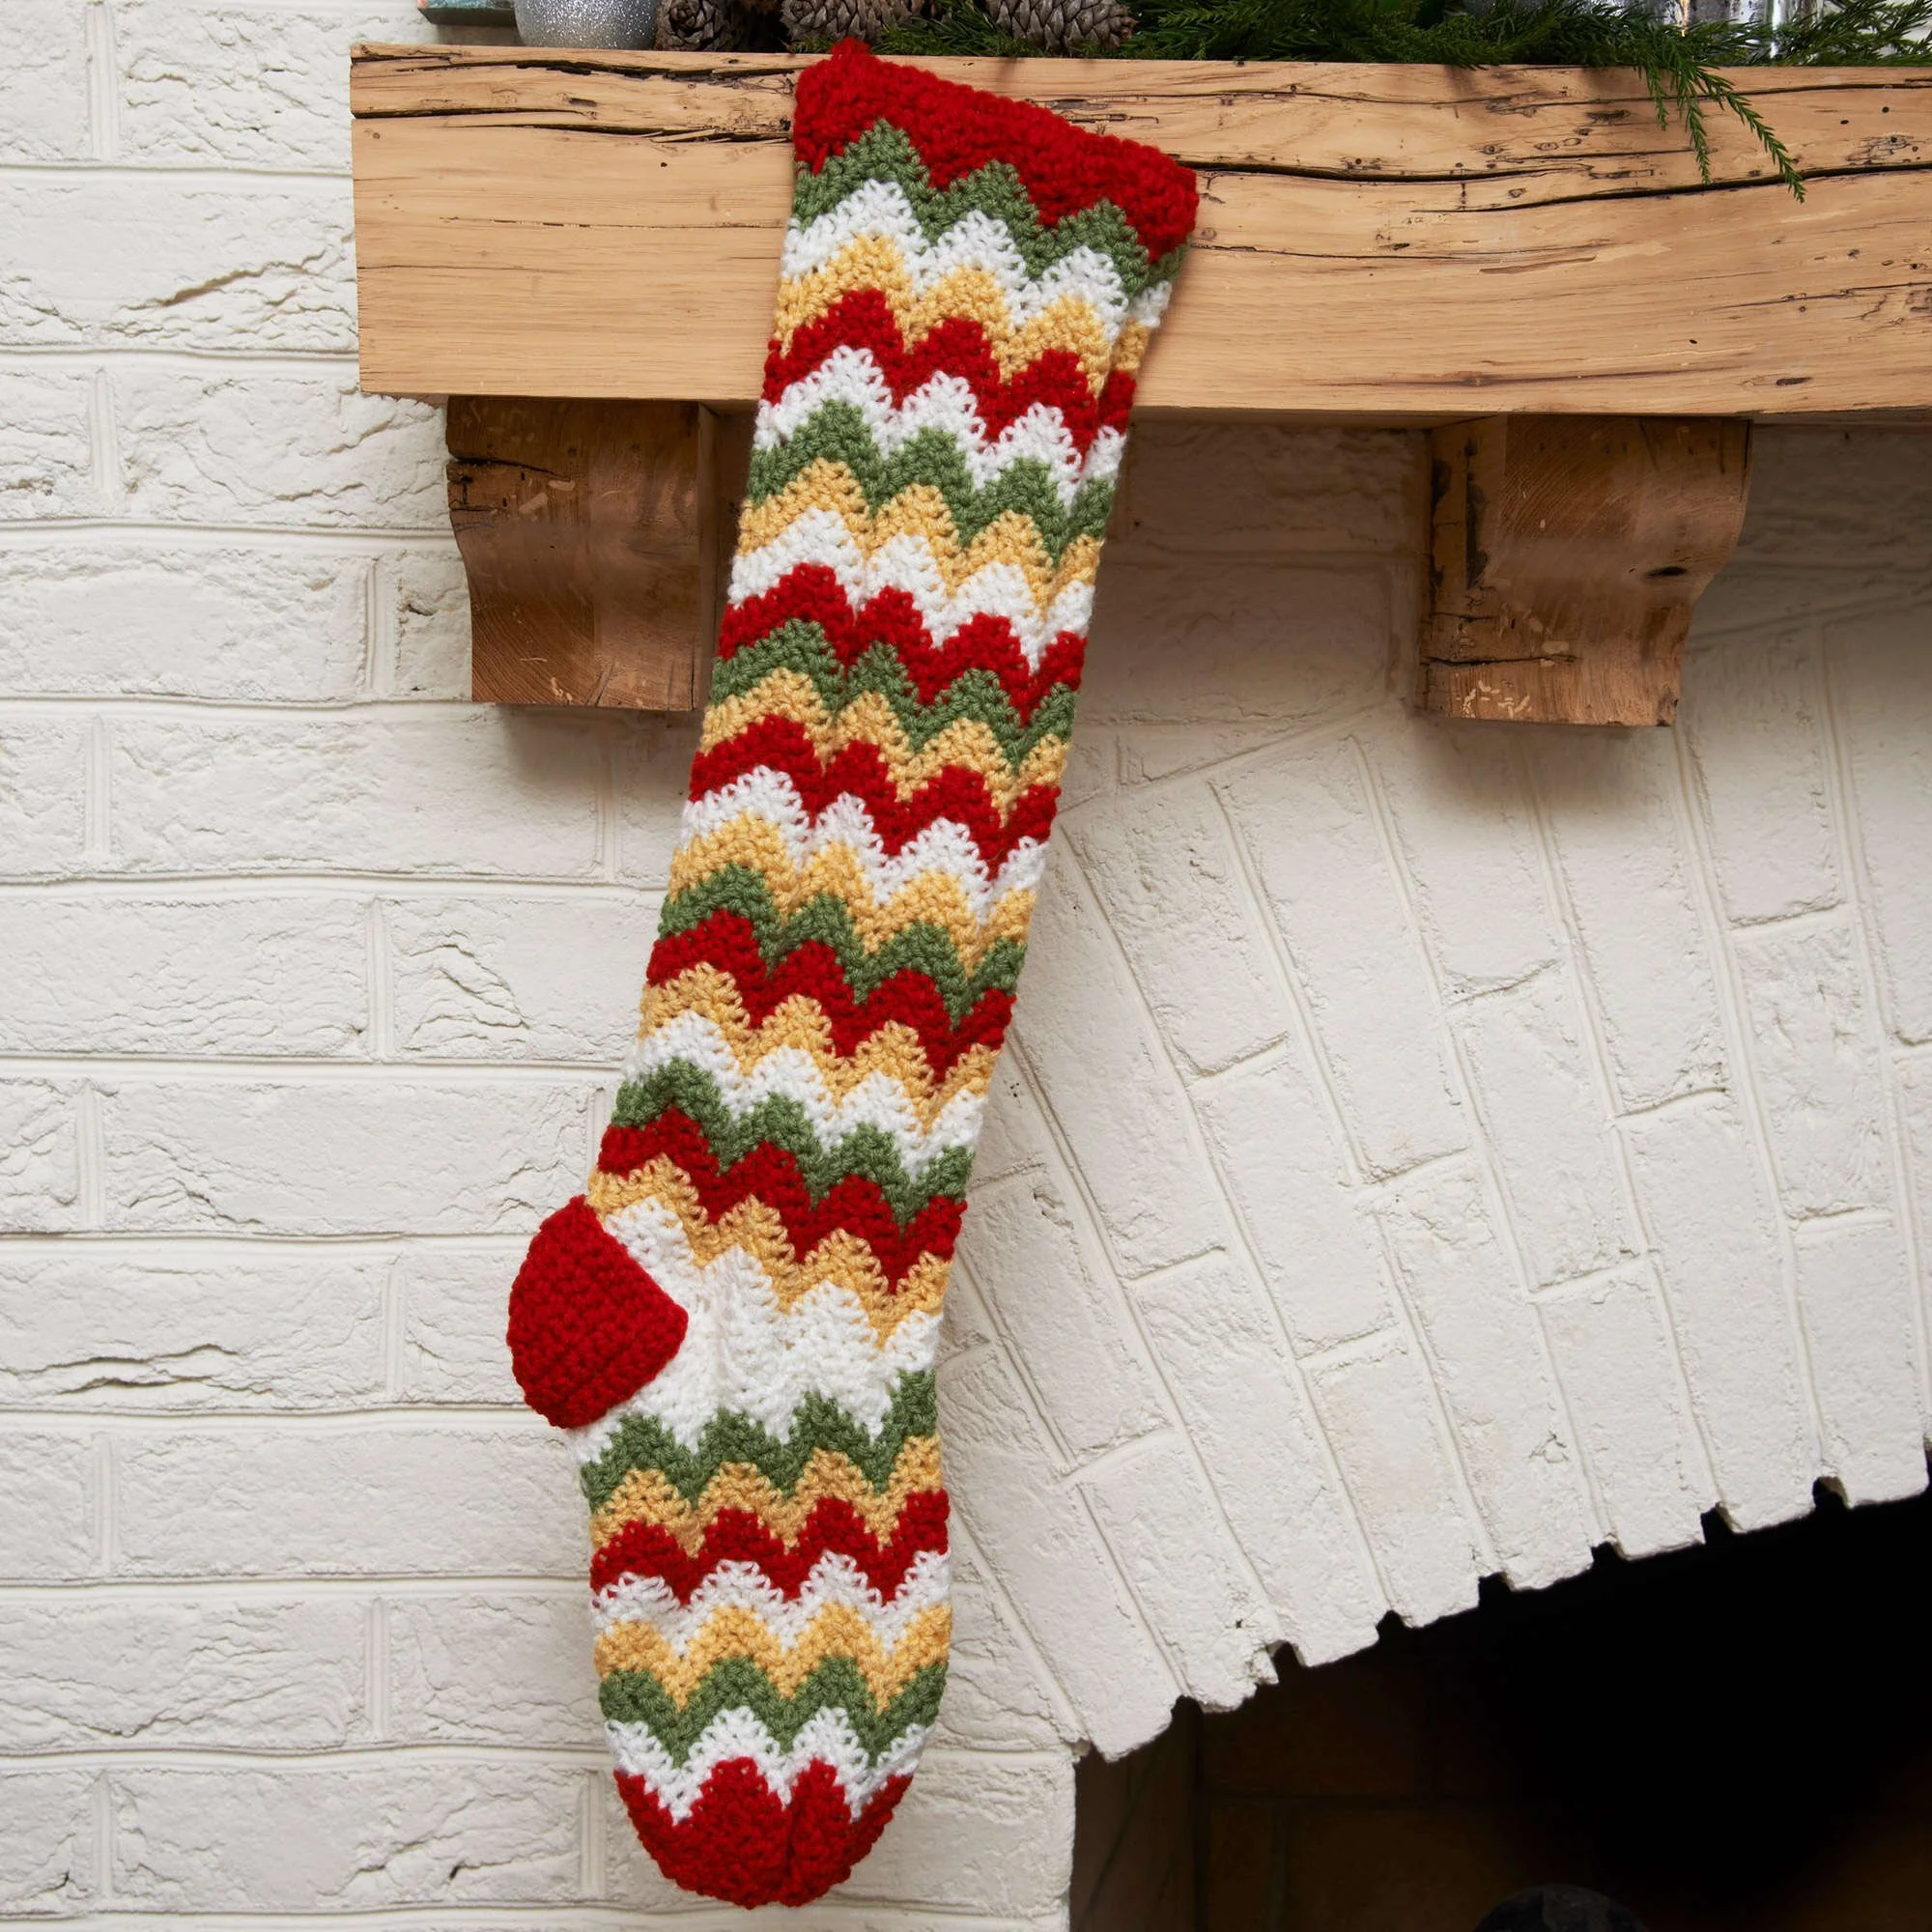
Crochet Zigzag Stocking Pattern
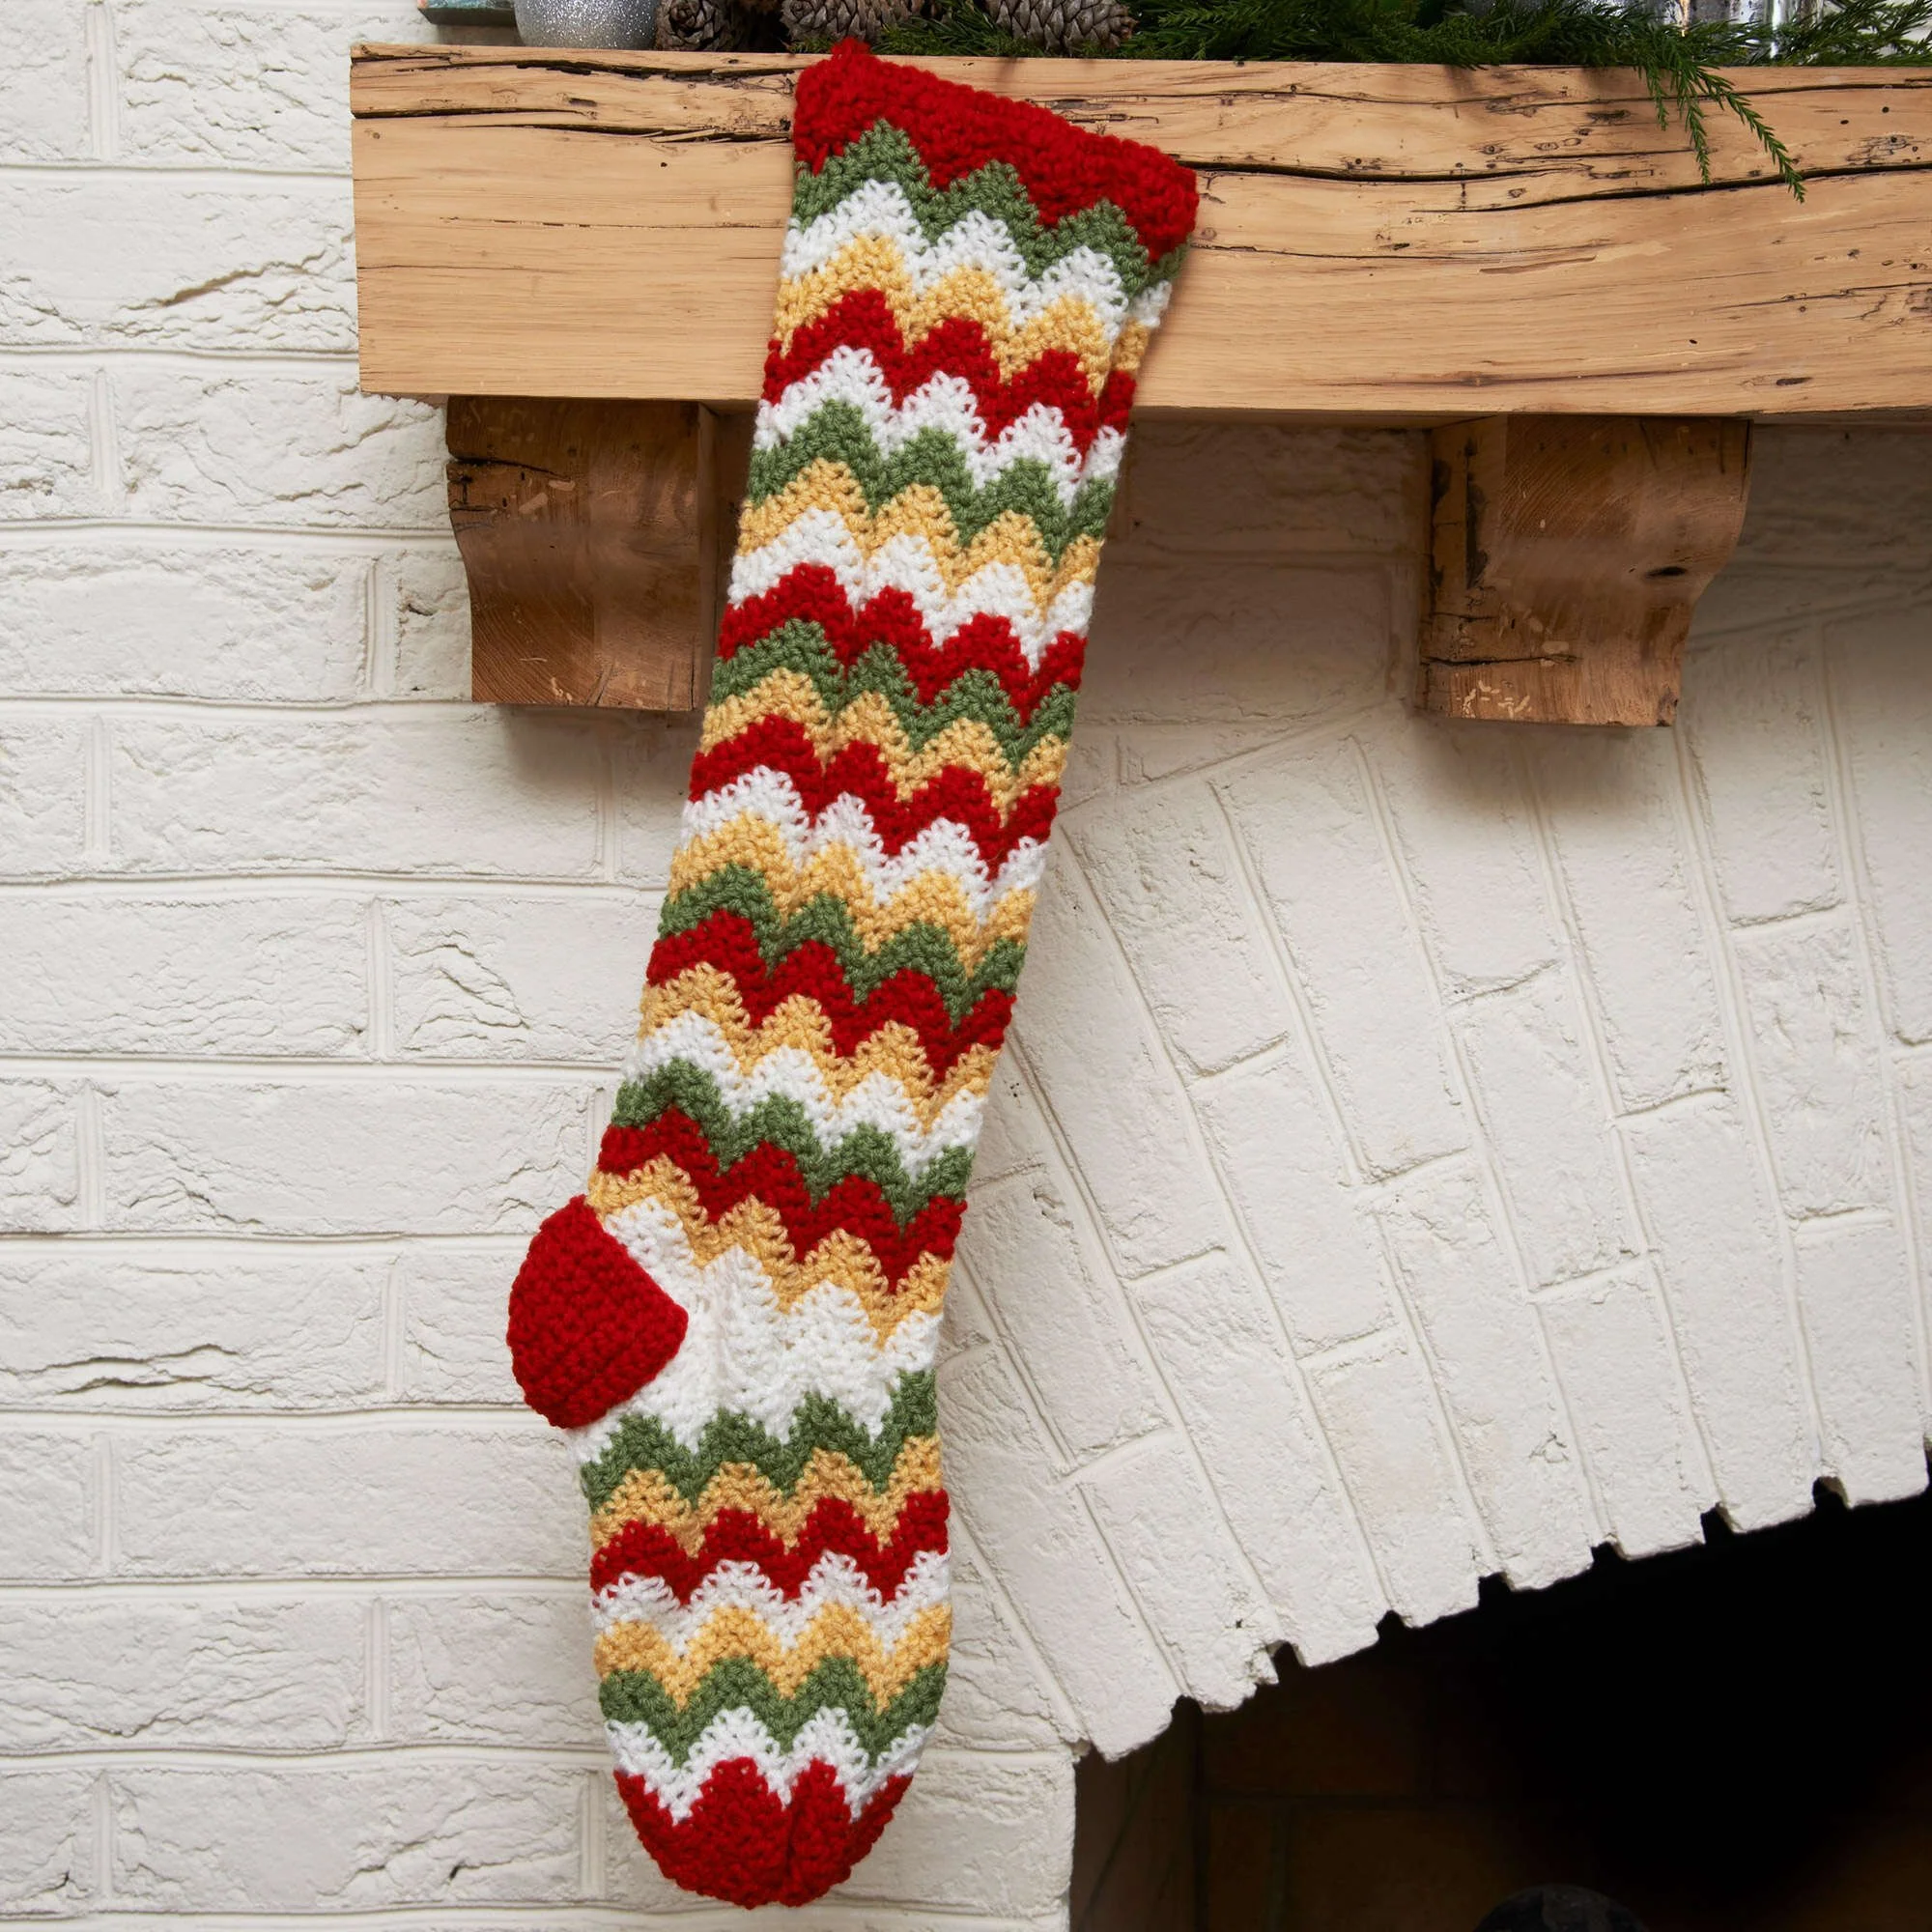
Create a lovely Crochet Zig-Zag Stocking with this vibrant and festive pattern! Featuring a dynamic zig-zag design and a mix of delightful colors, this stocking is perfect for holiday decoration or a thoughtful gift. The project incorporates basic crochet techniques including single crochet, slip stitch, and color changes, making it suitable for crocheters with intermediate skills. As you follow this pattern, you will create a charming stocking that boasts a textured appearance and a hanging loop for easy display. Don’t forget to check back to the written instructions as you crochet for the best results!
Project Details
- Crochet terminology: US terms
- Skill level: Intermediate
- Finished size: Approximately 18 inches tall
- Construction method: Worked in rows and includes color changes
Materials and Tools
| Yarn option | Yarn and specifications | Amount |
|---|---|---|
| A | RED HEART® Super Saver® – 319 Cherry Red | 1 skein |
| B | RED HEART® Super Saver® – 624 Tea Leaf | 1 skein |
| C | RED HEART® Super Saver® – 316 Soft White | 1 skein |
| D | RED HEART® Super Saver® – 320 Cornmeal | 1 skein |
- Susan Bates® Crochet Hook: 5.5mm [US I-9]
- Yarn needle
Abbreviations
| Abbreviation | Meaning |
|---|---|
| ch | Chain |
| sc | Single crochet |
| dc | Double crochet |
| tr | Triple crochet |
| hdc | Half double crochet |
| slip st | Slip stitch |
| st(s) | Stitch(es) |
| rep | Repeat |
Preparation and Techniques
Changing Yarn Colors
When changing colors, complete the last stitch of the current color until there are two loops left on the hook. Drop the working yarn and pick up the new color, pulling it through the remaining loops. This creates a clean transition between colors.
Starting Foundation Chain
Your foundation chain will determine the width of the stocking. For this project, you will chain 61, which includes the chain for the hanging loop. Be sure to keep your tension even for the best results.
Complete Pattern Instructions
Leg
Foundation: With A, ch 61.
| Row | Instructions | Stitches |
|---|---|---|
| 1 | Sc in 12th ch from hook, sc in each remaining ch across, turn *(unworked chains become hanging loop)* | 50 sc |
| 2 | Ch 1, (tr, dc) in first st, hdc in next st, sc in next st, slip st in each of next 2 sts, sc in next st, hdc in next st, *(dc, tr, dc) in next st, hdc in next st, sc in next st, slip st in each of next 2 sts, sc in next st, hdc in next st; repeat from * to last st, (dc, tr) in last st, turn | 64 sts |
| 3 | Ch 1, 2 sc in first st, sc in next 3 sts, skip next 2 slip sts, sc in next 3 sts, *(sc, ch 1, sc) in next st, sc in next 3 sts, skip next 2 slip sts, sc in next 3 sts; repeat from * to last st, 2 sc in last st; change to B, turn | 7 zigzags |
| 4 and 5 | With B, ch 1, 2 sc in first sc, sc in next 3 sc, skip next 2 sc, sc in next 3 sc, *(sc, ch 1, sc) in next ch-1 space, sc in next 3 sc, skip next 2 sc, sc in next 3 sc; repeat from * to last sc, 2 sc in last sc, turn; change to C in last st of Row 5 | — |
| 6 and beyond | Continue repeating Rows 4 and 5 working 2 rows in each color in the following sequence: C, D, A, C, B, D, C, A, B, D, A, C, D, B, A, D, C, B, A, D, C | — |
Shape Heel
| Row | Instructions | Stitches |
|---|---|---|
| 1 | With C, ch 1, 2 sc in first sc, sc in next 3 sc, skip next 2 sc, sc in next 3 sc, 2 sc in next ch-1 space, turn; leave remaining sts unworked | 10 sc |
| 2 | Ch 1, 2 sc in first sc, sc in next 3 sc, skip next 2 sc, sc in next 3 sc, 2 sc in last sc, turn. | — |
| 3 | Ch 1, 2 sc in first sc, sc in next 3 sc, skip next 2 sc, sc in next 3 sc, (sc, ch 1, sc) in next ch-1 space; working across unworked sts of previous row, sc in next 3 sc, skip next 2 sc, sc in next 3 sc, 2 sc in next ch-1 sp, turn; leave remaining sts unworked | 18 sc and 1 ch-1 space |
| 4 to 14 | Repeat the instructions for Rows 1–7, changing to B at the end of Row 14. | — |
Foot
| Row | Instructions | Stitches |
|---|---|---|
| 1 and 2 | With B, ch 1, 2 sc in first sc, sc in next 3 sc, skip next 2 sc, sc in next 3 sc, *(sc, ch 1, sc) in next ch-1 space, sc in next 3 sc, skip next 2 sc, sc in next 3 sc; repeat from * to last sc, 2 sc in last sc, turn; change to D at the end of Row 2. | — |
| 3 and beyond | Repeat Rows 1 and 2 working 2 rows in each color in the following sequence: D, A, C, D, B, C, A. Do not change color at end of last row. Continue with A. | — |
Shape Toe
| Row | Instructions | Stitches |
|---|---|---|
| 1 | With A, ch 1, sc in next 4 sc, skip next 2 sc, sc in next 3 sc, *sc in next ch-1 space, sc in next 3 sc, skip next 2 sc, sc in next 3 sc; repeat from * to last sc, sc in last sc, turn. | 50 sc |
| 2 | Ch 1, sc in first 3 sc, *skip next 2 sc, sc in next 5 sc; repeat from * to last 5 sc, skip next 2 sc, sc in last 3 sc, turn. | 36 sc |
| 3 | Ch 1, sc in first 2 sc, *skip next 2 sc, sc in next 3 sc; repeat from * to last 4 sc, skip next 2 sc, sc in last 2 sc, turn. | 22 sc |
| 4 | Ch 1, sc in first sc, *skip next 2 sc, sc in next sc; repeat from * across. | 8 sc |
| 5 | Fasten off A. | — |
Heel Patch (make 2)
| Row | Instructions | Stitches |
|---|---|---|
| 1 | With A, ch 19. Sc in 2nd ch from hook, sc in next 7 ch, skip next 2 ch, sc in last 8 ch, turn. | 16 sc |
| 2 | Ch 1, sc in first 7 sc, skip next 2 sc, sc in next 7 sc, turn. | 14 sc |
| 3 | Ch 1, sc in first 6 sc, skip next 2 sc, sc in next 6 sc, turn. | 12 sc |
| 4 | Ch 1, sc in first 5 sc, skip next 2 sc, sc in next 5 sc, turn. | 10 sc |
| 5 | Ch 1, skip first sc, sc in next 3 sc, skip next 2 sc, sc in next 4 sc, turn. | 7 sc |
| 6 | Ch 1, first sc, sc in next 2 sc, skip next 2 sc, sc in next 2 sc, turn. | 4 sc |
| 7 | Ch 1, skip 3 sts, sc in last sc. | 1 sc |
Assembly and Finishing
Sew the Sole and Back Seam
Sew the sole of the stocking closed and join the back seam securely. Position the two heel patches on either side of the stocking and sew them in place together at the back seam for added durability and style.
Practical Tips
- Maintain Even Tension: Keeping the same tension throughout will ensure the stocking has a uniform appearance and that the zigzag pattern aligns beautifully.
- Use Stitch Markers: Placing stitch markers at the beginning of each row can help track color changes and keep the pattern consistent.
- Practice Color Changing: Take time to practice switching colors smoothly to enhance the overall look of your zig-zag design.
- Make it Personal: Consider adding embellishments or embroidery to customize your stocking and make it truly unique.
Troubleshooting
- Uneven Zig-Zag: If the zig-zag pattern isn’t aligning, check that you are correctly following the stitch counts for each row, particularly with color changes.
- Stitch Count Discrepancies: Always verify the number of stitches at the end of each row. Use a stitch counter if necessary.
- Colors Not Transitioning Smoothly: If color transitions look choppy, ensure that you are pulling the new color through the last two loops as specified.
- Pattern Not Laying Flat: If your piece is curling, try blocking it gently to shape the stocking before sewing together.
Care
To care for your Crochet Zig-Zag Stocking, please remember:
- Hand wash gently in cold water and lay flat to dry.
- Avoid bleach and fabric softeners to maintain the integrity of the yarn.
- Store flat or hang to prevent creasing or damage.
Frequently Asked Questions
What size will my finished stocking be?
Your finished stocking will be approximately 18 inches tall, making it a perfect size for filling with treats or gifts!
Can I use different yarn than RED HEART® Super Saver®?
Yes, you can substitute with a similar weight yarn if it’s an Aran or worsted weight. Just be mindful that yarn choice can affect the final size and appearance.
Is this pattern suitable for beginners?
This pattern is best suited for those with some crochet experience due to the variety of stitches and color changes involved. However, determined beginners could certainly try with some patience!
How do I adjust the length of the stocking?
To increase the length, add more rows to the leg section before shaping the heel, keeping track of stitch counts. However, be cautious that this will affect the overall proportions.
What if I need to use different colors?
Feel free to experiment with different colors. Just make sure to maintain the same yarn weight and consider how the colors will transition to achieve a similar zig-zag effect.
Choose Your Next Crochet Project
Explore more creative patterns that you can easily add to your collection. Start crocheting today!



