
Get 30+ FREE Crochet Patterns — Join Our Newsletter
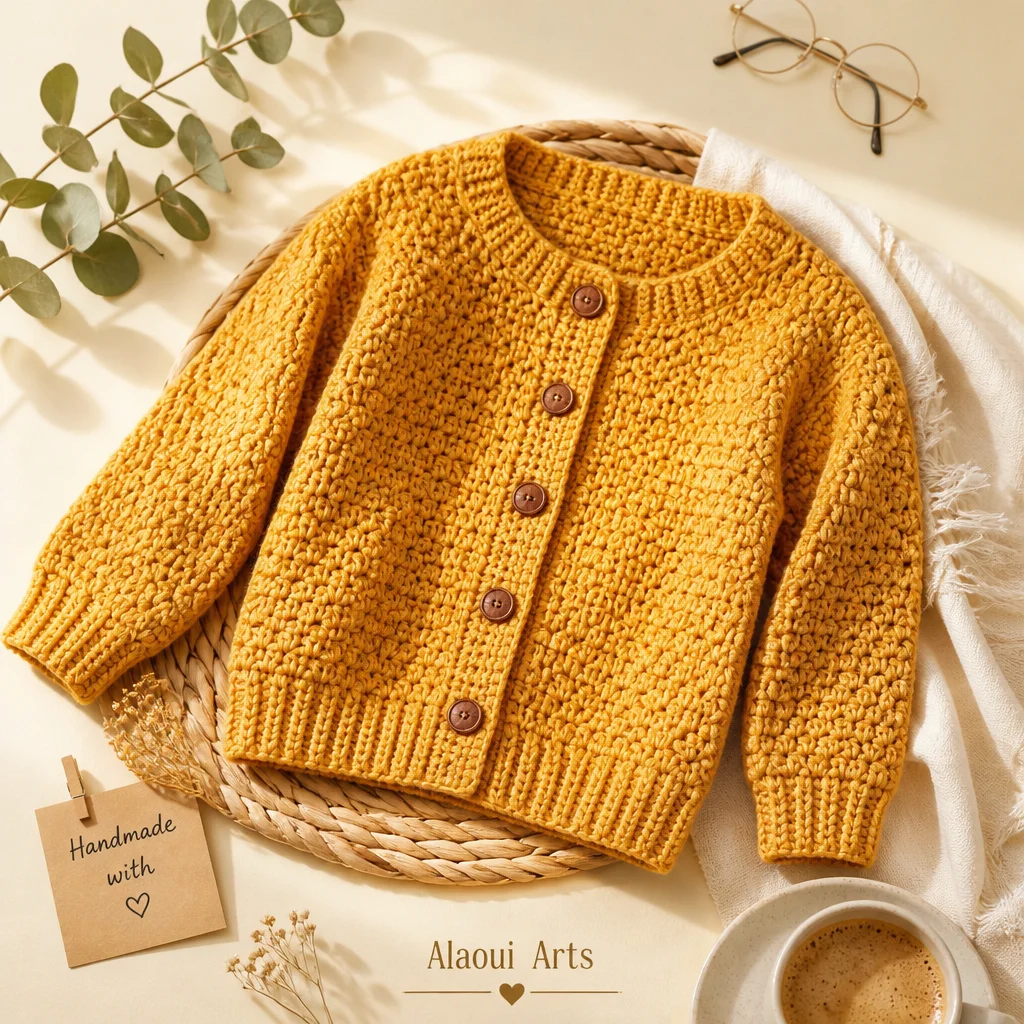
Crochet Crew Neck Cardigan Pattern for Adults
When I first dived into crochet, I never imagined the joy it would bring me, especially with wearable projects like the Adult Crochet Crew Neck Cardigan. This project is not only a cozy addition to any wardrobe, but it also combines comfort with style, making it the perfect item for crafters of all skill levels. Whether you’re a beginner eager to learn or an experienced crocheter looking for a relaxing, enjoyable project, this cardigan has you covered. Imagine wrapping yourself in a soft, handmade cardigan on a breezy evening or gifting it to a loved one!
Why you’ll love this pattern
This pattern stands out for many reasons. First and foremost, it is beginner-friendly, ensuring new crocheters can tackle it with ease while still providing enough complexity to keep seasoned crafters engaged. The customizable size options also mean it can be adapted to any body shape, making it a versatile staple in anyone’s wardrobe. Plus, the project is relatively quick to complete, giving you the satisfaction of a finished piece in no time!
Many crocheters have found the process relaxing and portable, allowing them to crochet while on the go or unwinding at home. Additionally, it’s a wonderful pattern for using up leftover yarn, making it not only a stylish piece but also an eco-friendly choice.
"I loved making this cardigan! It was simple enough for me as a beginner but still looked impressive when finished. I’ve already made two for gifts!" – A happy crocheter
How this crochet pattern comes together
This Adult Crochet Crew Neck Cardigan is a beautifully structured garment, worked in sections. You’ll create the main body, which includes the back, left and right fronts, and sleeves, using a delightful mix of single crochet (sc) and double crochet (dc) stitches, providing both texture and style. The project is approachable for anyone comfortable with basic crochet techniques and should take around several cozy evenings to complete, depending on your speed and available time.
Materials you’ll need
To whip up this cardigan, you’ll need:
Yarn:
-
Caron® Simply Soft® (Heathers: 5 oz/141.7 g; 250 yds/228 m)
- XS/S: 5 balls
- M: 6 balls
- L: 7 balls
- XL: 8 balls
- 2/3XL: 9 balls
- 4/5XL: 10 balls
-
Caron® Simply Soft® (Solids: 6 oz/170.1 g; 315 yds/288 m)
- XS/S: 5 balls
- M: 5 balls
- L: 6 balls
- XL: 7 balls
- 2/3XL: 8 balls
- 4/5XL: 9 balls
Crochet Hook:
- Size U.S. H/8 (5 mm) crochet hook or size needed to obtain gauge.
Notions:
- 4 stitch markers
- 7 buttons
Notes:
Caron® Simply Soft® offers a lovely, soft drape with a nice sheen, making it a perfect choice for wearables. Don’t hesitate to play with colors, as they can significantly alter the look of your cardigan!
Step-by-step instructions
BACK
Ribbing
- Chain 10.
- Row 1 (RS): Single crochet (sc) in 2nd chain from hook. Sc in each chain to end. Turn (9 sc).
- Row 2: Chain 1. Do a single crochet through the back loop (sctbl) in each stitch to end. Turn.
- Repeat Row 2 until the ribbing measures 18½ (20¼–22¼–24½–27½–31½)" [47 (51.5–56.5–62–70–80) cm], ending on a WS row. Do not fasten off or turn.
Join to pattern and work body
5. Next row (WS): Chain 1. Work 61 (67–73–81–91–103) sc evenly across long edge of Ribbing. Turn.
6. Proceed as follows:
- Row 1 (RS): Chain 1. Sc in the first stitch. Dc in next stitch, sc in next stitch. Repeat from * to end of row. Turn.
- Row 2: Chain 3 (counts as dc). Sc in next dc, dc in next sc. Repeat from * to end of row. Turn.
- Row 3: Chain 1. Sc in first dc. Dc in next sc, sc in next dc. Repeat from * to end, working last sc in top of chain 3. Turn.
- Repeat last 2 rows for pattern until the piece measures 16 (16–16–16½–16½–16½)" [40.5 (40.5–40.5–42–42–42) cm] for Her Version or 17 (17–17–17½–17½–17½)" [43 (43–43–44.5–44.5–44.5) cm] for His Version, ending on a WS row. Fasten off.
Shape armholes
8. Next row (RS): Skip first 6 (8–10–12–14–18) stitches.
9. Join yarn with slip stitch (sl st) to next dc.
10. Chain 1, work 1 sc in the same space as sl st.
11. Pattern across the next 48 (50–52–56–62–66) stitches. Turn.
12. Leave remaining 6 (8–10–12–14–18) stitches unworked.
13. Continue even in pattern over 49 (51–53–57–63–67) stitches until armhole measures 8½ (9–9–9½–10–10½)" [22.5 (23–23–24.5–25.5–27.5) cm], ending on a WS row. Fasten off. Turn.
Shape shoulders
14. Next row (RS): Skip first 6 (6–8–8–10–10) stitches.
15. Join yarn with sl st to next dc.
16. Chain 1, sc in same space.
17. Work across next 36 (38–36–40–42–46) stitches.
18. Fasten off. Turn.
19. Leave remaining 6 (6–8–8–10–10) stitches unworked.
20. Next row: Skip first 7 (7–6–7–8–8) stitches.
21. Join yarn with sl st to next stitch.
22. Work across next 23 (25–25–27–27–29) stitches. Fasten off.
LEFT FRONT
Ribbing
- Chain 10.
- Row 1 (RS): 1 sc in 2nd ch from hook. 1 sc in each ch to end of chain. Turn (9 sc).
- Row 2: Chain 1. sctbl in each st to end of row. Turn.
- Repeat last row until ribbing measures 9 (10–11–12–13½–15½)" [23 (25.5–28–30.5–34.5–39) cm], ending on a WS row.
- Do not fasten off.
Join to pattern and work body
6. Next row (WS): Chain 1. Work 31 (33–37–41–45–51) sc evenly across long edge of Ribbing. Turn.
7. Proceed in pattern as for BACK.
8. Complete as described for BACK, shaping armhole and neck as specified.
RIGHT FRONT
- Work as for LEFT FRONT, ensuring to leave unworked stitches as indicated.
SLEEVES
Ribbing
- Chain 10.
- Row 1 (RS): 1 sc in 2nd ch from hook. 1 sc in each ch to end of chain. Turn (9 sc).
- Row 2: Chain 1. sctbl in each st to end of row. Turn.
- Repeat last row until ribbing measures 9½ (9½–10–10–10½–10½)" [24.5 (24.5–25.5–25.5–26.5–26.5) cm], ending on a WS row.
- Do not fasten off.
Join to pattern and work sleeve
6. Next row (WS): Chain 1. Work 31 (31–33–33–35–37) sc evenly across long edge of Ribbing. Turn.
7. Follow the same pattern instructions as the body. Finish as indicated above, taking note of the row counts specified in the original instructions based on your size.
FINISHING
- Sew shoulder seams.
- Sew in sleeves, lining up rows above markers with unworked sts of Front and Back.
- Sew side and sleeve seams.
Neckband
- Chain 7.
- Row 1 (RS): 1 sc in 2nd ch from hook. 1 sc in each ch to end of chain. Turn (6 sc).
- Row 2: Chain 1. sctbl in each st to end of row. Turn.
- Repeat last row until Neckband measures enough to fit along neck edge, sewing in place as you work to allow stretch.
Button Band
- For Her Version: row up Left Front edge working 71 (73–73–77–77–81) sc; for His Version: work downward originating at the Right Front edge.
- Follow the specified rows, placing markers for button positions.
Buttonhole Band
- Work down the Right Front to lower edge for Her Version or up the Left Front edge for His Version, establishing button holes evenly spaced.
Ways to use your finished project
Now that you’ve completed your cardigan, consider ways to showcase your beautiful handiwork. You can use it as a stylish layer for a chilly day or as an elegant piece over a dress for an evening out. It also makes a thoughtful handmade gift for friends or family, perfect for holiday giving!
How to care for your crochet project
To keep your cardigan looking its best, hand wash using cool water and a mild detergent. Avoid aggressive scrubbing. Lay it flat to dry, reshaping it to prevent stretching. If needed, lightly steam-block it to restore any shape, but always check that your yarn can handle it first.
Helpful crochet tips
- Maintain even tension to ensure a uniform look.
- Count your stitches to avoid mistakes.
- Use stitch markers to track pattern repeats and armhole shaping.
- Securely weave in all ends to prevent unraveling.
Creative variations
Feel free to personalize your cardigan by using contrasting trim or creating a unique color block design by using multiple shades of yarn for different sections. You can also add decorative appliqués to make it entirely your own!
Frequently asked questions
-
Is this crochet pattern beginner-friendly?
Yes, this pattern is perfect for beginners wanting to learn basic stitches while creating a wearable item. -
What yarn works best?
Caron® Simply Soft is recommended for its softness and drape. -
Can I use a different hook size?
While a US H/8 (5 mm) hook is suggested, you may use a different size if it helps you achieve the desired gauge. -
How long does the project take?
This can vary, but expect to spend several cozy evenings on completion. -
How can I make it larger or smaller?
To adjust the size, you can add or subtract stitches and rows, referring to the stitch count guide provided.
Embarking on this cardigan project will not only enhance your crochet skills but also reward you with a warm and stylish garment. Enjoy the journey, and happy crocheting!



