
Get 30+ FREE Crochet Patterns — Join Our Newsletter
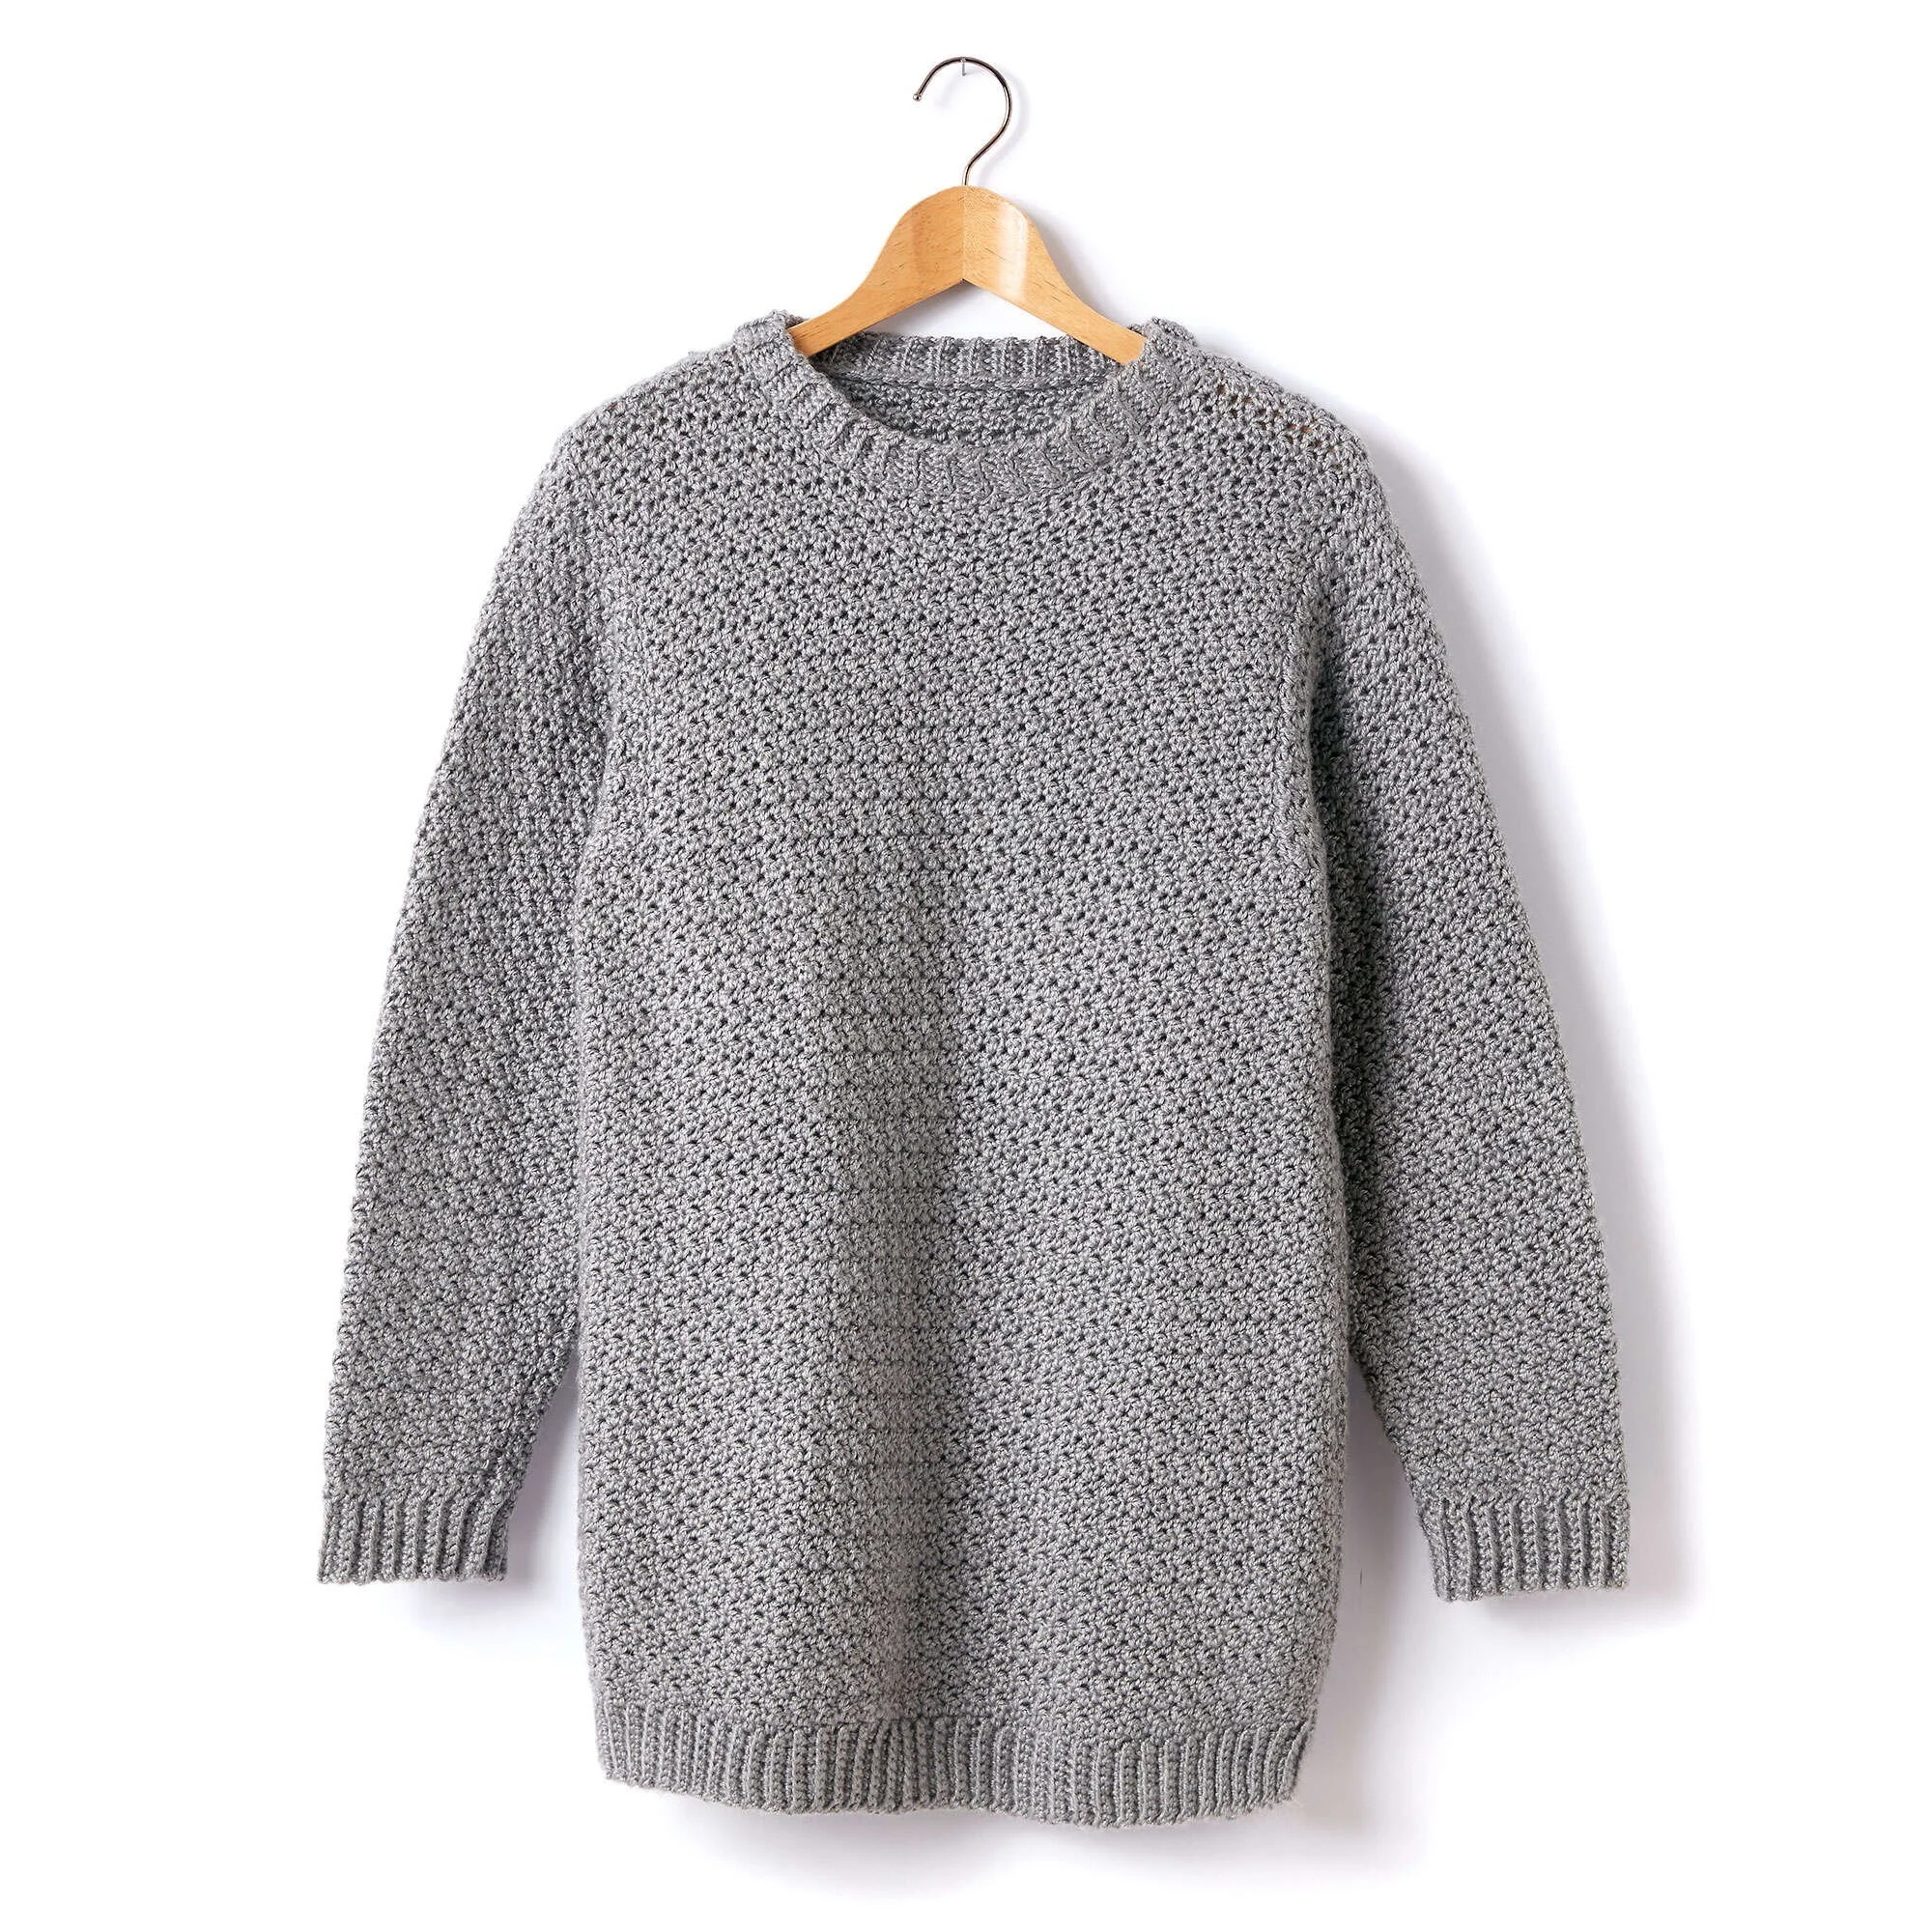
Crochet Crew Neck Pullover Pattern for Adults
Engaging in Crochet with This Adult Crew Neck Pullover Pattern
Crocheting the Adult Crochet Crew Neck Pullover is an enjoyable journey that merges practicality with creativity. It provides both warmth and style, making it a fantastic addition to any wardrobe. Whether you’re crafting a cozy pullover for yourself or a loved one, you will find satisfaction in each stitch. This project is great for some relaxing downtime, perfect for cooler seasons when you want to snuggle up in something handmade and unique.
What Makes This Crochet Pattern Worth Trying
This pattern stands out for various reasons. Here are a few highlights:
-
Beginner Friendly: Even newer crocheters can tackle this project with a little patience and practice, as it features basic stitches like single crochet and double crochet.
-
Building Skills: Crocheting this pullover offers a chance to enhance your skills, especially with shaping and working ribbing.
-
Quick Completion: Depending on your skill level, you can create this pullover fairly quickly, allowing for a rewarding experience without feeling overwhelmed.
-
Gift Potential: This cozy crew neck makes a thoughtful gift for family and friends. Handmade gifts carry a personal touch that store-bought items cannot match.
-
Relaxing Construction: The rhythmic stitch repetition makes it a portable project, ideal for taking to road trips or crafting circles.
“I made this pullover for my sister’s birthday, and she absolutely loved it! The pattern was straightforward, and I felt so proud to gift something handmade.” – Emily, happy crocheter
How This Crochet Pattern Comes Together
When you start this crochet project, you’ll be creating a stylish crew neck pullover that features ribbed details for texture and comfort. The main crochet techniques you’ll use involve forming ribbing and stitches that build around the neckline, body, and sleeves. You’ll work from the back to the front and finally attach the sleeves, creating a classic look. This project is perfect for those with a basic understanding of crocheting and can typically be completed over a weekend or within a few evenings.
Supplies You’ll Need
To create your Adult Crochet Crew Neck Pullover, gather the following materials:
-
Caron® Simply Soft® (Heathers)
- Grey Heather (H9509): XS/S 5 balls, M 6 balls, L 7 balls, XL 8 balls, 2/3XL 9 balls, 4/5XL 10 balls (5 oz/141.7 g; 250 yds/228 m).
-
Caron® Simply Soft® (Solids)
- Solids: XS/S 4 balls, M 5 balls, L 6 balls, XL 7 balls, 2/3XL 8 balls, 4/5XL 9 balls (6 oz/170.1 g; 315 yds/288 m).
-
Size U.S. H/8 (5 mm) crochet hook or a size needed to obtain gauge.
-
4 stitch markers.
Be mindful of yarn selection; these yarns provide softness and drape, perfect for tactile comfort. Ensure your gauge matches the recommended size to achieve the correct fit.
Step-by-Step Instructions
BACK
-
Start the Ribbing: Chain 10.
-
1st Row (RS): Single crochet (sc) in 2nd chain from hook. Sc across to the end. Turn. (9 sc).
-
2nd Row: Chain 1. Work sc through the back loop (sctbl) across the row. Turn.
-
Repeat the last row until ribbing measures 18½ (20¼-22¼-24½-27½-31½) inches when slightly stretched, ending with a wrong side (WS) row.
-
Next Row (WS): Chain 1. Work 61 (67-73-81-91-103) sc evenly across the long edge of ribbing. Turn.
-
Pattern:
- 1st Row (RS): Chain 1. Sc in first stitch; dc in next stitch, sc in next stitch. Repeat until end. Turn.
- 2nd Row: Chain 3 (counts as dc). Sc in the next dc, dc in the next sc. Repeat until end. Turn.
- 3rd Row: Chain 1. Sc in the first dc; dc in next sc, sc in next dc. Repeat until end, working last sc in top of the chain 3. Turn.
-
Repeat last two rows until work measures 16 (16-16-16½-16½-16½) inches for Her Version or 17 (17-17-17½-17½-17½) inches for His Version, ending on a WS row. Fasten off.
-
Shape Armholes: Next row (RS). Skip first 6 (8-10-12-14-18) stitches. Join yarn with a slip stitch (sl st) to the next dc. Chain 1, work 1 sc in the same space as the last sl st, and work sc pattern across the next 48 (50-52-56-62-66) stitches. Turn. Leave rem 6 (8-10-12-14-18) sts unworked.
-
Continue in pattern over 49 (51-53-57-63-67) sts until armhole measures 8½ (9-9-9½-10-10½) inches; ending on a WS row. Fasten off.
-
Shape Shoulders:
- Next Row (RS): Skip first 6 (6-8-8-10-10) stitches. Join yarn with sl st to the next dc. Chain 1; sc in the same space, and work across the next 36 (38-36-40-42-46) stitches. Fasten off.
- Leave remaining 6 (6-8-8-10-10) stitches unworked.
-
Skip first 7 (7-6-7-8-9) stitches. Join yarn with a sl st to the next stitch. In the same space as the last sl st, work across the next 23 (25-25-27-27-29) stitches. Fasten off.
FRONT
-
Repeat steps 1-5 as given for Back.
-
Continue in pat over 49 (51-53-57-63-67) stitches until armhole measures 8 rows less than Back to shoulder, ending on a WS row.
-
Shape Left Neck:
- 1st Row (RS): Chain 1; pattern across 19 (19-20-21-24-24) stitches (neck edge). Turn. Leave remaining sts unworked.
- 2nd Row: Chain 1. Sc2tog. Pattern to end. Turn.
- 3rd Row: Chain 1. Pattern to last 2 sts. Sc2tog. Turn.
- Repeat last 2 rows twice more. 13 (13-14-15-18-18) stitches remaining. Work 1 row even in pattern. Fasten off.
-
Shape Left Shoulder: Next row (RS). Skip first 6 (6-8-8-10-10) stitches. Join with sl st to next dc. Chain 1; sc in the same space. Pattern to end. Fasten off.
-
Shape Right Neck: With RS facing, skip center 11 (13-13-15-15-19) stitches. Join with sl st to the next stitch. Pattern to end of row.
-
Next row: Chain 3. Pattern to last 2 stitches. Sc2tog. Turn.
-
Next row: Chain 1. Sc2tog. Pattern to end. Turn.
-
Repeat last 2 rows twice more. 13 (13-14-15-18-18) stitches remaining. Work 1 row even in pattern.
-
Shape Right Shoulder: Next row (RS). Chain 1. Pattern across first 6 (6-8-8-10-10) stitches. Fasten off.
SLEEVES
-
Ribbing: Chain 10.
-
1st Row (RS): Sc in 2nd ch from hook. Sc in each ch to end. Turn. (9 sc).
-
2nd Row: Chain 1. Work sctbl across row. Turn.
-
Repeat last row until ribbing measures 9½ (9½-10-10-10½-10½) inches when slightly stretched.
-
Next Row (WS): Chain 1. Work 31 (31-33-33-35-37) sc evenly across the long edge of ribbing. Turn.
-
Proceed in pattern:
- 1st Row (RS): Chain 1; sc in first stitch; dc in next stitch, sc in next stitch. Repeat to end. Turn.
- 2nd Row: Chain 3 (counts as dc); sc in next dc, dc in next sc. Repeat to end. Turn.
- 3rd Row: Chain 1. Sc in first dc; dc in next sc, sc in next dc. Repeat to end, working last sc in the top of chain 3. Turn.
-
4th Row (inc row): Chain 1; (1 sc, 1 dc) in first sc; 1 sc in next dc, 1 dc in next sc. Repeat until last 2 stitches. 1 sc in next dc; (1 dc, 1 sc) in last sc. Turn.
-
5th Row: Chain 3 (counts as dc); 1 sc in next dc, 1 dc in next sc. Repeat to end. Turn.
-
6th Row (inc row): Chain 3 (counts as dc); 1 sc in first dc; 1 dc in next sc, 1 sc in next dc. Repeat to last 2 stitches. 1 dc in next sc; (1 sc, 1 dc) in top of chain 3. Turn.
-
Repeat steps 3-6 a total of 2 (3-3-4-6-7) times. You will end up with 43 (47-49-53-63-69) stitches.
-
For sizes XS/S, M, L, XL, and 2/3XL only:
- Next row (RS): Chain 1; 1 sc in first dc; 1 dc in next sc, 1 sc in next dc. Rep until end, working last sc in top of chain 3. Turn.
- Next row (inc row): Chain 1; (1 sc, 1 dc) in first sc; 1 sc in next dc, 1 dc in next sc. Rep until last 2 sts; 1 sc in next dc; (1 dc, 1 sc) in last sc. Turn.
- Next row: Chain 3 (counts as dc); 1 sc in next dc, 1 dc in next sc. Rep until end. Turn.
-
Rep last 3 rows 5 (5-4-3-0) times more. You should have 55 (59-59-61-65) stitches.
-
For all sizes: Continue evenly in pattern until piece measures 17 (17-17-16½-16-16)” [43 (43-43-42-40.5-40.5) cm] for Her Version or 18 (18-18-17½-17-17)” [45.5 (45.5-45.5-44.5-43-43) cm] for His Version, ending on a WS row. Place markers at each end of the last row.
-
Work a further 6 (6-8-10-12-14) rows in pattern. Fasten off.
FINISHING
-
Sew left shoulder seam.
-
Neckband: Chain 7.
- 1st Row (RS): Sc in 2nd ch from hook. Sc in each ch to end. Turn. (6 sc).
- 2nd Row: Chain 1. Work sctbl in each st to end. Turn.
- Repeat last row until ribbing measures the length to fit along the neck edge, sewing it in place while working, allowing stretch in the seam.
-
Sew right shoulder and neckband seam together.
-
Sew in sleeves, placing rows above markers along unworked stitches of Front and Back to create square armholes. Finally, sew side and sleeve seams together.
Ways to Use Your Finished Piece
This beautifully crafted pullover is versatile in its use. Here are a few creative ideas:
- Wardrobe Essential: Perfect for casual outings, dinner parties, or lounging at home.
- Gifts: Wrap it up as a thoughtful present for birthdays, holidays, or special occasions.
- Layering Piece: Wear it over simple tees or under jackets for those cooler days.
- Seasonal Fashion: Its cozy feel makes it ideal for fall and winter looks.
- Online Shop Listings: If you are selling crochet items, this pattern is a great addition to your shop.
How to Care for Your Crochet Project
Caring for your new pullover will help it last through many seasons:
- Hand Washing: Use cold water and mild detergent to gently wash your crochet item.
- Machine Washing: If necessary, use the gentle cycle in cold water.
- Reshape When Wet: Lay it flat on a towel to dry, reshaping it to maintain the structural form.
- Blocking: This may help even out stitches and enhance the overall appearance.
Always refer to the yarn label for specific washing instructions for best results.
Pro Crochet Tips
Here are some crochet insights to keep in mind as you work on your pullover:
- Tension Matters: Maintain even tension for a uniformly finished product.
- Count Your Stitches: Regularly check your stitch count to avoid mistakes.
- Use Stitch Markers: These can help keep track of rounds and shape areas.
- Watch for Accidental Increases: Stay alert to avoid adding extra stitches inadvertently.
- Secure Your Ends: Ensure all ends are woven in securely to prevent unraveling.
- Block: Consider blocking your finished pieces to prevent curling edges and shape the overall design.
Customize Your Project
Personalizing your crochet pullover can make it truly your own. Here are some suggestions:
- Yarn Colors: Experiment with different hues and shades to match your style.
- Contrasting Borders: Add a touch of flair with contrasting colors on edges.
- Sizing Adjustments: Tailor the size to create a more custom fit.
- Textured Patterns: Mix in other stitches for diverse textures and designs.
- Seasonal Palette: Yarn colors that reflect the season can elevate your piece.
Be mindful that any variation may impact the final outcome in terms of size and drape.
Frequently Asked Questions
Here are some common questions you might have about this crochet pattern:
-
Is this crochet pattern beginner-friendly?
Yes, it’s suitable for those who have a basic understanding of crochet. -
What yarn works best?
Caron® Simply Soft® is recommended for softness and drape. -
Can I use a different hook size?
You can, but be aware it may affect the gauge, size, and drape of the pullover. -
How long does the project take?
This varies, but many find they can complete it in a weekend or a few evenings. -
How can I make it larger or smaller?
You can adjust the stitch counts and lengths in the pattern to suit your preferences. -
Why is my crochet curling?
This can happen if the tension is too tight; practice maintaining consistent tension. -
How do I keep the edges even?
Count your stitches frequently and use stitch markers to keep your place. -
How should I wash the finished project?
Hand washing in cold water is preferred; block or reshape when drying. -
Can I sell finished items made from this pattern?
Check the designer’s terms for specific usage permissions regarding sales. -
How much yarn do I need?
Yarn requirements vary by size. Refer to the initial material list for specifics.
By following this guide, you’ll be well on your way to creating a beautiful and functional crochet pullover that you can cherish or share with others. Happy crocheting!



