Get 30+ FREE Crochet Patterns — Join Our Newsletter
Crochet Holiday Stocking Pattern
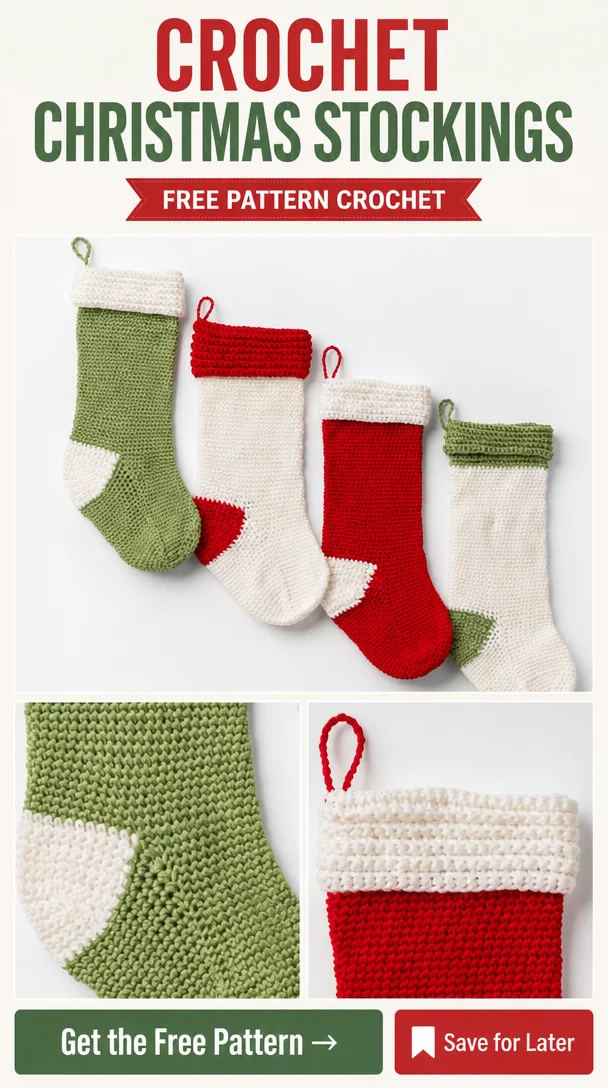
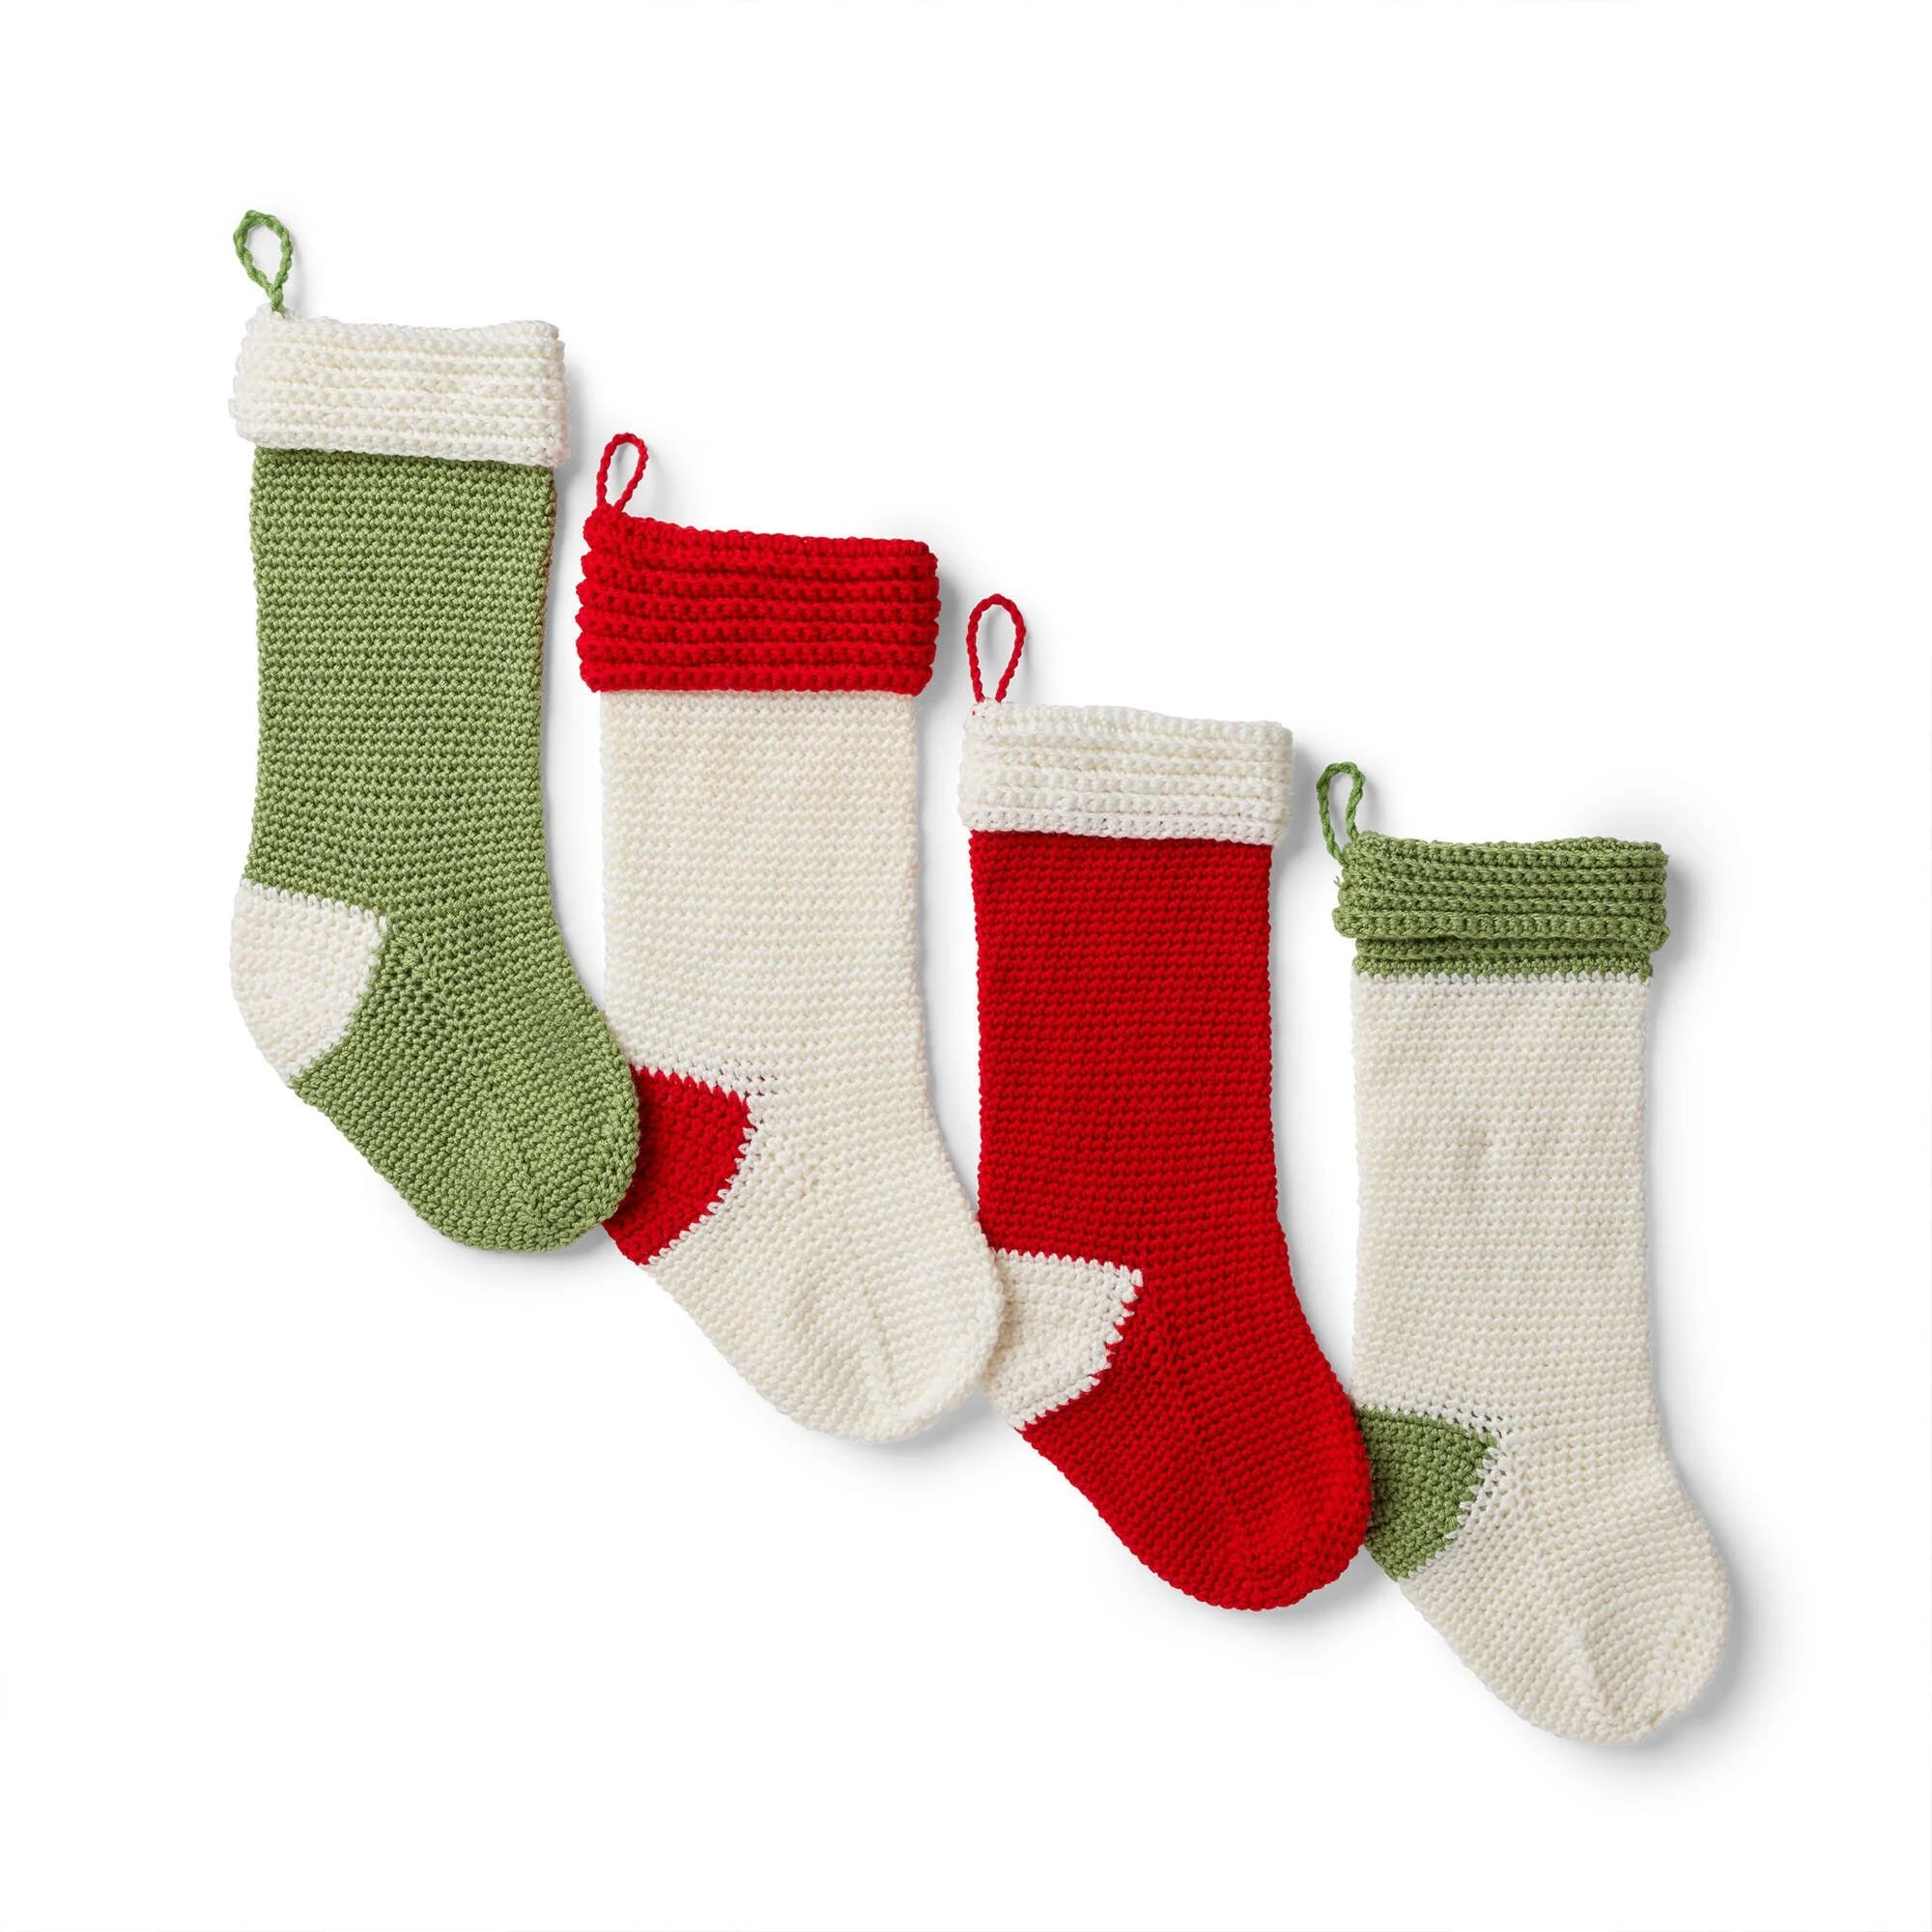
Embrace the holiday spirit with this charming Holiday Crochet Stocking Pattern. This stocking features a lovely design and is crafted using Red Heart® Super Saver™ yarn, ensuring durability and vibrancy. With multiple color variations to choose from, it allows for a personalized touch to match your festive decor. The project involves a simple yet effective construction sequence that includes forming the cuff, leg, heel, and toe, making it suitable for various skill levels. Follow along with the written directions and accompanying photos to achieve a delightful finish.
Project Details
- Terminology: U.S. crochet terms
- Skill Level: Intermediate
- Finished Size: Approximately 14 inches long
- Construction Method: Worked in rounds
Materials and Tools
| Yarn Option | Yarn and Specifications | Amount |
|---|---|---|
| Version 1 | Red Heart® Super Saver™ – Tea Leaf (0624), Soft White (0316) | 1 ball each |
| Version 2 | Red Heart® Super Saver™ – Soft White (0316), Tea Leaf (0624) | 1 ball each |
| Version 3 | Red Heart® Super Saver™ – Soft White (0316), Cherry Red (0319) | 1 ball each |
| Version 4 | Red Heart® Super Saver™ – Cherry Red (0319), Soft White (0316) | 1 ball each |
- Size U.S. H/8 (5 mm) crochet hook or size needed to obtain gauge
- Stitch marker
Abbreviations
| Abbreviation | Meaning |
|---|---|
| ch | Chain |
| sc | Single crochet |
| sl st | Slip stitch |
| PM | Place marker |
| sc2tog | Single crochet two together |
Preparation and Techniques
Working in a Spiral
This pattern uses continuous rounds for the body of the stocking. When working in spirals, it’s helpful to place a stitch marker in the first stitch of each round to keep track of your progress.
Changing Yarn Colors
When changing colors, always complete the last step of the previous stitch in the new color, ensuring a smooth transition between colors.
Cuff
| Round | Instructions | Stitches |
|---|---|---|
| 1st rnd | With B, ch 46. Join with sl st to first ch to form a ring, taking care to not twist chain. | 46 sc |
| 2nd rnd | (WS) Ch 1. Working in back loops only, 1 sc in each sc around. Join. Turn. | 46 sc |
| Repeat | Repeat 2nd rnd, alternating RS and WS until work from beg measures 5″ [12.5 cm], ending on a WS rnd. Turn. Break B. Join A. | – |
Leg
| Round | Instructions | Stitches |
|---|---|---|
| 1st rnd | With A, ch 1. Working in both loops, 1 sc in each sc around. Join. | – |
| Repeat | Rep last rnd until work from bottom of Cuff measures 9″ [23 cm]. Fasten off. | – |
Heel
| Row | Instructions | Stitches |
|---|---|---|
| 1st row | With RS facing, join B with sl st to first sc. Ch 1. 1 sc in same sp as last sl st. 1 sc in each of next 22 sc. Turn. Leave rem sts unworked. | 23 sc |
| 2nd row | Ch 1. 1 sc in each sc to end of row. Turn. | 23 sc |
| Repeat | Rep 2nd row for 2″ [5 cm], ending on a WS row. | – |
| Shape heel | See detailed instructions below for multiple rows. | 15 sts after 8th row |
Shape Heel
| Row | Instructions |
|---|---|
| 1st row | (RS) Ch 1. 1 sc in each of next 15 sc. Sc2tog. 1 sc in next sc. Turn. Leave rem sts unworked. |
| 2nd row | Ch 1. 1 sc in each of first 9 sts. Sc2tog. 1 sc in next sc. Turn. |
| 3rd row | Ch 1. 1 sc in each of first 10 sts. Sc2tog. 1 sc in next sc. Turn. |
| 4th row | Ch 1. 1 sc in each of first 11 sts. Sc2tog. 1 sc in next sc. Turn. |
| 5th row | Ch 1. 1 sc in each of first 12 sts. Sc2tog. 1 sc in next sc. Turn. |
| 6th row | Ch 1. 1 sc in each of first 13 sts. Sc2tog. 1 sc in next sc. Turn. |
| 7th & 8th rows | Ch 1. 1 sc in each of first 14 sts. Sc2tog. Turn. |
Fasten off at end of 8th row.
Joining Round (Instep + Sides of Heel)
| Round | Instructions | Stitches |
|---|---|---|
| Joining rnd | (RS) Join A with sl st at left side of Heel Base. Ch 1. 1 sc in each of next 23 sc of instep. PM. Work 7 sc up right side of Heel, 1 sc in each of next 15 sc across end of Heel. Work 7 sc down left side of Heel. Join. | 52 sc |
| 2nd rnd | Ch 1. 1 sc in each sc to marker. Sc2tog. 1 sc in each sc to last 2 sc. Sc2tog. Join. | – |
| Repeat | Rep 2nd rnd until 44 sts rem. | – |
| Next rnd | Ch 1. 1 sc in each sc around. Join with sl st to first sc. Rep last rnd until work from joining rnd measures 5½” [14 cm]. | – |
Toe
| Round | Instructions |
|---|---|
| 1st rnd | Ch 1. (1 sc in each of next 9 sc. Sc2tog) 4 times. Join. |
| 2nd rnd | Ch 1. (1 sc in each of next 8 sc. Sc2tog) 4 times. Join. |
| Continue | Continue in same manner, dec 4 sts on every rnd until 12 sts rem. Break yarn, leaving a long end. Draw end tightly through rem sts and fasten securely. |
Twisted Cord Loop (Finish)
Cut 3 lengths of yarn, 16″ [40.5 cm] long. Taking all strands together, have someone hold one end or attach the end to a hook. Twist strands to the right until they begin to curl. Fold 2 ends together and tie in a knot so they will not unravel. The strands will now twist themselves together. Sew to Stocking for hanging loop.
Practical Tips
- Keep Tension Consistent: Maintaining even tension while crocheting helps achieve a more polished finish on your stocking.
- Use Stitch Markers: Marking your rounds can help prevent losing track of where you are, especially in the joining round.
- Check for Gauge: Ensuring you have the correct gauge can prevent your stocking from turning out too small or large.
- Color Work: When changing colors, make sure to pull both colors snugly when starting the next round to avoid gaps.
Troubleshooting
- Uneven Edges: This can often occur due to inconsistent tension. To fix this, practice maintaining the same tension throughout your project.
- Too Loose or Too Tight: If your stocking is much larger or smaller than expected, check your gauge and adjust your hook size accordingly.
- Color Change Gaps: If you notice gaps where you changed colors, be sure to pull the new color tight around the previous stitch.
Care
Your finished stocking will be well-loved and used for years to come. To keep it looking great:
- Hand Wash Only: Gently hand wash in cold water to maintain the shape and avoid damage.
- Air Dry: Lay it flat to dry, keeping its shape intact.
Frequently Asked Questions
What size will the finished stocking be?
The finished stocking measures approximately 14 inches long, perfect for filling with holiday treats!
Can I use different yarn?
Yes, you can substitute other worsted-weight yarns, but keep in mind that this may affect the stocking’s final size and appearance. Make sure to check your gauge!
How should I hang the stocking?
The stocking can be hung using the twisted cord loop that you create at the end of the project, ensuring it’s securely attached for stability.
Is this stocking suitable for outdoor use?
This crochet stocking is designed for indoor use, but if you wish to display it outdoors, ensure it’s kept dry to maintain its shape and integrity.
Can I sell the finished stocking?
Check the original designer’s terms for any selling permissions if you’d like to sell your stockings, as guidelines may vary.
How do I personalize the stocking?
You can personalize your stocking by adding initials, embellishments, or varying colors to make each one unique!