Get 30+ FREE Crochet Patterns — Join Our Newsletter
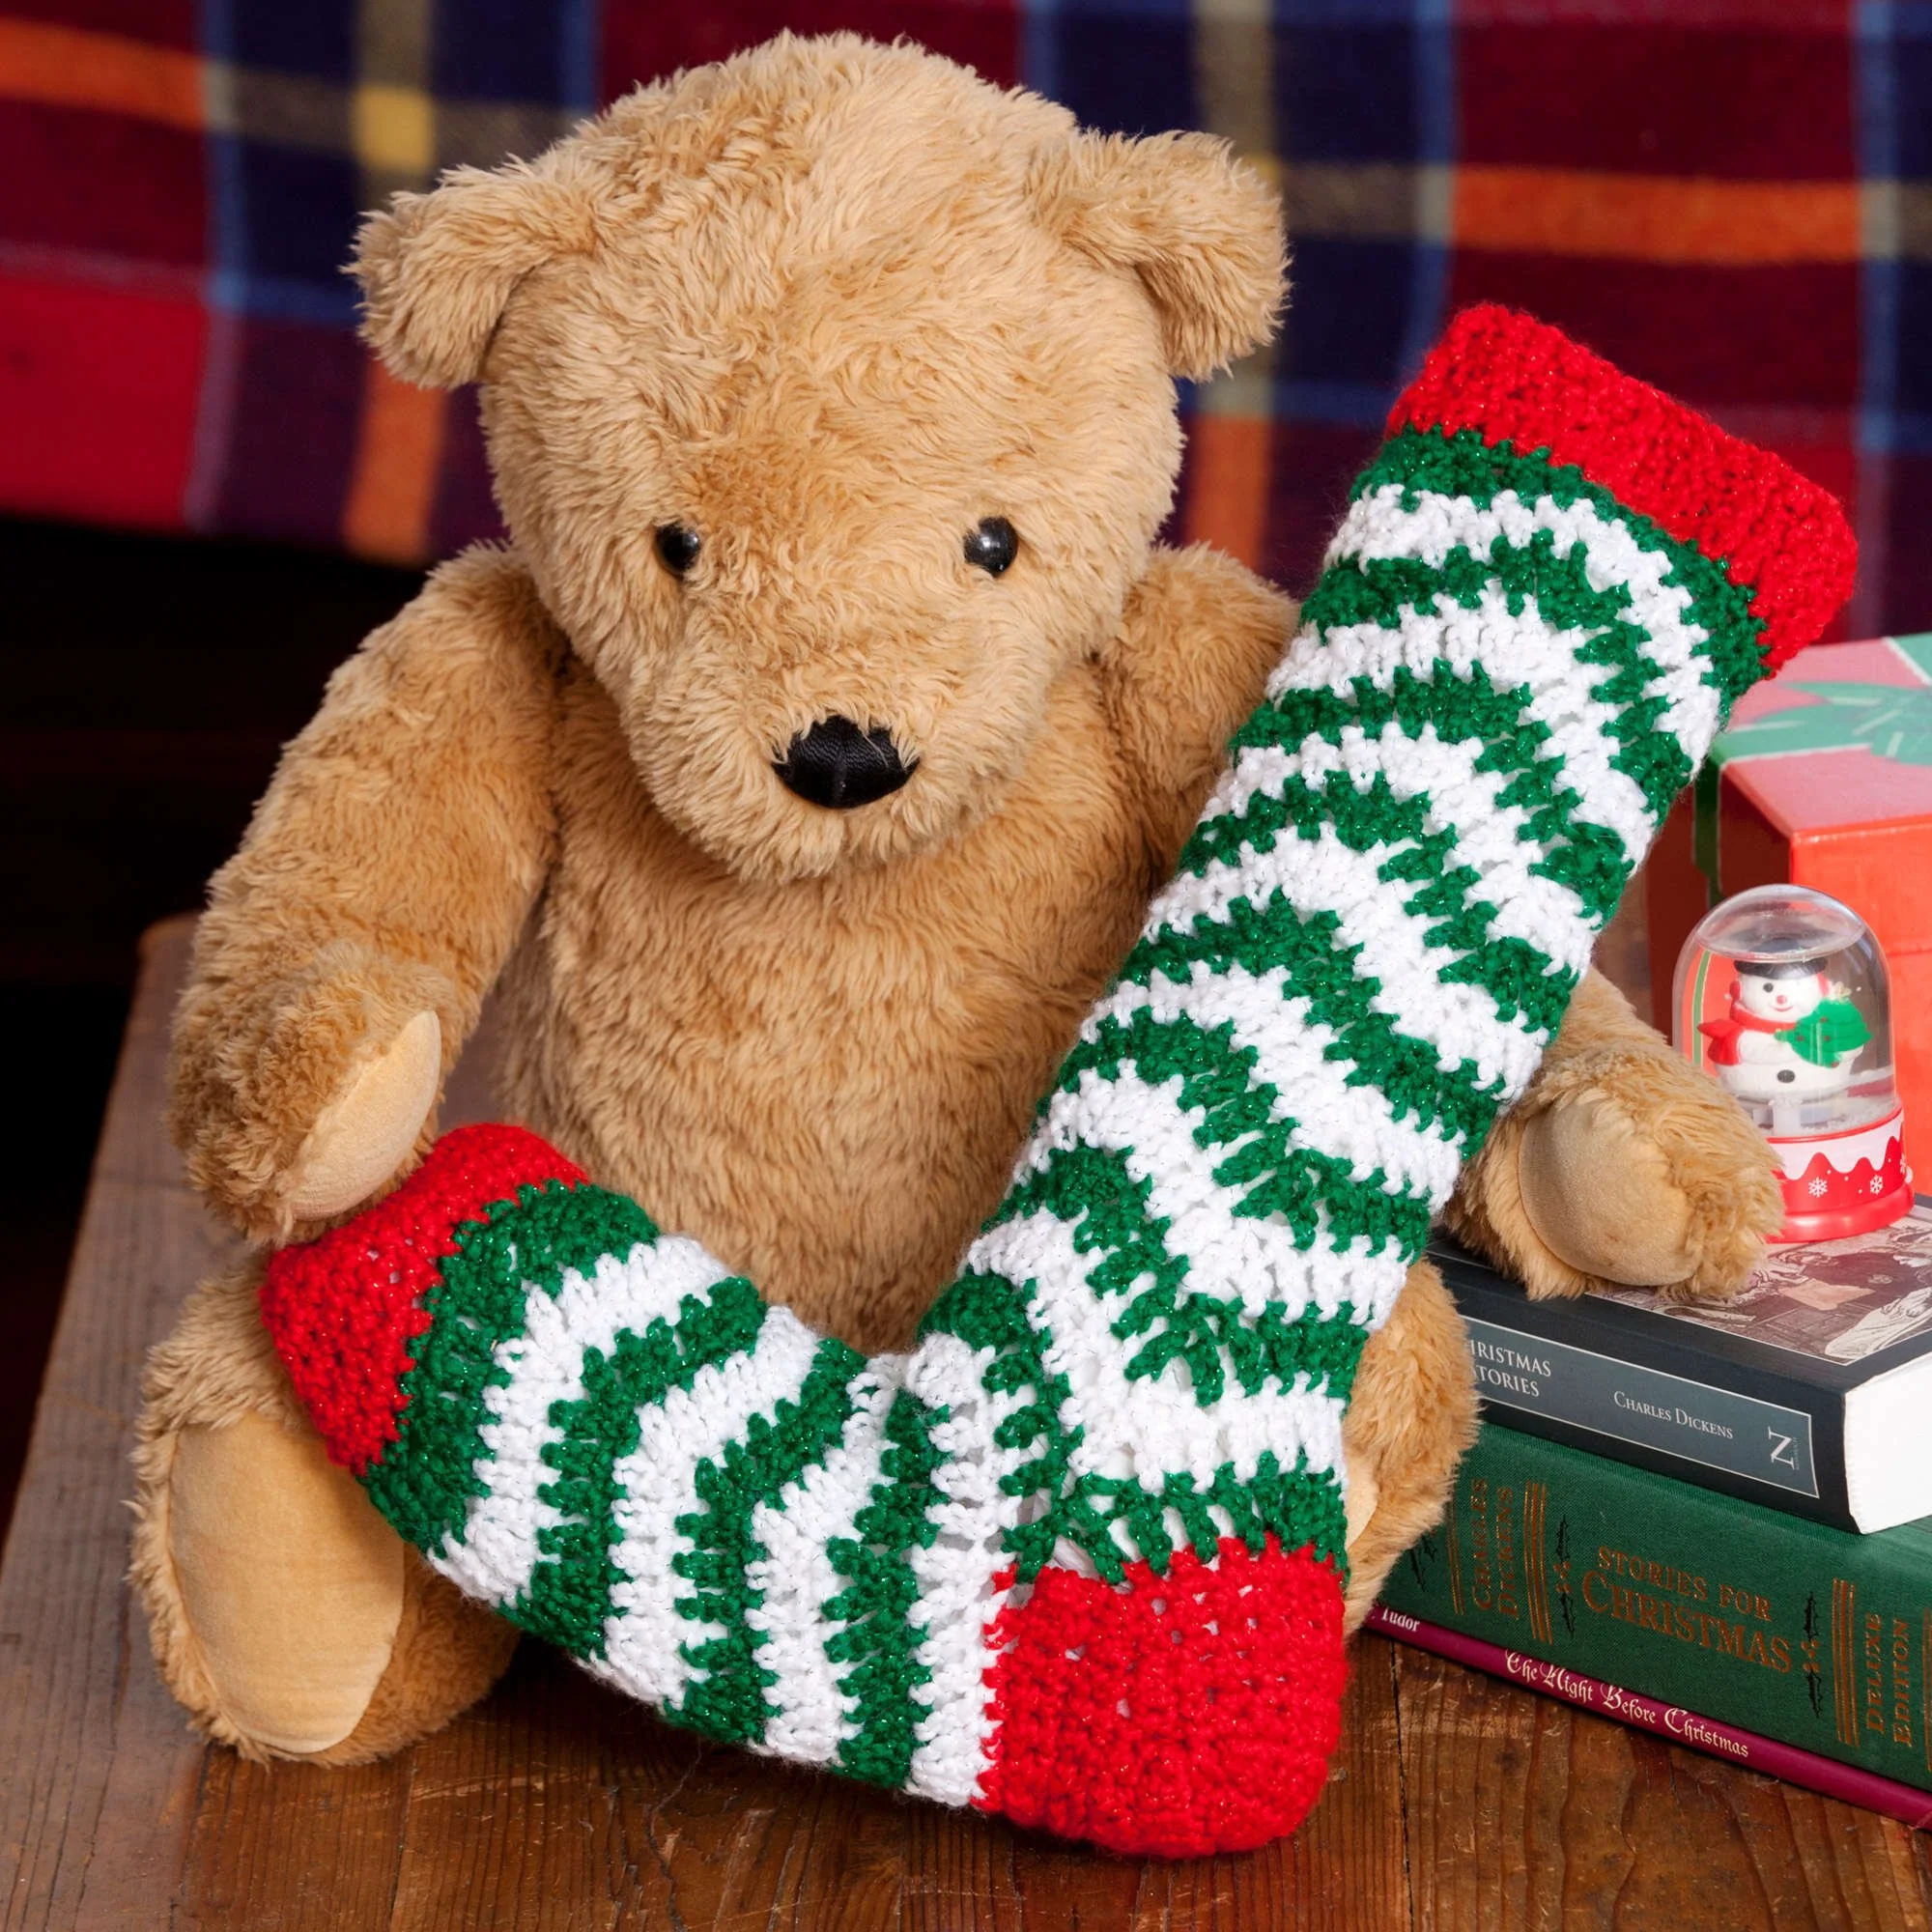
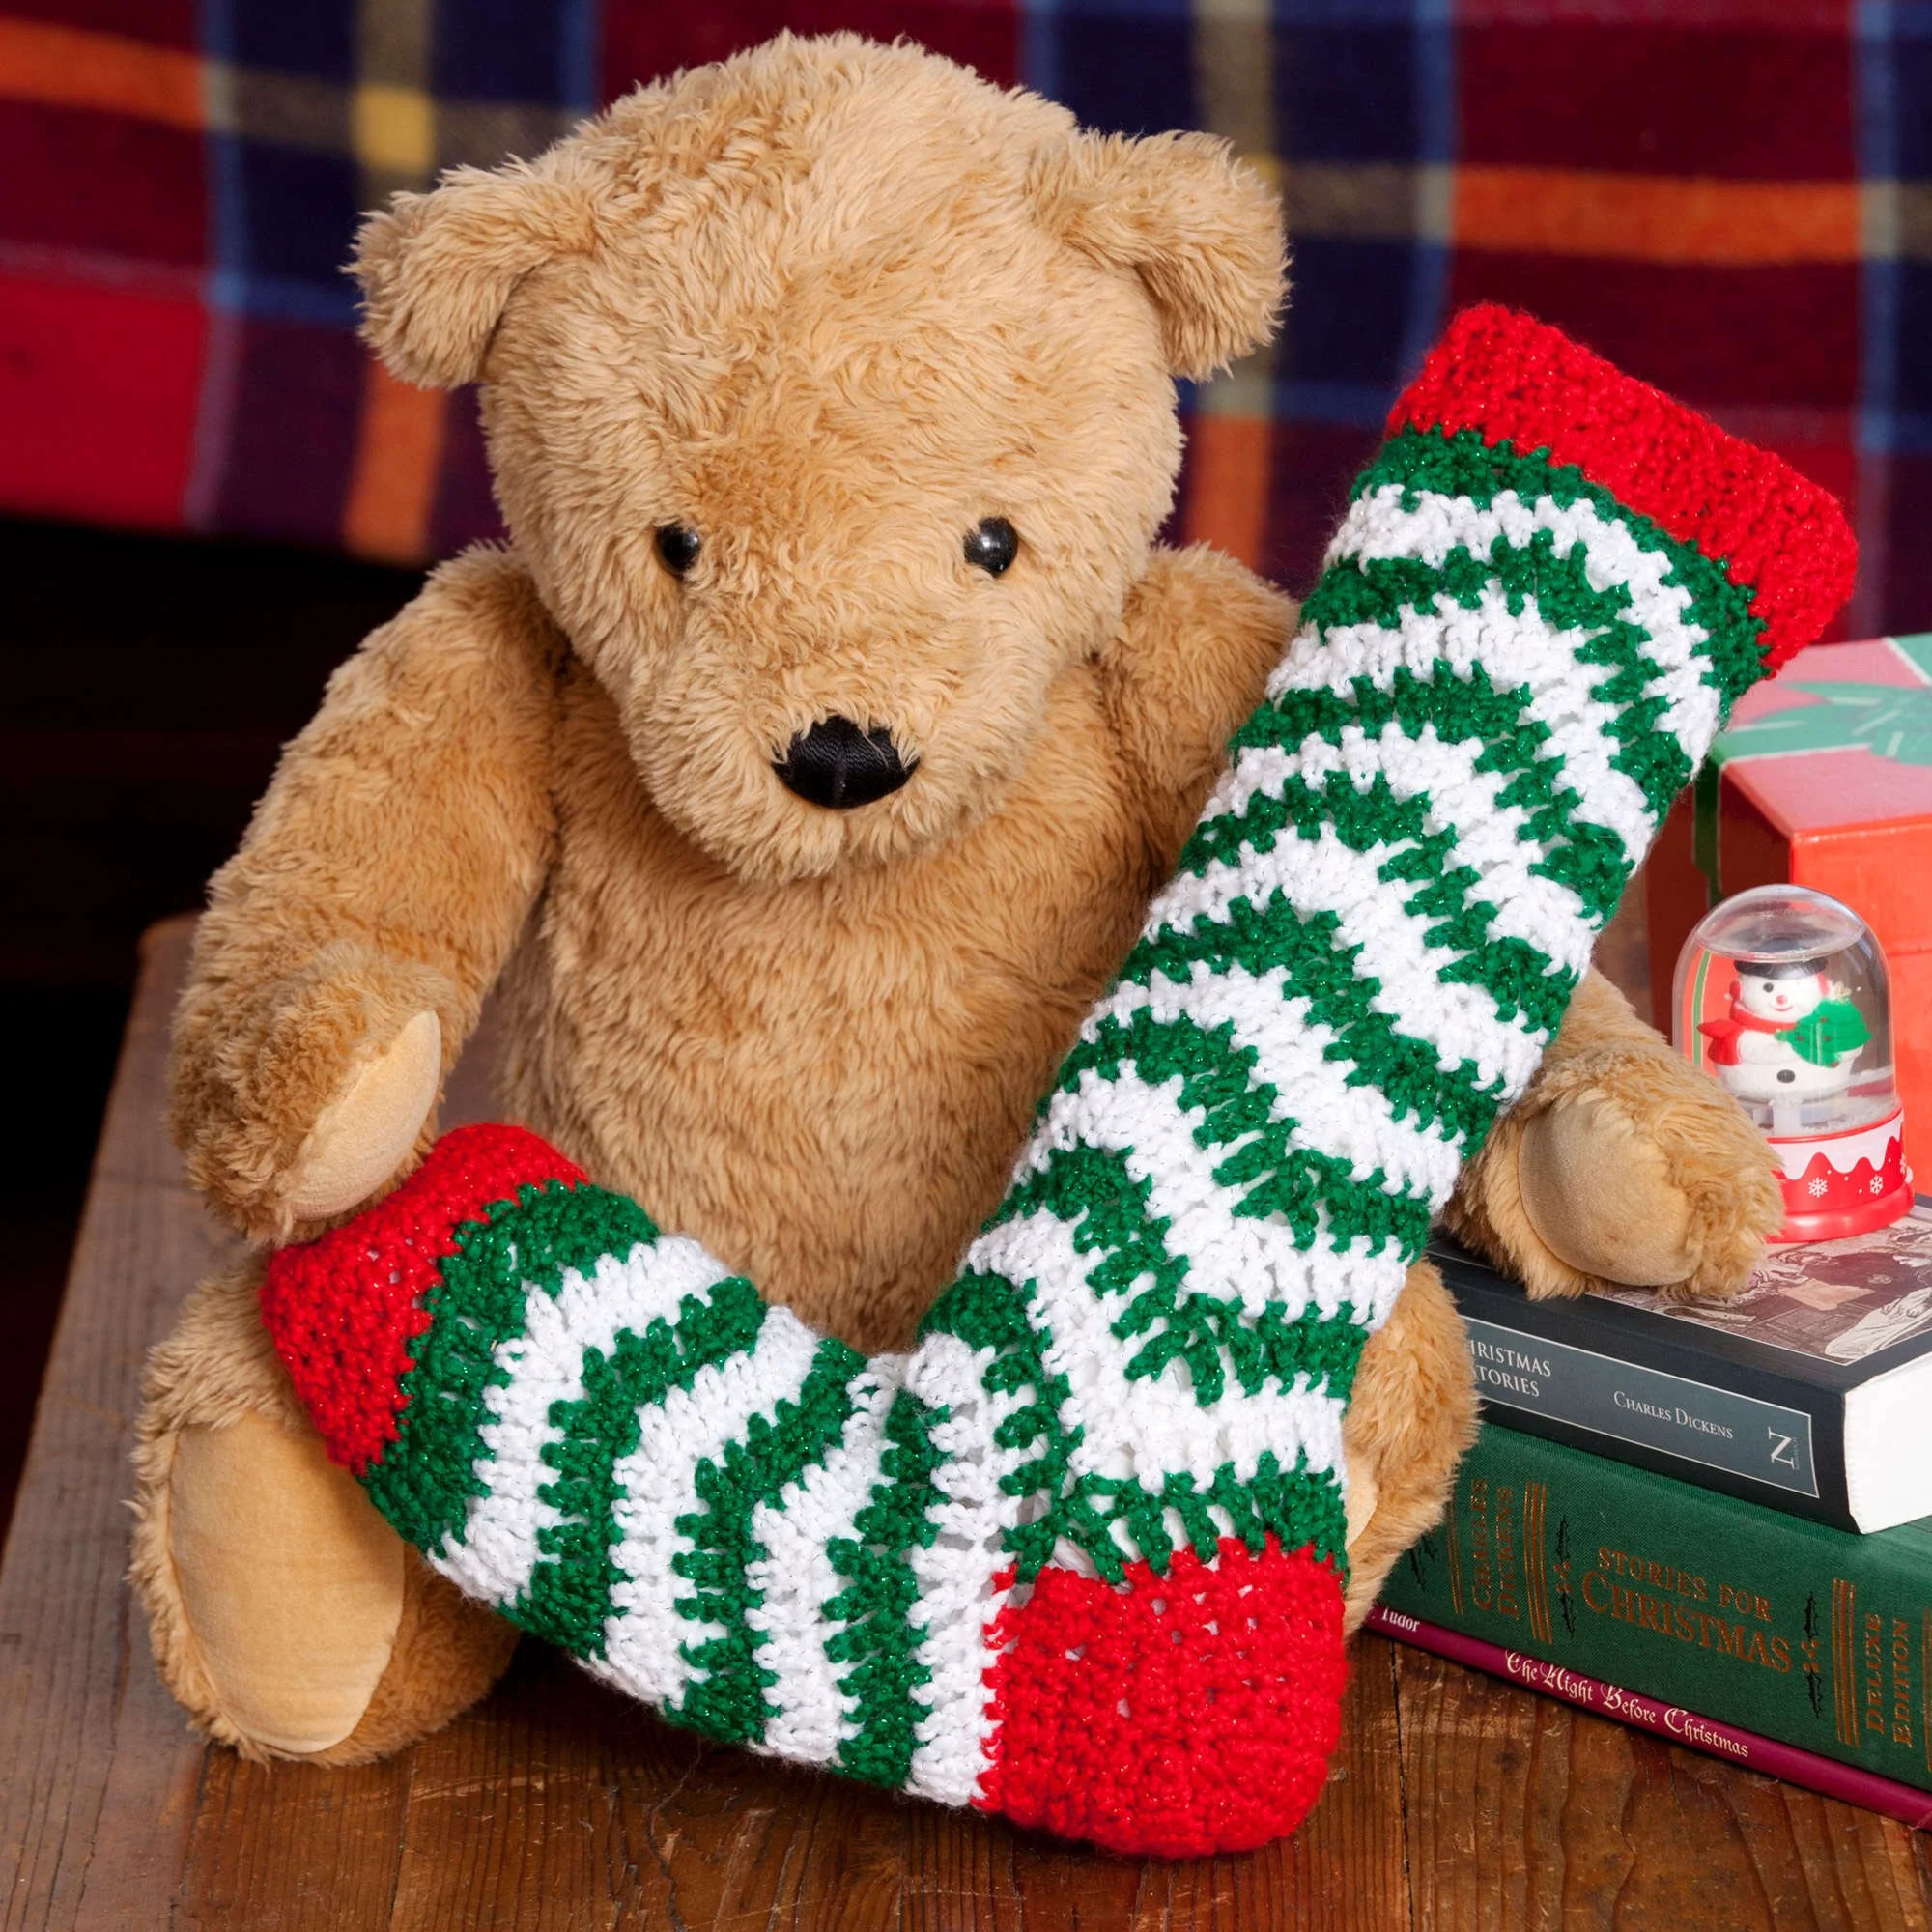
Crochet Ripple Stocking Pattern for the Holidays
Kick off your festive season with this delightful Crochet Holiday Ripple Stocking Pattern, a charming accessory that will add a touch of handmade elegance to your holiday decor. The stocking features a beautiful ripple design, showcasing vibrant reds and greens, perfect for filling with treats and surprises. Made from the toe up, this project incorporates techniques like continuous rounds for the toe and foot, short rows for the heel, and rounds for the leg and cuff, allowing you to create a cozy piece that embodies the spirit of the holidays. Follow the written instructions along with the photos provided to guide you through each step.
Project Details
- Terminology: US terms
- Skill Level: Intermediate
- Finished Size: Approximately 18 inches tall
- Construction Method: Worked in rounds from the toe up
Materials and Tools
| Yarn Option | Yarn and Specifications | Amount |
|---|---|---|
| RED HEART® Holiday | 9090 Red/Red (A) | 1 skein |
| RED HEART® Holiday | 6060 Green/Green (B) | 1 skein |
| RED HEART® Holiday | 140 White/Silver (C) | 1 skein |
- Crochet Hook: 5.0mm [US H-8]
Abbreviations
| Abbreviation | Meaning |
|---|---|
| ch | chain |
| sc | single crochet |
| dc | double crochet |
| sl st | slip stitch |
| dc2tog | double crochet two together |
Preparation and Techniques
Working in a Spiral
The stocking is worked in continuous rounds, particularly in the toe and foot sections. To maintain the spiral effect, do not join the rounds. Use a stitch marker to mark the beginning of each round and keep track of your progress.
Complete Pattern Instructions
Toe
| Round | Instructions | Stitches |
|---|---|---|
| 1 | With A, ch 7. Sc in 2nd ch from hook and in each ch across. Place marker in last st to mark side. Working along bottom of ch, sc in each ch across to end. Place unique marker in last st to mark side. Do not join, work in continuous rounds. Move marker up as each round is completed. | 12 sc |
| 2 | *Sc in each sc to one sc before marked st, 2 sc in next sc, sc in marked st, 2 sc in next sc; repeat from * once, ending in first sc of last round. | 16 sc |
| 3 | Sc in each sc around. | 16 sc |
| 4 | *Sc in each sc to one sc before marked st, 2 sc in next sc, sc in marked st, 2 sc in next sc; repeat from * once. | 20 sc |
| 5 | Sc in each sc around. | 20 sc |
| 6 | *Sc in each sc to one sc before marked st, 2 sc in next sc, sc in marked st, 2 sc in next sc; repeat from * once. | 24 sc |
| 7 | Sc in each sc around. | 24 sc |
| 8 | *Sc in each sc to one sc before marked st, 2 sc in next sc, sc in marked st, 2 sc in next sc; repeat from * once. | 28 sc |
| 9 | Sc in each sc around; join with a slip st in next sc. Fasten off. | 28 sc |
Foot
| Round | Instructions | Stitches |
|---|---|---|
| 1 | Lay sock flat so that toe is at foundation ch. Join B with a sc in center sc on one side of foot, evenly space 28 more sc around; join with a slip st to first sc. | 29 sc |
| 2 | Ch 3, dc in next 2 sc, 3 dc in next sc, dc in next 3 sc, dc2tog over next 3 sc, *dc in next 3 sc, 3 dc in next sc, dc in next 3 sc, dc2tog over next 3 sc; repeat from * around, ending with final leg of last dc2tog in same st as beginning ch-3 of round; join with a slip st in beginning ch-3. | 3 ripples |
| 3 | With right side facing, join C with a slip st in top of first dc after beginning ch-3, ch 3, dc in next 2 dc, 3 dc in next dc, dc in next 3 dc, dc2tog over next 3 dc, *dc in next 3 dc, 3 dc in next dc, dc in next 3 dc, dc2tog over next 3 dc; repeat from * around; join with a slip st in beginning ch-3. | 3 ripples |
| 4 | Pick up B, slip st in top of first dc after repeat ch-3 of previous row, ch 3, dc in next 2 sc, 3 dc in next dc, dc in next 3 dc, dc2tog over next 3 dc, *dc in next 3 dc, 3 dc in next dc, dc in next 3 dc, dc2tog over next 3 dc; repeat from * around; join with a slip st in beginning ch-3. | 3 ripples |
| 5-9 | Repeat rounds 3 and 4 twice, then repeat round 3 once. Fasten off. | — |
Heel
Lay sock flat so that toe is at foundation ch. Note: You will be working in short rows now.
| Row | Instructions | Stitches |
|---|---|---|
| 1 | Join A with a sc at one side of foot, sc in next 14 sts, turn. | 15 sc |
| 2 | Ch 1, sc in each sc across, ch 1, turn. | — |
| 3 | Ch 1, sc in each sc across to within last st, turn, leaving last st un-worked. | 14 sc |
| 4-10 | Repeat row 3. | — |
| 11 | Ch 1, sc in each sc across, turn. | 15 sc |
| 12 | Ch 1, sc in each sc across, sc in unworked st in row below closest to current row, slip st in side of that row, turn. | 8 sc |
| 13 | Skip slip st, sc in each sc across, sc in unworked st in row below closest to current row, slip st in side of that row, turn. | 9 sc |
| 14-19 | Repeat row 13. | — |
Leg
Note: Work now progresses in rounds. Ripples will match up with the ripples on the foot.
| Round | Instructions | Stitches |
|---|---|---|
| 1 | With right side facing, join B with a slip st in first dc to the left of dc2tog in round 9 of foot, ch 3, dc in next 2 st, 3 dc in next st, dc in next 3 sts, dc2tog over next 3 sts, *dc in next 3 sts, 3 dc in next st, dc in next 3 sts, dc2tog over next 3 sts; repeat from * around; join with a slip st in beginning ch-3. | 3 ripples |
| 2 | With right side facing, join C with a slip st in top of first dc after beginning ch-3, ch 3, dc in next 2 dc, 3 dc in next dc, dc in next 3 dc, dc2tog over next 3 dc, *dc in next 3 dc, 3 dc in next dc, dc in next 3 dc, dc2tog over next 3 dc; repeat from * around; join with a slip st in beginning ch-3. | 3 ripples |
| 3 | Pick up B, slip st in top of first dc after repeat ch-3 of previous row, ch 3, dc in next 2 sc, 3 dc in next dc, dc in next 3 dc, dc2tog over next 3 dc, *dc in next 3 dc, 3 dc in next dc, dc in next 3 sc, dc2tog over next 3 dc; repeat from * around; join with a slip st in beginning ch-3. | 3 ripples |
| 4-15 | Repeat rounds 2 and 3 (6 times). | — |
| 16 | Ch 1, sc in same st as joining, work 29 more sc evenly spaced around; join with a slip st in first sc. | 30 dc |
| — | Fasten off B and C. | — |
Cuff
| Round | Instructions | Stitches |
|---|---|---|
| 1 | With right side facing, join A with a slip st in any sc, ch 3, dc in each sc around; join with a slip st in top of beginning ch-3. | 30 dc |
| 2 | Ch 3, FPdc around the post of next dc, *dc in next dc, FPdc around the post of next dc; repeat from * around; join with a slip st in beginning ch-3. | — |
| 3 | Ch 3, FPdc around the post of next FPdc, *dc in next dc, FPdc around the post of next FPdc; repeat from * around; join with slip st in beginning ch-3. Fasten off. | — |
Hanging Loop
With B: ch 25, slip st in each ch across. Fasten off, leaving a sewing length. Fold hanging loop in half and sew in place on center back of cuff.
Finishing
Weave in ends. Ensure all stitches are secure and shape the stocking as desired.
Practical Tips
- Color Changes: When changing colors, ensure smooth transitions by dropping the previous color to the wrong side instead of cutting it.
- Marking Stitches: Use stitch markers to keep track of the beginning of your rounds, especially in continuous round sections.
- Maintaining Tension: Keep an even tension throughout your stitches to ensure a neat finish, particularly in the ribbing and joining sections.
- Blocking: After completing your stocking, blocking it can help to define the stitch pattern and smooth out any irregularities.
Troubleshooting
- Uneven Edges: If the edges are uneven, check your stitch count and confirm that you are working in the correct number of stitches for each round.
- Too Tight or Loose Stitches: If your stitches are too tight or too loose, adjust your hook size. A larger hook can help if your work is too tight.
- Ripples Not Aligning: Misaligned ripples can occur if the starting rounds are not symmetrical. Double-check your work for consistent stitch counts in the foot and leg sections.
Care
To keep your Crochet Ripple Stocking looking its best, follow these care instructions:
- Hand wash in cool water with mild soap.
- Lay flat to dry rather than using a dryer, which can affect the shape.
- Avoid bleach and harsh chemicals that can damage the fabric.
Frequently Asked Questions
What size is the finished Crochet Holiday Ripple Stocking?
Approximately 18 inches tall from the toe to the cuff. Adjustments can be made by using a different hook size, but this can affect the overall shape.
Is this pattern suitable for beginners?
This pattern is assessed as intermediate due to the techniques involved, such as working in continuous rounds and short rows. It may not be suitable for complete beginners.
Can I use a different type of yarn?
Yes, you can substitute a different yarn, but ensure it is of a comparable weight to maintain the dimensions and structure of the stocking. Be mindful that fiber content can affect the final look and feel.
How do I adjust the length of the stocking?
To make the stocking longer or shorter, you can add or remove rounds in the leg section. Ensure that the heel and toe remain proportionate to the adjusted length.
What are some tips for finishing the stocking?
When finishing, double-check for any loose ends and weave them in securely. Blocking the finished stocking can also help define the patterns and shape.