Get 30+ FREE Crochet Patterns — Join Our Newsletter
Crochet Snowflake Tree Pattern
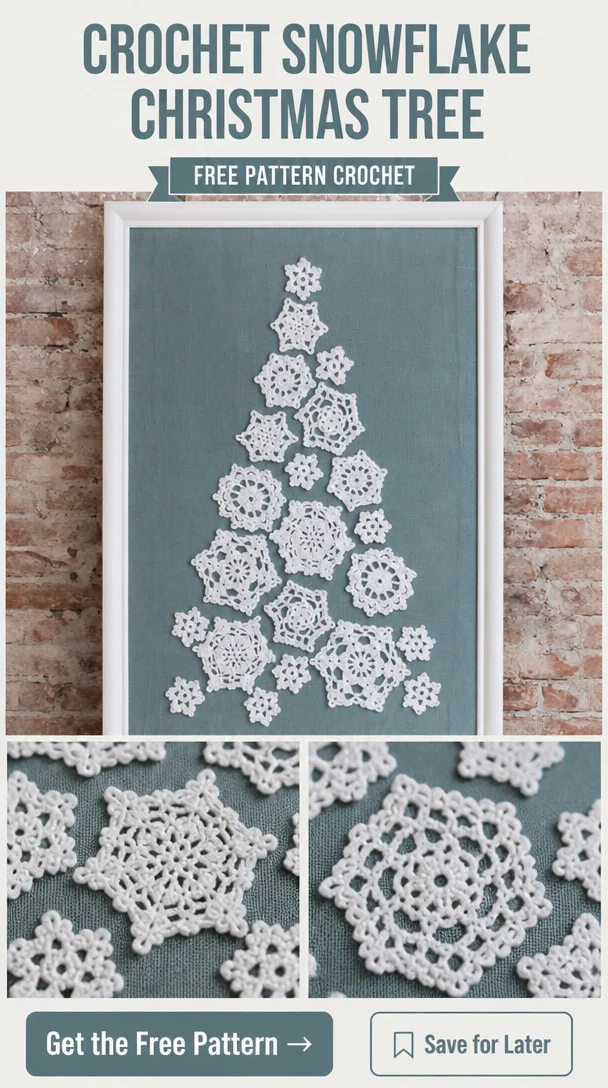
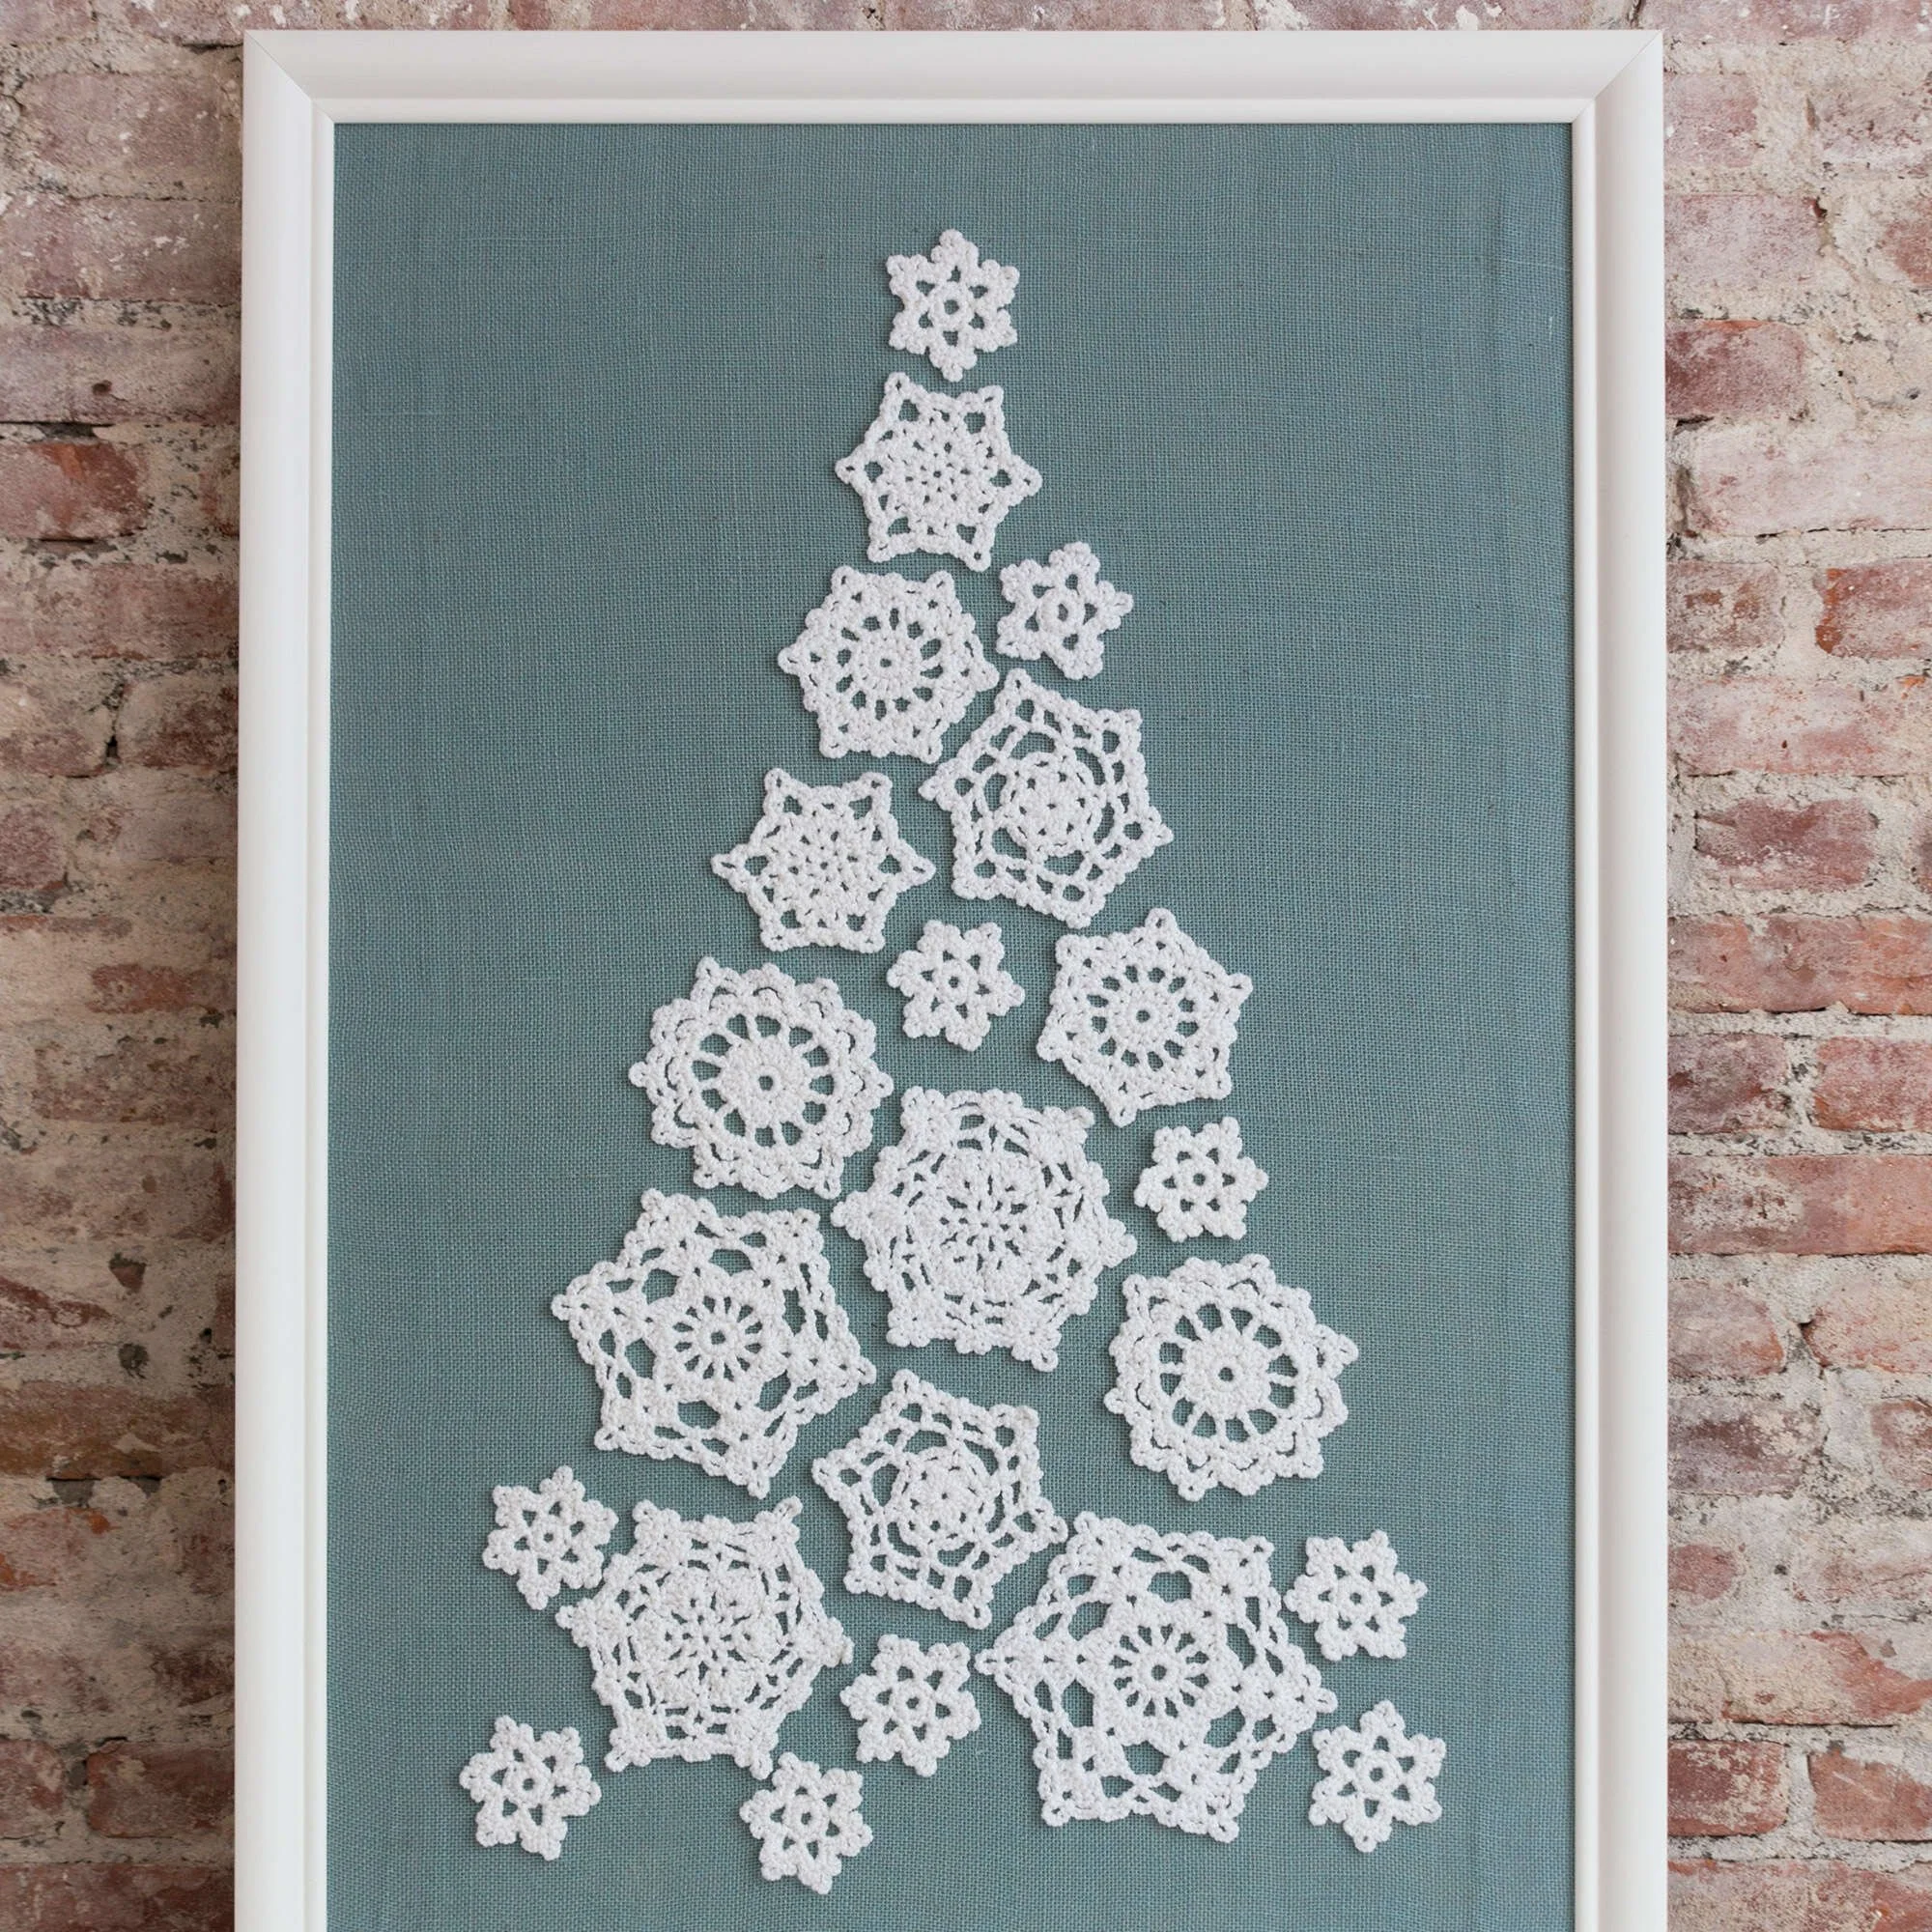
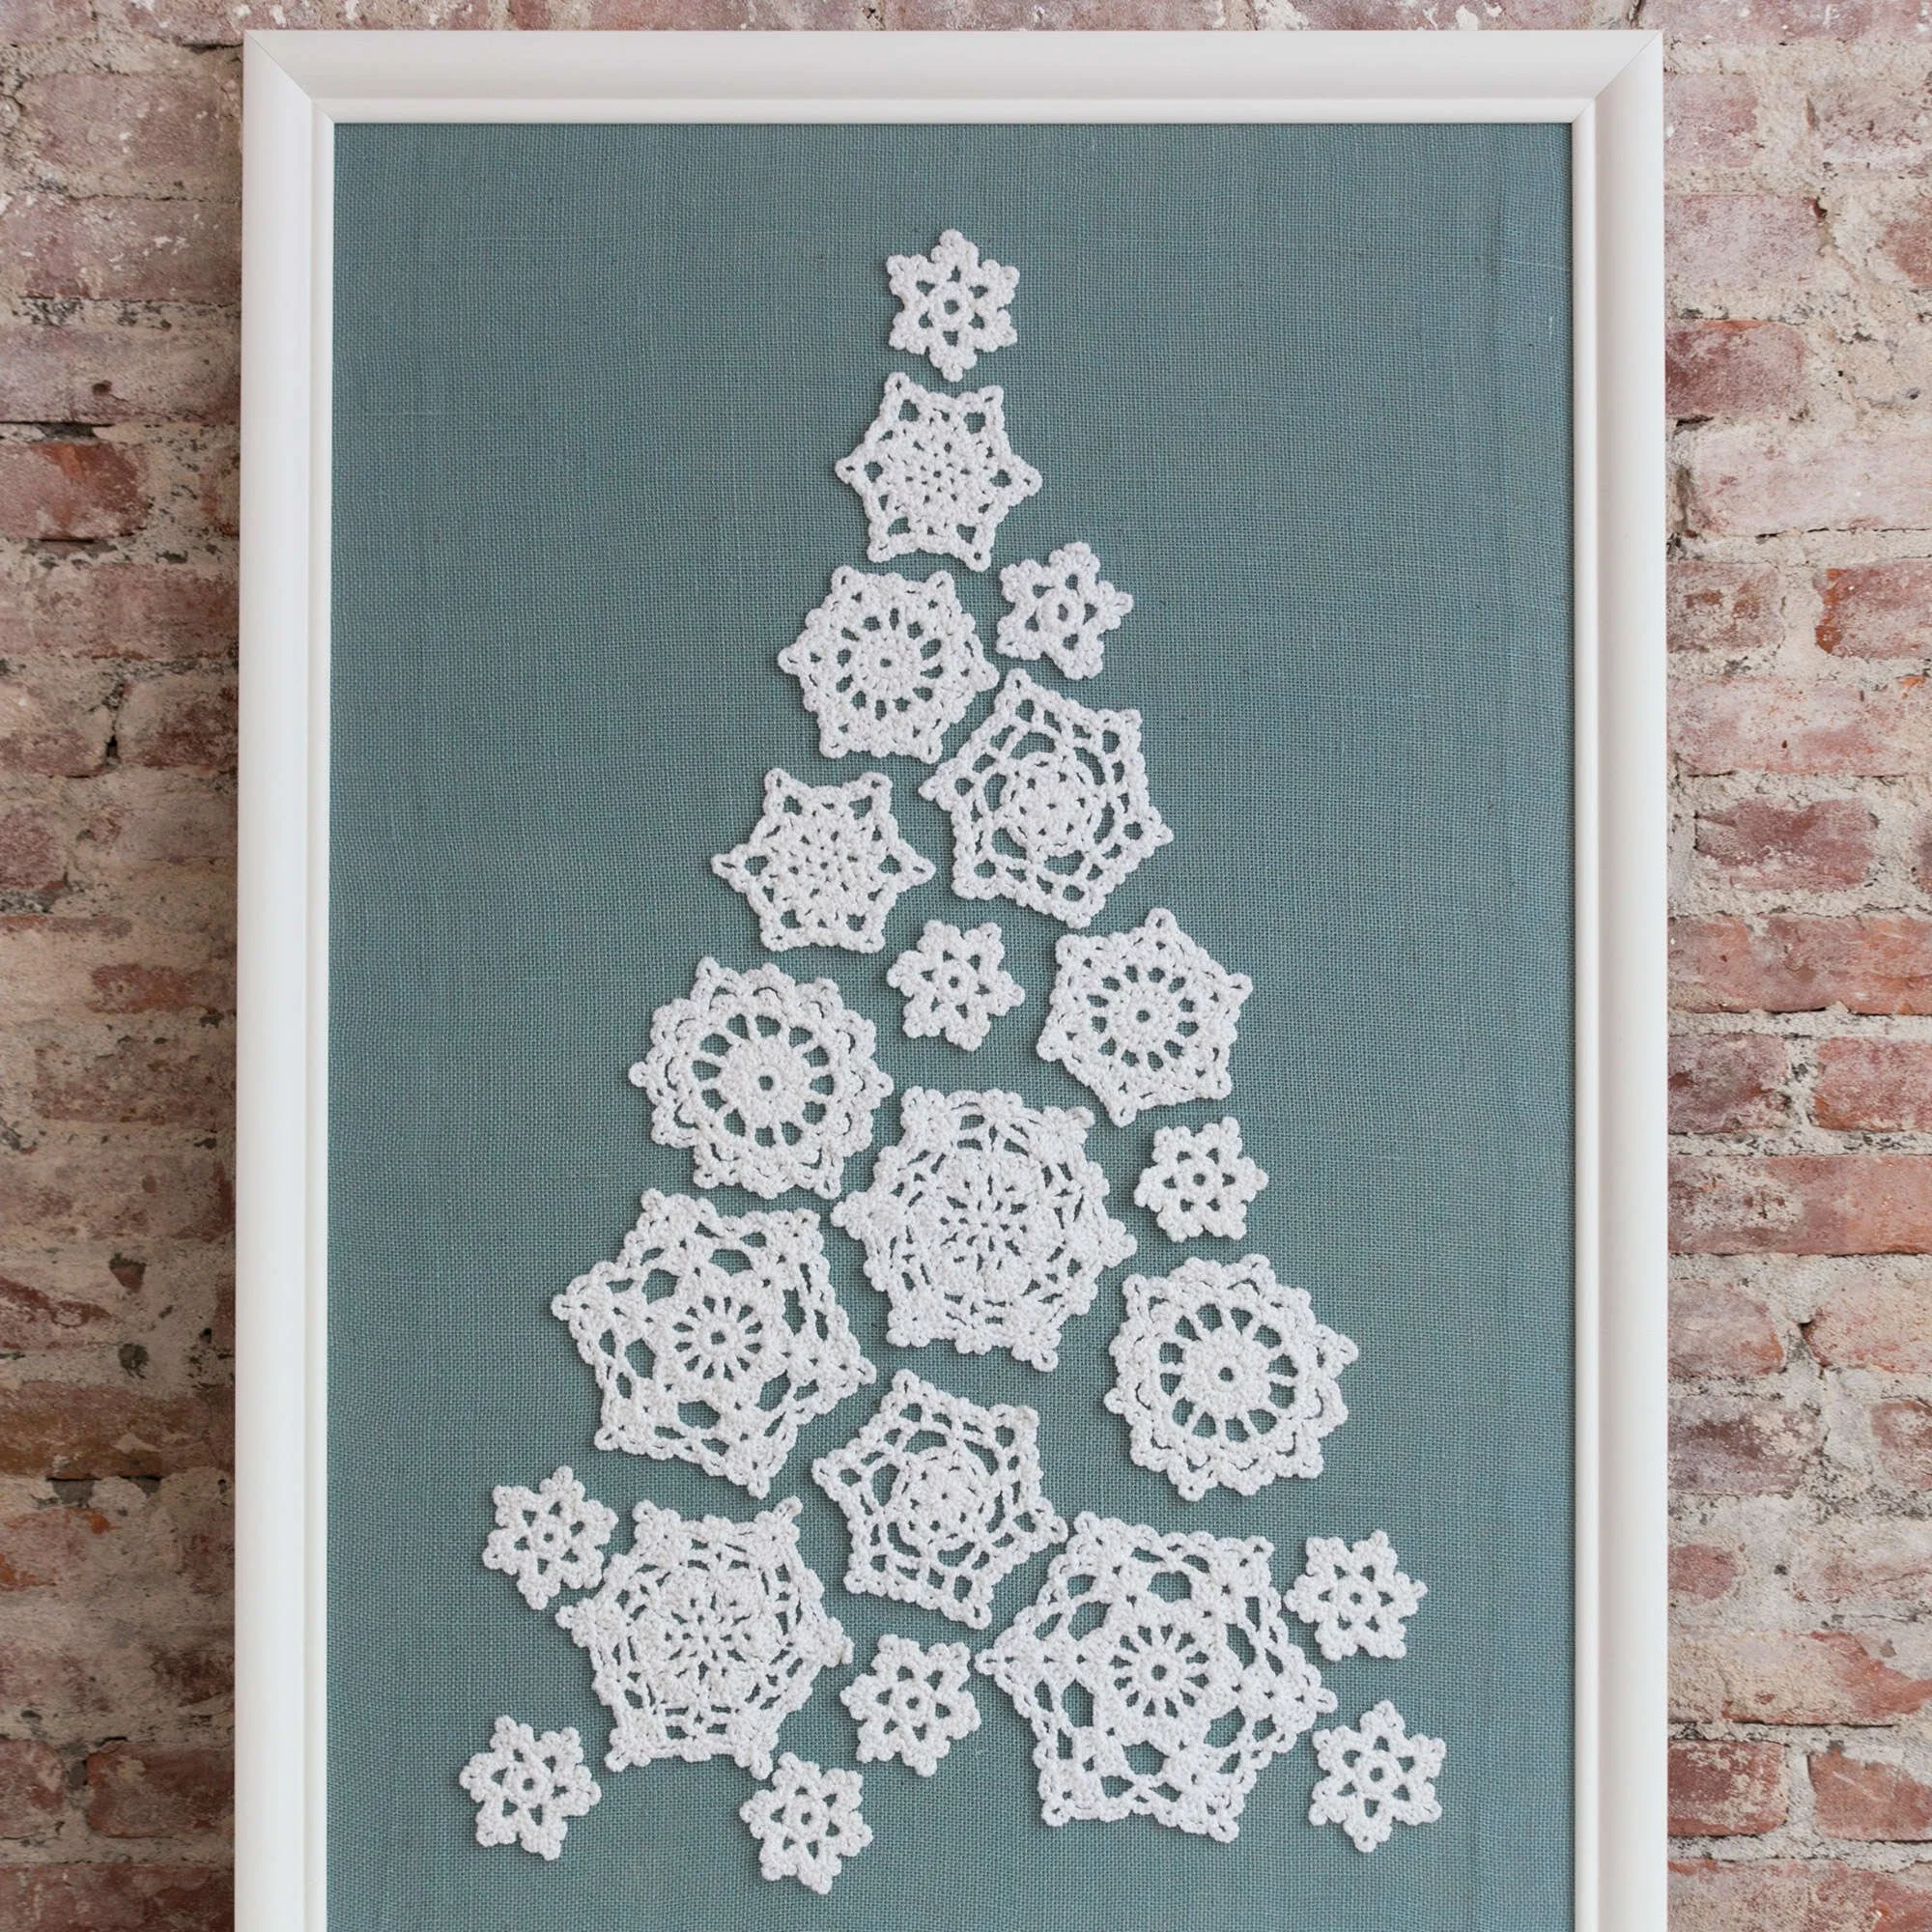
The Crochet Tree of Snowflakes Pattern creates an enchanting decor piece perfect for winter celebrations. This design features a collection of elegant snowflake doilies that are arranged and glued onto a burlap background, forming a beautiful tree that’s approximately 28½ x 42½” [72.5 x 108 cm] when framed. Each doily varies in size, with 22 total doilies making up the entire design. This project is ideal for crocheters of various skill levels looking to enhance their home decor or make a thoughtful gift. Follow along closely with the instructions and refer to the provided photographs to achieve the best results.
Project Details
- Crochet terminology: US terminology
- Skill Level: Intermediate
- Finished Size: Approximately 28½ x 42½ inches [72.5 x 108 cm]
- Construction Method: Assembly of crocheted doilies on burlap
- Gauge: Varies with each doily; check pattern specifics for details
Materials and Tools
| Yarn Option | Yarn and Specifications | Amount |
|---|---|---|
| RED HEART® Holiday® | 140 White/Silver | 1 skein |
- Susan Bates® Crochet Hook: 3.75mm [US F-5] or 4mm [US G-6] (choose whichever size feels most comfortable)
- Sewing needle and white thread (to sew down ends)
- Yarn needle
- 1½ yds (1.5 m) burlap in color of your choice (shown: Wedgewood blue)
- Hot glue gun and glue sticks
- Framing supplies (optional):
- Acid-free foam core backing
- Sewing needle and thread to match burlap
- Large picture frame
Abbreviations
| Abbreviation | Meaning |
|---|---|
| ch | chain |
| sl st | slip stitch |
| sc | single crochet |
| dc | double crochet |
| hdc | half double crochet |
| beg-Cl | beginning cluster |
| shell | (2 dc, ch 2, 2 dc) in indicated space |
| V-st | (dc, ch 3, dc) in indicated space |
Preparation and Techniques
Working in Joined Rounds
Most doilies in this pattern are worked using joined rounds. After finishing each round, complete a slip stitch to the beginning stitch of that round to secure. Then chain as indicated to start the next round.
Checking Gauge
Gauge varies by doily, so be sure to check the specific instructions for each one. Proper gauge will ensure that all doilies are uniform and that the entire piece fits well on the burlap base.
Complete Pattern Instructions
Mini Snowflake Doily (Make 10)
Finished Size: About 3¼” (8.5 cm) diameter. Gauge: Rounds 1–2 = 2” (5 cm) across.
| Round | Instructions | Stitches |
|---|---|---|
| 1 | Ch 6; join with sl st in first ch to form a ring. Ch 1, 12 sc in ring; join with sl st in first sc. | 12 sc |
| 2 | Ch 5, skip same sc as joining, skip next sc, sl st in next sc, [ch 5, skip next sc, sl st in next sc] 4 times, ch 5, skip last sc; join with sl st in joining sl st of Round 1. | 6 ch-5 spaces |
| 3 | (Sl st, ch 1, 2 sc, ch 3, sc, ch 5, sc, ch 3, 2 sc) in first ch-5 space, (2 sc, ch 3, sc, ch 5, sc, ch 3, 2 sc) in each remaining ch-5 space around; join with sl st in first sc. | Finale of the round will complete doily |
Fasten off.
Small Snowflake Doily #1 (Make 2)
Finished Size: About 5” (12.5 cm) tip to tip. Gauge: Rounds 1–3 = 2¾” (7 cm) across.
| Round | Instructions | Stitches |
|---|---|---|
| 1 | Ch 4; join with sl st in first ch to form a ring. Ch 1, [sc in ring, ch 2] 6 times; join with sl st in first sc. | 6 sc, 6 ch-2 spaces |
| 2 | (Sl st, ch 1, sc, ch 2, sc) in first ch-2 space, [ch 2, (sc, ch 2, sc) in next ch-2 space] 5 times, ch 2; join with sl st in first sc. | 12 sc, 12 ch-2 spaces |
| 3 | (Sl st, ch 1, sc, ch 3, sc) in first ch-2 space, (sc, ch 3, sc) in next 11 ch-2 spaces; join with sl st in first sc. | 12 sc, 12 ch-3 spaces |
| 4 | (Sl st, ch 1, sc) in first ch-3 space, [ch 5, sc in next ch-3 space, ch 3, sc in next ch-3 space] 5 times, ch 5; join with sl st in first sc. | 12 sc, 6 ch-5 spaces, 6 ch-3 spaces |
| 5 | Ch 2, (sc, ch 5, sc) in first ch-5 space, [ch 2, sl st in next sc, ch 1, sc in next ch-3 space, ch 1, sl st in next sc, ch 2, (sc, ch 5, sc) in next ch-5 space] 5 times, ch 2; slip st in next sc. | Concludes doily |
Fasten off.
Small Snowflake Doily #2 (Make 2)
Finished Size: About 5” (12.5 cm) tip to tip. Gauge: Rounds 1–3 = 2¾” (7 cm) across.
| Round | Instructions | Stitches |
|---|---|---|
| 1 | Ch 4; join with sl st in first ch to form a ring. Ch 1, 12 sc in ring; join with sl st in first sc. | 12 sc |
| 2 | Ch 1, sc in same sc as joining, [ch 1, sc in next sc] 11 times, ch 1; join with sl st in first sc. | 12 sc, 12 ch-1 spaces |
| 3 | Sl st in first ch-1 space, ch 6 (counts as dc, ch 3), skip next sc, dc in next ch-1 space; [ch 3, skip next sc, dc in next ch-1 space] 10 times, ch 3; join with sl st in 3rd ch of beginning ch-6. | 12 dc, 12 ch-3 spaces |
| 4 | (Sl st, ch 1, sc, ch 2, sc) in first ch-3 space, [skip next dc, shell in next ch-3 space, skip next dc, (sc, ch 2, sc) in next ch-3 space] 5 times; join with sl st in first sc. | 6 shells |
| 5 | (Sl st, ch 1, sc, ch 3, sc) in first ch-2 space, [ch 3, (sc, hdc, ch 4, hdc, sc) in ch-2 space of next shell, ch 3, (sc, ch 3, sc) in next ch-2 space] 5 times; join with sl st in first sc. | Concludes doily |
Fasten off.
Medium Snowflake Doily #1 (Make 2)
Finished Size: About 6” (15 cm) tip to tip. Gauge: Rounds 1–3 = 3¼” (8.5 cm) across.
| Round | Instructions | Stitches |
|---|---|---|
| 1 | Ch 6; join with sl st in first ch to form a ring. Beg-Cl in ring, [ch 3, Cl in ring] 5 times; join with sl st in top of beg-Cl. | 6 clusters, 6 ch-3 spaces |
| 2 | (Sl st, ch 1, sc, ch 3, sc) in first ch-3 space, [ch 3, (sc, ch 3, sc) in next ch-3 space] 5 times; join with sl st in first sc. | 12 sc, 12 ch-3 spaces |
| 3 | (Sl st, ch 1, sc) in first ch-3 spaces, [ch 7, skip next ch-3 space, sc in next ch-3 space] 5 times; join with sl st in first sc. | 6 sc, 6 ch-7 spaces |
| 4 | Ch 5 (counts as dc, ch 2), V-st in next ch-7 space, [ch 2, dc in next sc, ch 2, V-st in next ch-7 space] 5 times; join with sl st in 3rd ch of beginning ch-5. | 6 V-sts |
| 5 | Ch 3, slip st in next dc, ch 3, (sc, ch 5, sc) in next ch-5 space, ch 3; join with sl st in first sc. | Concludes doily |
Fasten off.
Medium Snowflake Doily #2 (Make 2)
Finished Size: About 6” (15 cm) tip to tip. Gauge: Rounds 1–3 = 3” (7.5 cm) across.
| Round | Instructions | Stitches |
|---|---|---|
| 1 | Ch 6; join with sl st in first ch to form a ring. Ch 1, 12 sc in ring; join with sl st in first sc. | 12 sc |
| 2 | Ch 1, sc in same st as joining, [small-shell in next st, sc in next st] 5 times; join with sl st in first sc. | 6 small-shells |
| 3 | Ch 7 (counts as tr, ch 3), dc in center st of first small-shell; [ch 3, tr in next sc, ch 3, dc in center st of next small-shell] 5 times; join with sl st in 4th ch of beginning ch-7. | 6 tr, 6 dc, 12 ch-3 |
| 4 | (Sl st, ch 1, 2 sc, ch 3, 2 sc) in first ch-3 space, [ch 1, (2 sc, ch 3, 2 sc) in next ch-3 space] 11 times; join with sl st in first sc. | 12 (2 sc, ch 3, 2 sc) groups |
| 5 | Ch 1, TURN, sc in first ch-1 space; [ch 6, sc in next ch-1 space] 11 times; join with sl st in first sc. | 12 sc |
| 6 | Ch 3, TURN, (sc, ch 5, sc) in first ch-6 space; [ch 3, slip st in next sc, ch 3, (sc, ch 3, sc) in next ch-6 space] 5 times; join with slip st in same sc as joining of Round 5. | Concludes doily |
Fasten off.
Large Snowflake Doily #1 (Make 2)
Finished Size: About 7” (18 cm) tip to tip. Gauge: Rounds 1–3 = 3” (7.5 cm) across.
| Round | Instructions | Stitches |
|---|---|---|
| 1 | Ch 5; join with sl st in first ch to form a ring. Ch 1, [sc in ring, ch 4] 5 times, sc in ring; join with ch 1, dc in first sc. | 6 sc, 6 ch-4 spaces |
| 2 | Ch 1, (sc, ch 4, sc) in first ch-4 space; [ch 4, (sc, ch 4, sc) in next ch-4 space] 5 times; join with ch 1, dc in first sc. | 12 sc, 12 ch-4 spaces |
| 3 | Ch 1, sc in first ch-4 space; [shell in next ch-4 space, sc in next ch-4 space] 5 times; join with sl st in first sc. | 6 shells, 6 sc |
| 4 | Ch 6 (counts as dc, ch 3), dc in same sc as joining; [ch 3, sc in center dc of next shell, ch 3, V-st in next sc] 5 times; join with sl st in 3rd ch of beginning ch-6. | 6 sc, 6 V-sts, 12 ch-3 spaces |
| 5 | (Sl st, ch 1, sc) in ch-3 space of first V-st; [ch 3, shell in next sc, ch 3, sc in ch-3 space of next V-st] 5 times; join with sl st in first sc. | 6 shells, 6 sc, 12 ch-3 spaces |
| 6 | Ch 1, ([sc, ch 2] twice, sc) in same sc as joining; *ch 3, (sc, ch 3, sc, ch 7, sc, ch 3, sc) in center dc of next shell; repeat from * 4 more times; join with sl st in first sc. | Concludes doily |
Fasten off.
Large Snowflake Doily #2 (Make 2)
Finished Size: About 7½” (19 cm) tip to tip. Gauge: Rounds 1–3 = 3½” (9 cm) across.
| Round | Instructions | Stitches |
|---|---|---|
| 1 | Ch 6; join with sl st in first ch to form a ring. Ch 1, 12 sc in ring; join with sl st in first sc. | 12 sc |
| 2 | Ch 5 (counts as dc, ch 2), dc in next sc; [ch 2, dc in next sc] 10 times; join with sl st in 3rd ch of beginning ch-5. | 12 dc, 12 ch-2 spaces |
| 3 | Slip st in first ch-2 space, ch 3, (2 dc, ch 2, 3 dc) in same ch-2 space; repeat around, join with sl st in top of beginning ch-3. | 6 sc, 6 shells |
| 4 | …continue as described in previous donliy |
Fasten off.
Assembly and Finishing
Sewing/Blocking and Gluing
Weave in tails. Using a sewing needle and white thread, carefully sew down the ends on the backside of each doily. Optional: Block each doily if desired to enhance definition. Lay burlap flat and iron out wrinkles. Arrange the doilies on the burlap according to the layout diagram. Use your hot glue to secure each doily in place on the burlap.
Framing the Tree
Cut the foam core into a rectangle that extends about 3” (7.5 cm) beyond the tree on all sides and fits into your large picture frame. Carefully stretch the burlap over the foam core and pin, sew, or glue the edges to the back side. You may prefer to remove any glass from the frame before inserting the piece. Once completed, insert the piece into the picture frame. It can also be professionally framed if desired.
Practical Tips
- Choose a comfortable hook size to ensure your doilies are made with precision and neatness.
- Use a light touch with the hot glue to avoid excessive amounts that could show through the burlap.
- Consider using seasonal colors or patterns of burlap that complement your décor.
- Be sure to block your doilies for a polished look and to ensure uniformity in size.
Troubleshooting
- Incorrect Stitch Count: If your doily seems off, recount your stitches as you work. Make adjustments to ensure you’ve followed the correct number of stitches in each round.
- Doilies Curling: This could happen if your tension is too tight. Ensure your stitches are consistent and not overly tight as you crochet.
- Glue Residue: If you accidentally apply too much glue, consider using a damp cloth to clean the area carefully, as long as it won’t compromise the burlap.
Care
To keep your finished tree looking its best:
- Store in a dry place, avoiding direct sunlight to prevent fading.
- If needed, delicate spot cleaning with a damp cloth can help maintain the integrity of the burlap.
- For long-lasting use, avoid storing in damp areas where mold could develop.
Frequently Asked Questions
What materials do I need for the Crochet Tree of Snowflakes?
You will need RED HEART® Holiday® yarn, a crochet hook (either 3.75mm or 4mm), burlap, a hot glue gun, and basic sewing supplies. Optionally, you may want framing materials.
How long does it take to complete this project?
Completion time varies by skill level, but plan for several hours to complete the snowflakes and assembly. Intermediate crocheters may find they can finish the project in one or two days.
Can I use a different yarn instead of RED HEART® Holiday®?
Yes, you can use a different yarn, but be mindful of weight and fiber content as this may affect gauge and final size. Look for similar worsted weight yarns.
Do I need to block the doilies?
Blocking is optional but highly recommended for a crisp and finished look. It helps define the pattern and can make a significant difference in the appearance of your doilies.
What if my doilies don’t come out the right size?
If they’re not the right size, double-check your tension and gauge against the pattern. Adjust your hook size if necessary, or rework the doilies with slight variations in tension.
How should I frame my finished tree?
Consider stretching the burlap over acid-free foam core for stable framing. You can either use a large picture frame or opt for professional framing to protect your work.