
Get 30+ FREE Crochet Patterns — Join Our Newsletter
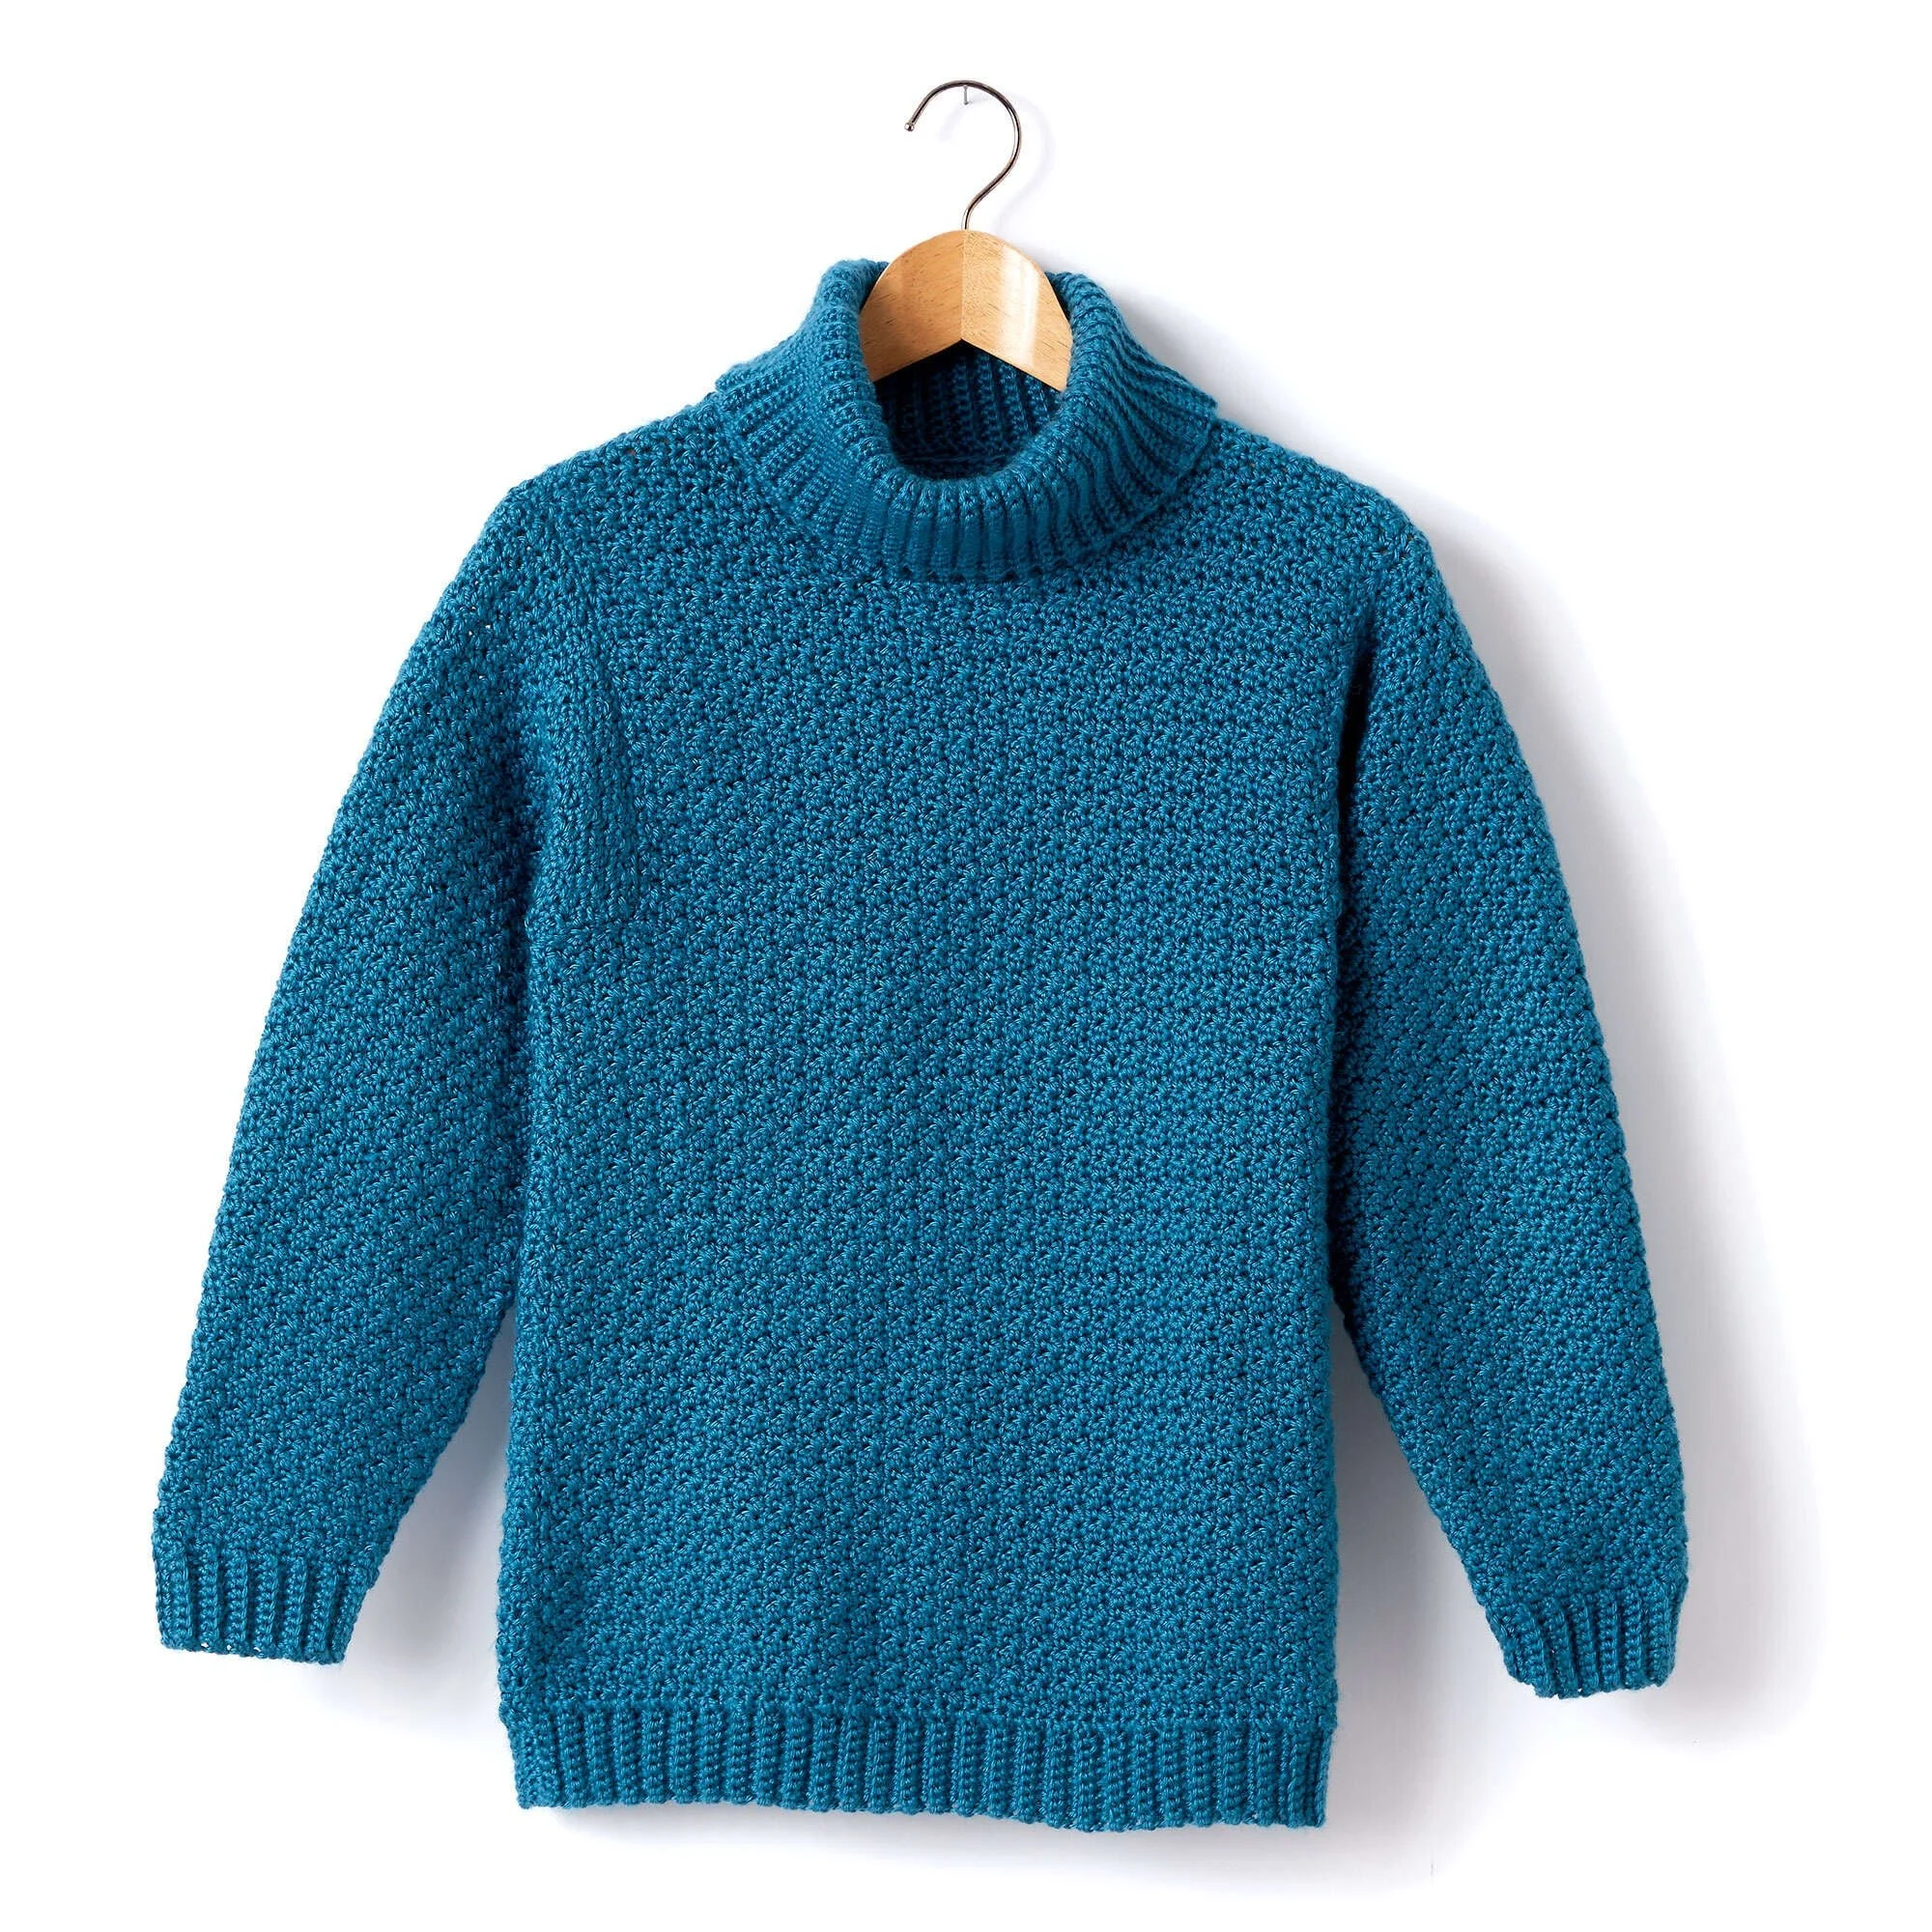
Crochet Turtleneck Pullover Pattern for Adults
Why you’ll love this pattern
This adult crochet turtleneck pullover is more than just a cozy garment; it’s a delightful project that brings together comfort and style. Crocheting this pullover allows you to express your creativity while crafting a functional piece perfect for chilly evenings or layering in colder months. This project is a fantastic choice for both seasoned crocheters and adventurous beginners seeking to enhance their skills. In addition, it offers calming, portable construction, making it ideal for both home crafting and on-the-go projects.
“I loved making this pullover! It was easy to follow, and now I have a cozy sweater I can wear everywhere!” – Happy Crocheter
How this crochet pattern comes together
This crochet project consists of a cozy pullover made with simple yet effective stitches that create a beautiful texture. You’ll start by crocheting the ribbing for the back, then move on to the main body, setting the foundation for both the front and sleeves.
The main technique involves working in rows of single crochet (sc) and double crochet (dc) stitches, which makes it suitable for crocheters with basic skills. Depending on your experience and pace, you can expect to complete this pullover in just a few weekends of leisurely crafting.
Materials you’ll need
To get started on your crochet turtleneck pullover, gather the following supplies:
- Yarn: Caron® Simply Soft®
- Heathers: 5 oz / 141.7 g (250 yds / 228 m) — 5 (6) 7 (8) 9 (10) balls for sizes XS/S, M, L, XL, 2/3XL, 4/5XL
- OR Solids: 6 oz / 170.1 g (315 yds / 288 m):
- Version 1: Ocean (39759) 4 (5) 6 (7) 8 (9) balls
- Version 2: Persimmon (39754) 4 (5) 6 (7) 8 (9) balls
- Hook: Size U.S. H/8 (5 mm) crochet hook, or size needed to obtain gauge.
- Stitch markers: 4 markers for keeping track of your stitches.
Remember, choosing your color can be an exciting part of the process, so feel free to pick any shade that resonates with your personal style!
Step-by-step instructions
Back
- Ribbing: Chain 10.
- 1st Row: (RS). 1 sc in 2nd ch from hook. 1 sc in each ch to end of chain. Turn. (9 sc)
- 2nd Row: Ch 1. 1 sctbl in each st to end of row. Turn.
- Repeat the last row until ribbing measures 18½ (20¼–22¼–24½–27½–31½)" [47 (51.5–56.5–62–70–80) cm], ending on a WS row. Do not fasten off or turn.
- Next row: (WS). Ch 1 and work 61 (67–73–81–91–103) sc evenly across the long edge of ribbing. Turn.
- Proceed in pattern:
- 1st Row: (RS). Ch 1. 1 sc in 1st st. *1 dc in next st. 1 sc in next st. Rep from * to end. Turn.
- 2nd Row: Ch 3 (counts as dc). *1 sc in next dc. 1 dc in next sc. Rep from * to end. Turn.
- 3rd Row: Ch 1. 1 sc in 1st dc. *1 dc in next sc. 1 sc in next dc. Rep from * to end, working last sc in top of ch 3. Turn.
- Repeat last 2 rows until work from lower edge measures:
- 16 (16–16–16½–16½–16½)" [40.5 (40.5–40.5–42–42–42) cm] for Her version
- 17 (17–17–17½–17½–17½)" [43 (43–43–44.5–44.5–44.5) cm] for His version
Ending on a WS row. Fasten off.
Shape Armholes
- Next Row: (RS). Skip first 6 (8–10–12–14–18) sts. Join yarn with sl st to next dc. Ch 1. 1 sc in same sp as last sl st. Pattern across next 48 (50–52–56–62–66) sts. Turn. Leave rem 6 (8–10–12–14–18) sts unworked.
- Continue even in pattern over 49 (51–53–57–63–67) sts until armhole measures 8½ (9–9–9½–10–10½)" [22.5 (23–23–24.5–25.5–27.5) cm], ending on a WS row. Fasten off. Turn.
Shape Shoulders
- Next Row: (RS). Skip first 6 (6–8–8–10–10) sts. Join yarn with sl st to next dc. Ch 1. 1 sc in same sp as last sl st. Pattern across next 36 (38–36–40–42–46) sts. Fasten off. Turn. Leave rem 6 (6–8–8–10–10) sts unworked.
- Next Row: Skip first 7 (7–6–7–8–9) sts. Join yarn with sl st to next st and pattern across next 23 (25–25–27–27–29) sts. Fasten off.
Front
- Work from 1 to 2 as given for Back.
- Continue even in pattern over 49 (51–53–57–63–67) sts until armhole measures 10 rows less than Back to shoulder, ending on a WS row.
Shape Left Neck
- 1st Row: (RS). Ch 1. Pattern across 19 (19–20–21–24–24) sts (neck edge). Turn. Leave rem sts unworked.
- 2nd Row: Ch 1. Sc2tog. Pattern to end of row. Turn.
- 3rd Row: Ch 1. Pattern to last 2 sts. Sc2tog. Turn.
Repeat the last 2 rows twice more. 13 (13–14–15–18–18) sts remaining. Work 3 rows even in pattern. Fasten off.
Shape Left Shoulder
- Next Row: (RS). Skip first 6 (6–8–8–10–10) sts. Join yarn with sl st to next dc. Ch 1. 1 sc in same sp as last sl st. Pattern to end of row. Fasten off.
Shape Right Neck
- With RS facing, skip center 11 (13–13–15–15–19) sts. Join yarn with sl st to next st and pattern to end of row. Turn.
- Next Row: Ch 3. Pattern to last 2 sts. Sc2tog. Turn.
- Next Row: Ch 1. Sc2tog. Pattern to end of row. Turn.
Repeat the last 2 rows twice more. 13 (13–14–15–18–18) sts remaining. Work 3 rows even in pattern.
Shape Right Shoulder
- Next Row: (RS). Ch 1. Pattern across first 6 (6–8–8–10–10) sts. Fasten off. Leave rem sts unworked.
Sleeves
- Ribbing: Ch 10.
- 1st Row: (RS). 1 sc in 2nd ch from hook. 1 sc in each ch to end of chain. Turn. (9 sc)
- 2nd Row: Ch 1. 1 sctbl in each st to end of row. Turn.
Repeat the last row until ribbing measures 9½ (9½–10–10–10½–10½)" [24.5 (24.5–25.5–25.5–26.5–26.5) cm], ending on a WS row. Do not fasten off or turn.
4. Next Row: (WS). Ch 1. Work 31 (31–33–33–35–37) sc evenly across long edge of ribbing. Turn.
Proceed in pattern
- 1st Row: (RS). Ch 1. 1 sc in first st. *1 dc in next st. 1 sc in next st. Rep from * to end. Turn.
- 2nd Row: Ch 3 (counts as dc). *1 sc in next dc. 1 dc in next sc. Rep from * to end. Turn.
- 3rd Row: Ch 1. 1 sc in first dc. *1 dc in next sc. 1 sc in next dc. Rep from * to end, working last sc in top of ch 3. Turn.
- 4th Row (Inc Row): Ch 1. (1 sc. 1 dc) in first sc. *1 sc in next dc. 1 dc in next sc. Rep from * to last 2 sts. 1 sc in next dc. (1 dc. 1 sc) in last sc. Turn.
- 5th Row: Ch 3 (counts as dc). *1 sc in next dc. 1 dc in next sc. Rep from * to end. Turn.
- 6th Row (Inc Row): Ch 3 (counts as dc). 1 sc in first dc. *1 dc in next sc. 1 sc in next dc. Rep from * to last 2 sts. 1 dc in next sc. (1 sc. 1 dc) in top of ch 3. Turn.
Repeat rows 3 to 6 for 1 (3–3–4–6–7) times more, ending up with 39 (47–49–53–63–69) sts.
All Sizes – Continue Even in Pattern
- Continue until work measures 17 (17–17–16½–16–16)" [43 (43–43–42–40.5–40.5) cm] for Her Version or 18 (18–18–17½–17–17)" [45.5 (45.5–45.5–44.5–43–43) cm] for His Version.
- Place markers at each end of the last row.
- Work a further 6 (6–8–10–12–14) rows in pattern. Fasten off.
Finishing
- Sew the left shoulder seam.
- Collar: Chain 32.
- 1st Row: (RS). 1 sc in 2nd ch from hook. 1 sc in each ch to end of chain. Turn. (31 sc)
- 2nd Row: Ch 1. 1 sctbl in each st to end of row. Turn.
- Repeat the last row until collar measures enough to fit along the neck edge, sewing in place as you work, ensuring stretch in the seam.
- Sew right shoulder and collar seam, reversing the seam for a turnback.
- Sew in sleeves, placing rows above markers along unworked sts of front and back to form square armholes.
- Finally, sew side and sleeve seams.
Ways to use your finished project
Your completed turtleneck pullover can be a versatile addition to your wardrobe. Here are some creative ideas for showcasing your handmade garment:
- Casual Wear: Pair it with jeans or leggings for an effortless, cozy outfit perfect for weekend outings or casual lunches.
- Layering Piece: Use it as a base layer under jackets or coats for added warmth during chilly seasons.
- Gift Giving: With its handmade appeal, this pullover makes an excellent gift for friends and family, especially during the cooler months.
How to care for your crochet project
To keep your turtleneck pullover looking its best, follow these care instructions:
- Washing: Hand wash in cold water or machine wash on a gentle cycle.
- Drying: Lay flat to dry to prevent stretching and maintain its shape.
- Storing: Store in a cool, dry place. Avoid hanging, as this can distort the garment’s shape.
Helpful crochet tips
- Maintain Even Tension: Keep your stitches uniform to avoid unevenness in your finished piece.
- Count Stitches: Regularly check your stitch count to stay on track and prevent mistakes.
- Use Stitch Markers: Place markers to help remember where to shape armholes or shoulders.
- Check Gauge: Be sure to measure your gauge before starting to ensure proper sizing.
Creative variations
Consider personalizing your turtleneck pullover with these creative ideas:
- Color Combinations: Use contrasting colors for the ribbing or the body to create a unique look.
- Textured Yarns: Experiment with different yarn weights or textures for variations in fabric appearance.
- Appliqués: Add decorative elements like embroidered patches or fabric appliqués for added flair.
Before altering, be mindful that changes in yarn type or color can affect the overall size and drape of the garment.
Frequently asked questions
-
Is this crochet pattern beginner-friendly?
Yes, the pattern uses basic stitches and can be tackled by beginners. -
What yarn works best?
Caron® Simply Soft® is recommended for its softness and drape, ideal for garments. -
Can I use a different hook size?
You may adjust the hook size; just ensure it matches your gauge. -
How long does the project take?
Completion time varies, but expect it to be done over several leisurely crafting sessions. -
How can I make it larger or smaller?
Adjust the number of beginning chains and follow the pattern proportionately to maintain dimensions.



