Get 30+ FREE Crochet Patterns — Join Our Newsletter
Polar Bear Crochet Blanket and Hat Pattern
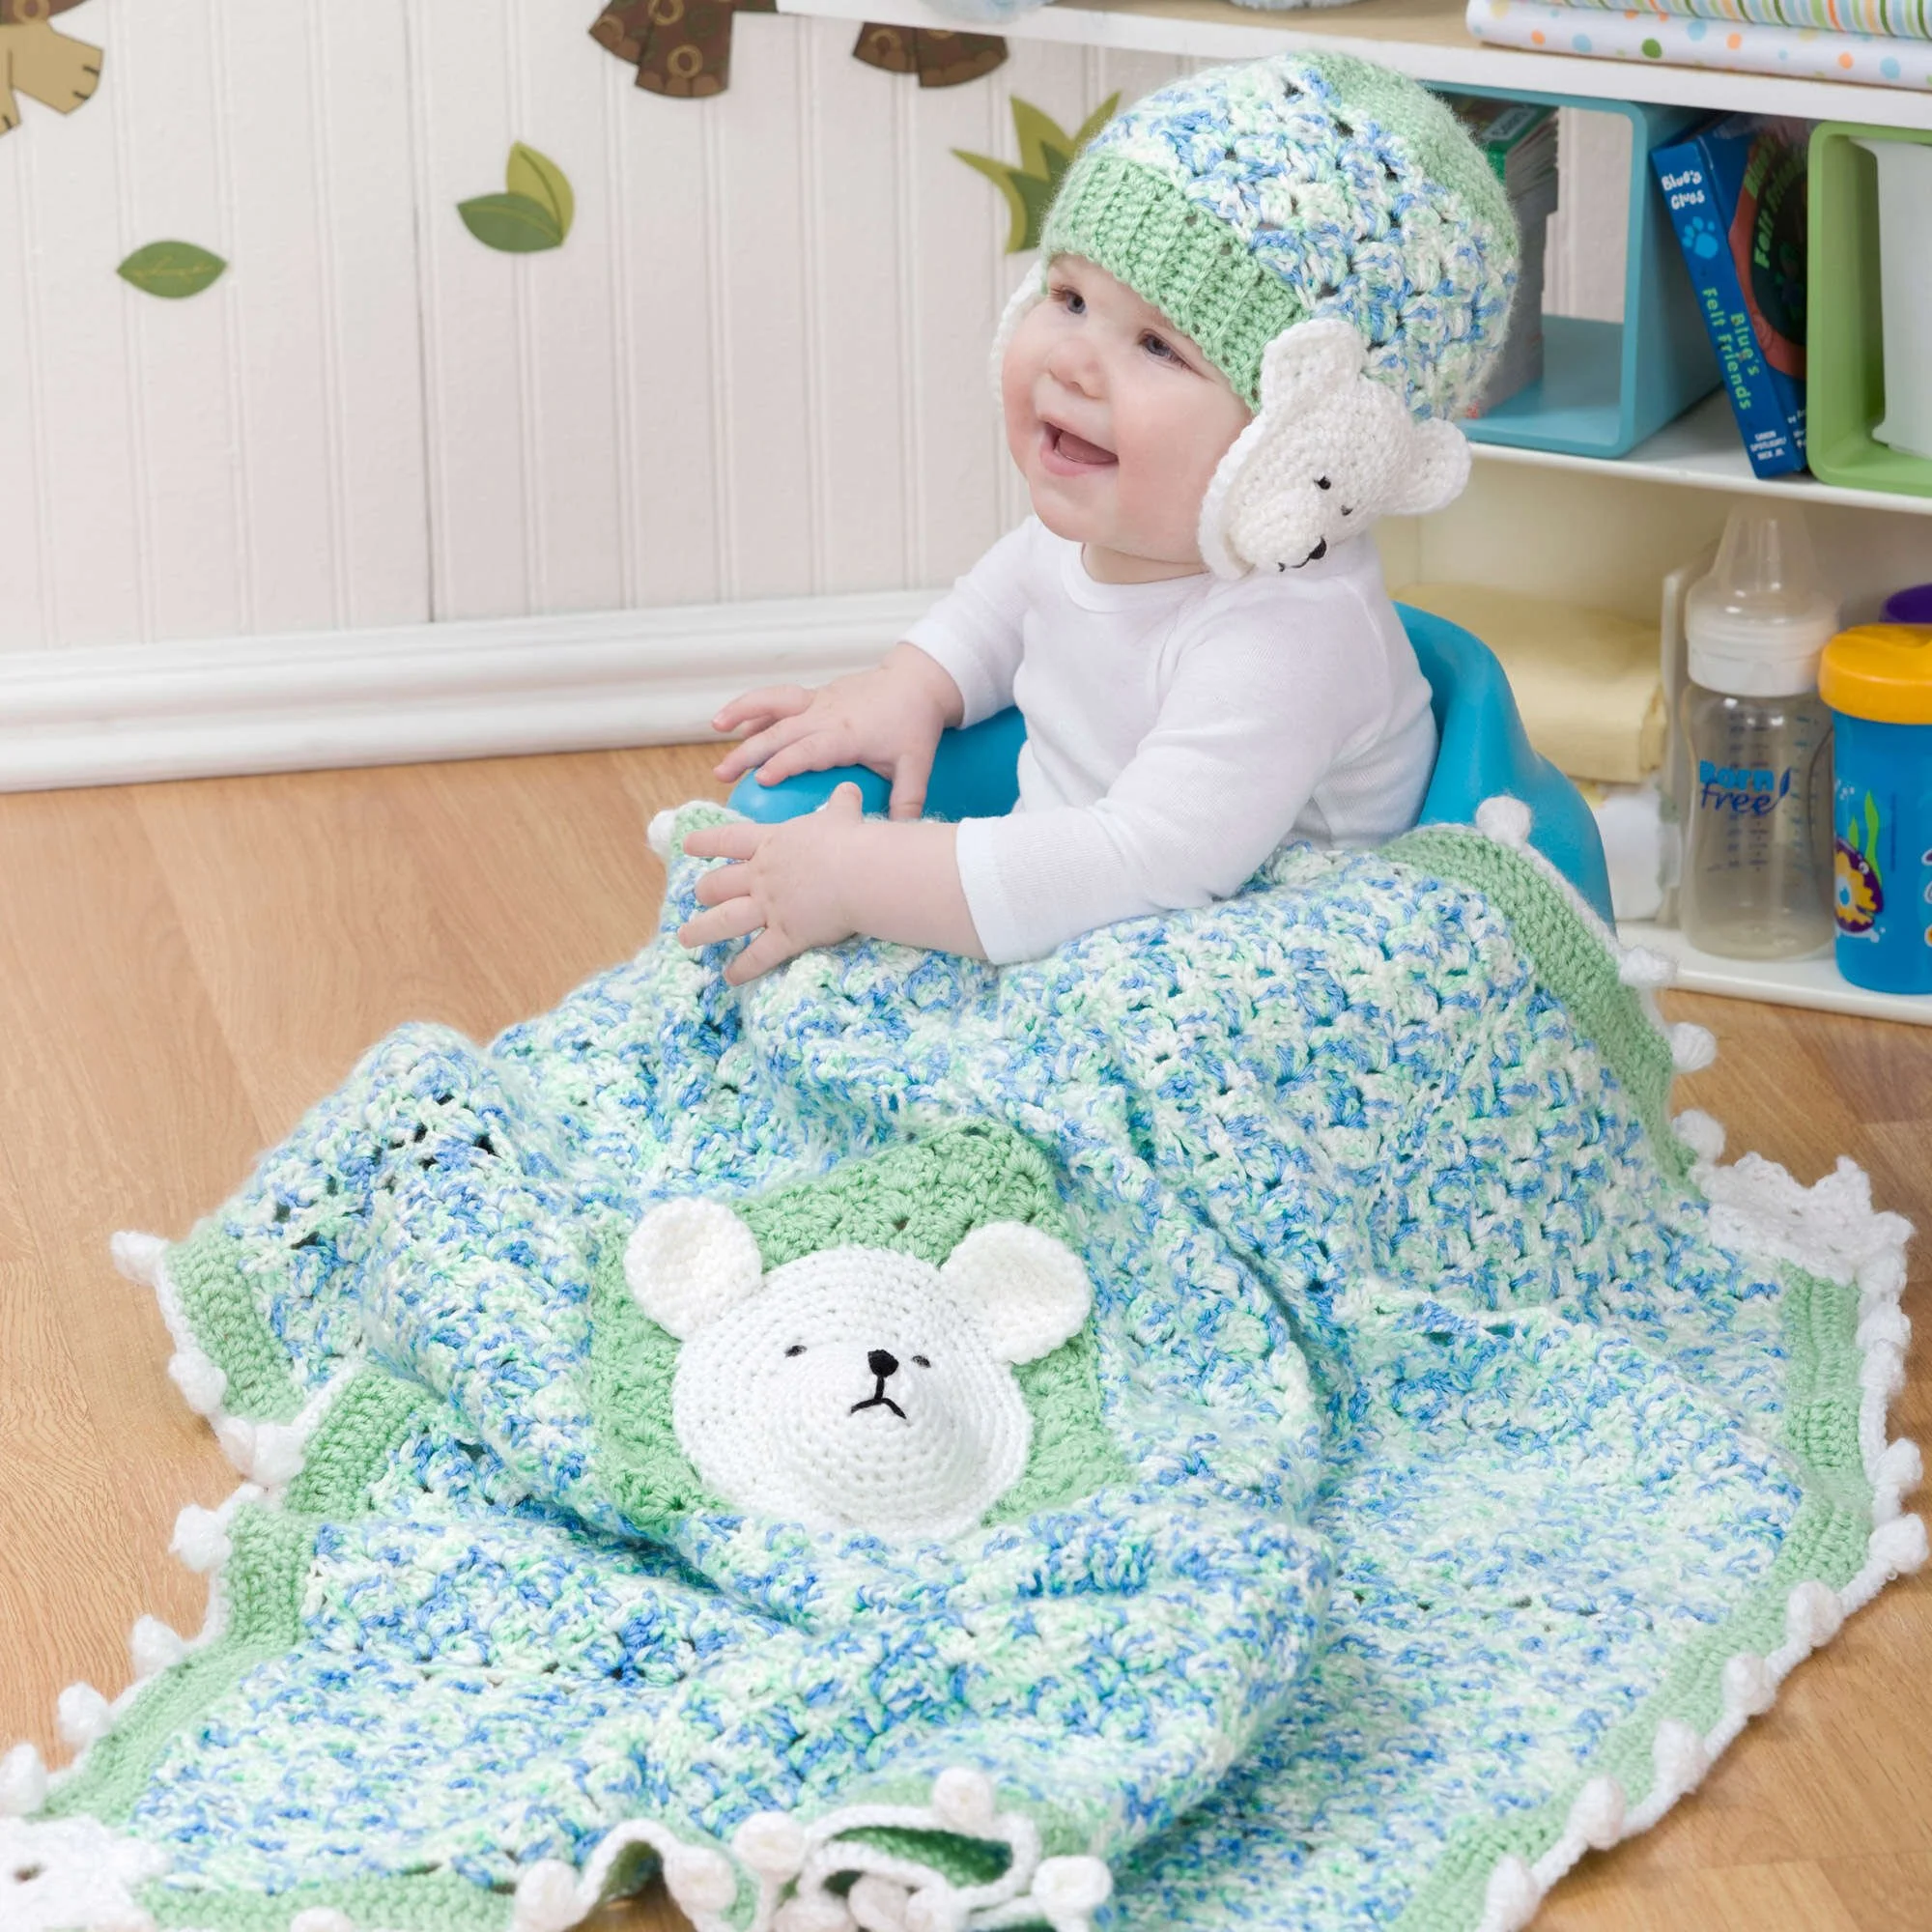
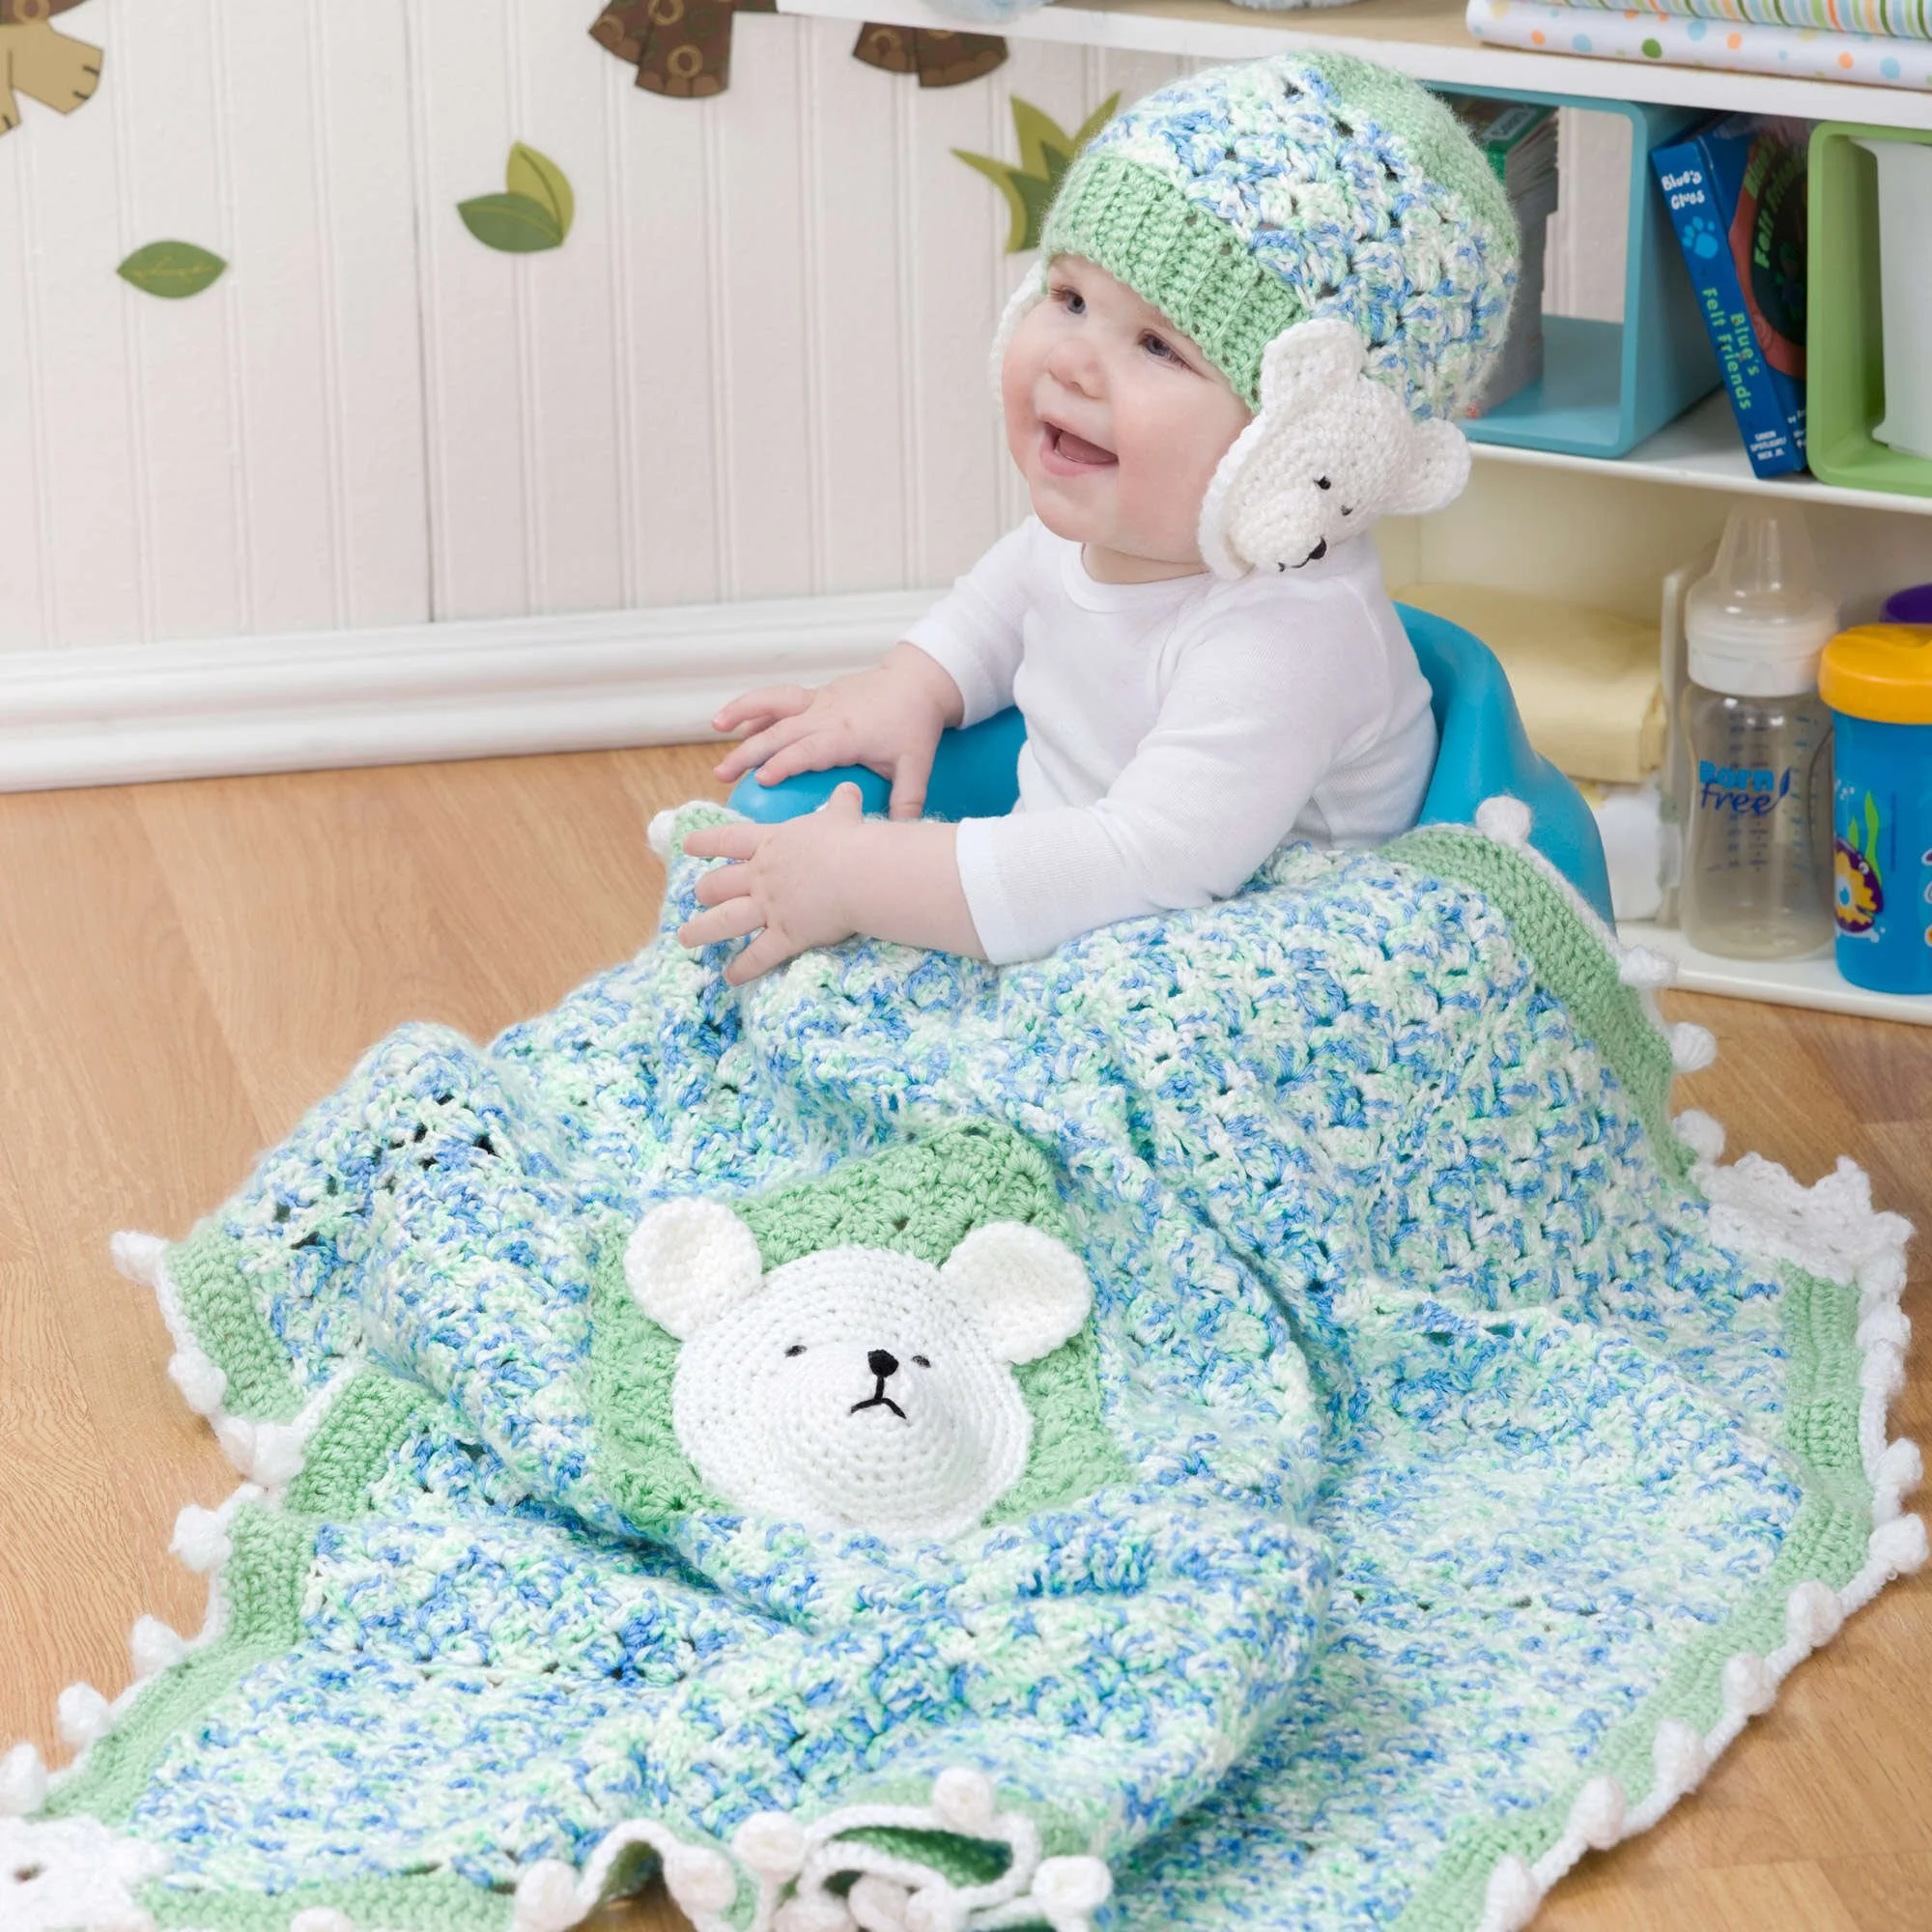
The Polar Bear Crochet Blanket and Hat pattern is a whimsical project perfect for cozying up in winter. Featuring adorable polar bears, this set combines charming squares in Puppy Print for the blanket with a cute hat, all crafted using basic crochet techniques like double crochet and single crochet. This project is suitable for crocheters familiar with working in continuous rounds and basic construction methods. Follow the written directions alongside any available photographs for clarity.
Project Details
- Crochet terminology: US
- Skill level: Intermediate
- Finished size: Not specified, approximately a toddler’s size
- Construction method: Blanket made of squares and an appliqué; hat worked in ribbing and rounds
Materials and Tools
| Yarn Option | Yarn Specifications | Amount |
|---|---|---|
| RED HEART® “Soft Baby Steps™” | 5 balls 9932 Puppy Print A | 5 balls |
| RED HEART® “Soft Baby Steps™” | 2 balls 9620 Baby Green B | 2 balls |
| RED HEART® “Soft Baby Steps™” | 1 ball 9600 White C | 1 ball |
| AUNT LYDIA’S® “Fashion Crochet Thread”, Size 3 | Color 12 black | small amount |
- Crochet Hook: 4 mm [US G-6]
- Accessories: split lock stitch marker, yarn needle, small amount of stuffing
Abbreviations
| Abbreviation | Meaning |
|---|---|
| ch | chain |
| sc | single crochet |
| dc | double crochet |
| inc | increase |
| dec | decrease |
| hdc | half double crochet |
| st(s) | stitch(es) |
| rnd | round |
Preparation and Techniques
Working in a Spiral
For the bear head and snout, work in continuous rounds without joining, marking the beginning of each round to maintain stitch count.
Changing Yarn Colors
When switching colors, simply drop the current yarn and continue with the new color, making sure to carry the old yarn along the edge to avoid long ends.
Complete Pattern Instructions
Blanket
Blanket Squares (Make 15 A and 1 B):
- Ch 36
| Row | Instructions | Stitches |
|---|---|---|
| 1 | Dc in 4th ch from hook, *skip 3 ch, (sc, ch 3, 3 dc) all in next ch; repeat from * to last 4 ch, skip 3 ch, sc in last ch; turn. | Varies |
| 2-13 | Ch 3, dc in first sc, *skip next 3 dc, (sc, ch 3, 3 dc) all in next ch-3 space; repeat from * to last st; sc in top of ch-3; turn. | Varies |
| 14 | Ch 3, dc in first sc, ch 2, sc in next ch-3 space, *ch 3, sc in next ch-3 space; repeat from * to last 2 sts; ch 3, dc in next sc, dc in top of ch-3. Fasten off. | Varies |
Assembly
Sew squares together 4 across and 4 down, placing the green square second from the right in the second row.
Bear Appliqué
Head
Work in continuous rounds without joining. Mark the beginning of the round; move the marker up each round.
| Round | Instructions | Stitches |
|---|---|---|
| 1 | With C, ch 2; 6 sc in 2nd ch from hook. | 6 |
| 2 | 2 sc in each sc around – 12 sc. | 12 |
| 3 | [Sc in next sc, inc] 6 times – 18 sc. | 18 |
| 4 | [Sc in next 2 sc, inc] 6 times – 24 sc. | 24 |
| 5 | [Sc in next 3 sc, inc] 6 times – 30 sc. | 30 |
| 6 | Sc in next 2 sc, inc, [sc in next 4 sc, inc] 5 times, sc in last 2 sc – 36 sc. | 36 |
| 7 | [Sc in next 5 sc, inc] 6 times – 42 sc. | 42 |
| 8 | Sc in next 3 sc, inc, [sc in next 6 sc, inc] 5 times, sc in last 3 sc – 48 sc. | 48 |
| 9 | [Sc in next 7 sc, inc] 6 times – 54 sc. | 54 |
| 10 | Sc in next 4 sc, inc, [sc in next 8 sc, inc] 5 times, sc in last 4 sc – 60 sc. | 60 |
| 11 | [Sc in next 9 sc, inc] 6 times – 66 sc. | 66 |
Fasten off, leaving a length of yarn for sewing.
Snout
| Round | Instructions | Stitches |
|---|---|---|
| 1 | With C, ch 2; 6 sc in 2nd ch from hook. | 6 |
| 2 | 2 sc in each sc around – 12 sc. | 12 |
| 3 | Sc in each sc around. | 12 |
| 4 | [Sc in next sc, inc] 6 times – 18 sc. | 18 |
| 5 | Sc in each sc around. | 18 |
| 6 | [Sc in next 2 sc, inc] 6 times – 24 sc. | 24 |
| 7 | [Sc in next 3 sc, inc] 6 times – 30 sc. | 30 |
| 8 | [Sc in next 4 sc, inc] 6 times – 36 sc. | 36 |
| 9 | [Sc in next 5 sc, inc] 6 times – 42 sc. | 42 |
Fasten off, leaving a length of yarn for sewing.
Snout Placement / Embroidery
Sew the snout in place on the head, stuffing lightly. With crochet thread, embroider satin stitch for eyes and nose and straight stitches for the mouth. Sew in place on B square.
Ear (Make 2)
| Round | Instructions | Stitches |
|---|---|---|
| 1-3 | Work same as Head Rounds 1-3 – 18 sc. | 18 |
| 4-6 | Sc in each sc around. | 18 |
| 7 | [Sc in next sc, dec] 6 times – 12 sc. | 12 |
Fasten off. Do not stuff. Sew in place.
Blanket Edging
Worked along each side separately.
- Row 1 (join B in corner): With the right side facing, join B in any corner; ch 1, work 120 sc evenly across (30 sc across each square); turn.
- Row 2: Ch 1, sc in each sc across; turn.
- Row 3: Ch 3, skip the first sc, dc in the next sc and in each sc across; turn.
- Row 4: Ch 1, sc in each dc across and in the top of ch-3; turn. Fasten off B.
- Row 5 (add color C): With the right side facing, join C in the first sc; ch 1, sc in the next 4 sc,
* (slip st, ch 1, 9 hdc) all in the next sc, drop loop from hook, insert hook from front in the first hdc, then into the dropped loop, pull loop through, ch 1 to close, sc in the next 9 sc; repeat from * across ending sc in the last 5 sc.
Fasten off.
Repeat Edging Rows 1-5 on each side.
Snowflake (Make 4)
With C, ch 6; join with a slip stitch to form a ring.
| Round | Instructions | Stitches |
|---|---|---|
| 1 | Ch 1, 12 sc in the ring; join with a slip st in the first sc. | 12 |
| 2 | Ch 3, 2 dc in same sc as joining, ch 1, skip next sc, * 3 dc in next sc, ch 1, skip next sc; repeat from * around; join in top of ch-3. | Varies |
| 3 | Ch 1, sc in same st as joining, * (hdc, dc, ch 2, dc, hdc) all in next dc, sc in next dc, sc in ch-1 space, sc in next dc; repeat from * around, end at ; join. Fasten off. | Varies |
Snowflake Placement
Sew one snowflake at each corner.
Hat
Construction Start
With B, ch 7. Work in ribbing as follows:
| Row | Instructions | Stitches |
|---|---|---|
| 1 | Sc in 2nd ch from hook and each ch across; turn – 6 sc. | 6 |
| 2-64 | Ch 1, working in back loops only, sc in each sc across. | 6 |
Crown
| Row | Instructions | Stitches |
|---|---|---|
| 1 | Ch 1, sc in the end of each row across ribbing; turn – 64 sc. | 64 |
| 2 | Join A in first sc; ch 3, dc in same st as joining, * skip next 3 sc, (sc, ch 3, 3 dc) all in next sc; repeat from * to last 4 sc; skip next 3 sc, sc in last sc; turn. | Varies |
| 3-6 | Repeat Row 2 of Blanket Square. | Varies |
| 7 | Repeat Row 14 of Blanket Square. | Varies |
| 8 | Ch 1, sc in each sc and ch across – 64 sc. | 64 |
| 9 | Join B in first sc; ch 1, sc in same sc and in next 13 sc, dec, [sc in next 14 sc, dec] 3 times; turn – 60 sc. | 60 |
Crown Decreasing Rows
| Row | Instructions | Stitches |
|---|---|---|
| 10 | Ch 1, [sc in next 8 sc, dec] 6 times; turn – 54 sc. | 54 |
| 11 | Ch 1, [sc in next 7 sc, dec] 6 times; turn – 48 sc. | 48 |
| 12 | Ch 1, [sc in next 6 sc, dec] 6 times; turn – 42 sc. | 42 |
| 13 | Ch 1, [sc in next 5 sc, dec] 6 times; turn – 36 sc. | 36 |
| 14 | Ch 1, [sc in next 4 sc, dec] 6 times; turn – 30 sc. | 30 |
| 15 | Ch 1, [sc in next 3 sc, dec] 6 times; turn – 24 sc. | 24 |
| 16 | Ch 1, [sc in next 2 sc, dec] 6 times; turn – 18 sc. | 18 |
| 17 | Ch 1, [sc in next sc, dec] 6 times; turn – 12 sc. | 12 |
| 18 | Ch 1, [dec] 6 times; turn – 6 sc. | 6 |
Fasten off. Sew back seam.
Polar Bear Earflaps
Head (Make 2)
| Round | Instructions | Stitches |
|---|---|---|
| 1-7 | Repeat Rounds 1-7 of Bear Head – 42 sc. | 42 |
| 8 | Slip st in each sc around. Fasten off. | Varies |
Ear (Make 4)
With C, ch 2.
| Row | Instructions | Stitches |
|---|---|---|
| 1 | 4 sc in 2nd ch from hook; turn. | 4 |
| 2 | Ch 1, 2 sc in each sc across; turn – 8 sc. | 8 |
| 3 | Ch 1, sc in next 2 sc, [inc] 4 times, sc in last 2 sc – 12 sc. | 12 |
Fasten off.
Snout (Make 2)
Repeat Snout instructions as written.
Finishing
Sew 2 ears in place on each head. Sew snouts in place, stuffing lightly. Embroider features the same as for the bear on the blanket, and sew in place on each side of the hat.
Practical Notes
- To keep the edges of your blanket neat, be sure to maintain an even tension while sewing the squares together.
- Be careful when stuffing the snouts to keep them from showing through the outer fabric.
- Using the same yarn for the hat as the blanket can create a lovely matching set.
Frequently Asked Questions
What size is the finished blanket and hat?
The finished size is not explicitly stated but is approximately designed for toddlers, with the blanket made of 16 square blocks.
Can I use different yarn brands for this project?
You can use other yarn brands as long as they match the weight (Medium worsted) and fiber content. Just note that gauge may vary, affecting final dimensions.
Is this pattern suitable for beginners?
This pattern is classified as intermediate because it involves working in continuous rounds and sewing components together. Familiarity with basic stitches is recommended.
How do I care for the finished blanket and hat?
Refer to the yarn label for care instructions, but generally, machine washing on a gentle cycle and laying flat to dry is best for acrylic yarns.
What techniques are essential for this pattern?
You will need to be comfortable with basic stitches such as single and double crochet, as well as working in continuous rounds and sewing pieces together.
Can I sell items made from this pattern?
Please verify the original designer’s usage terms regarding commercial sales, as some patterns may have restrictions.