
Get 30+ FREE Crochet Patterns — Join Our Newsletter
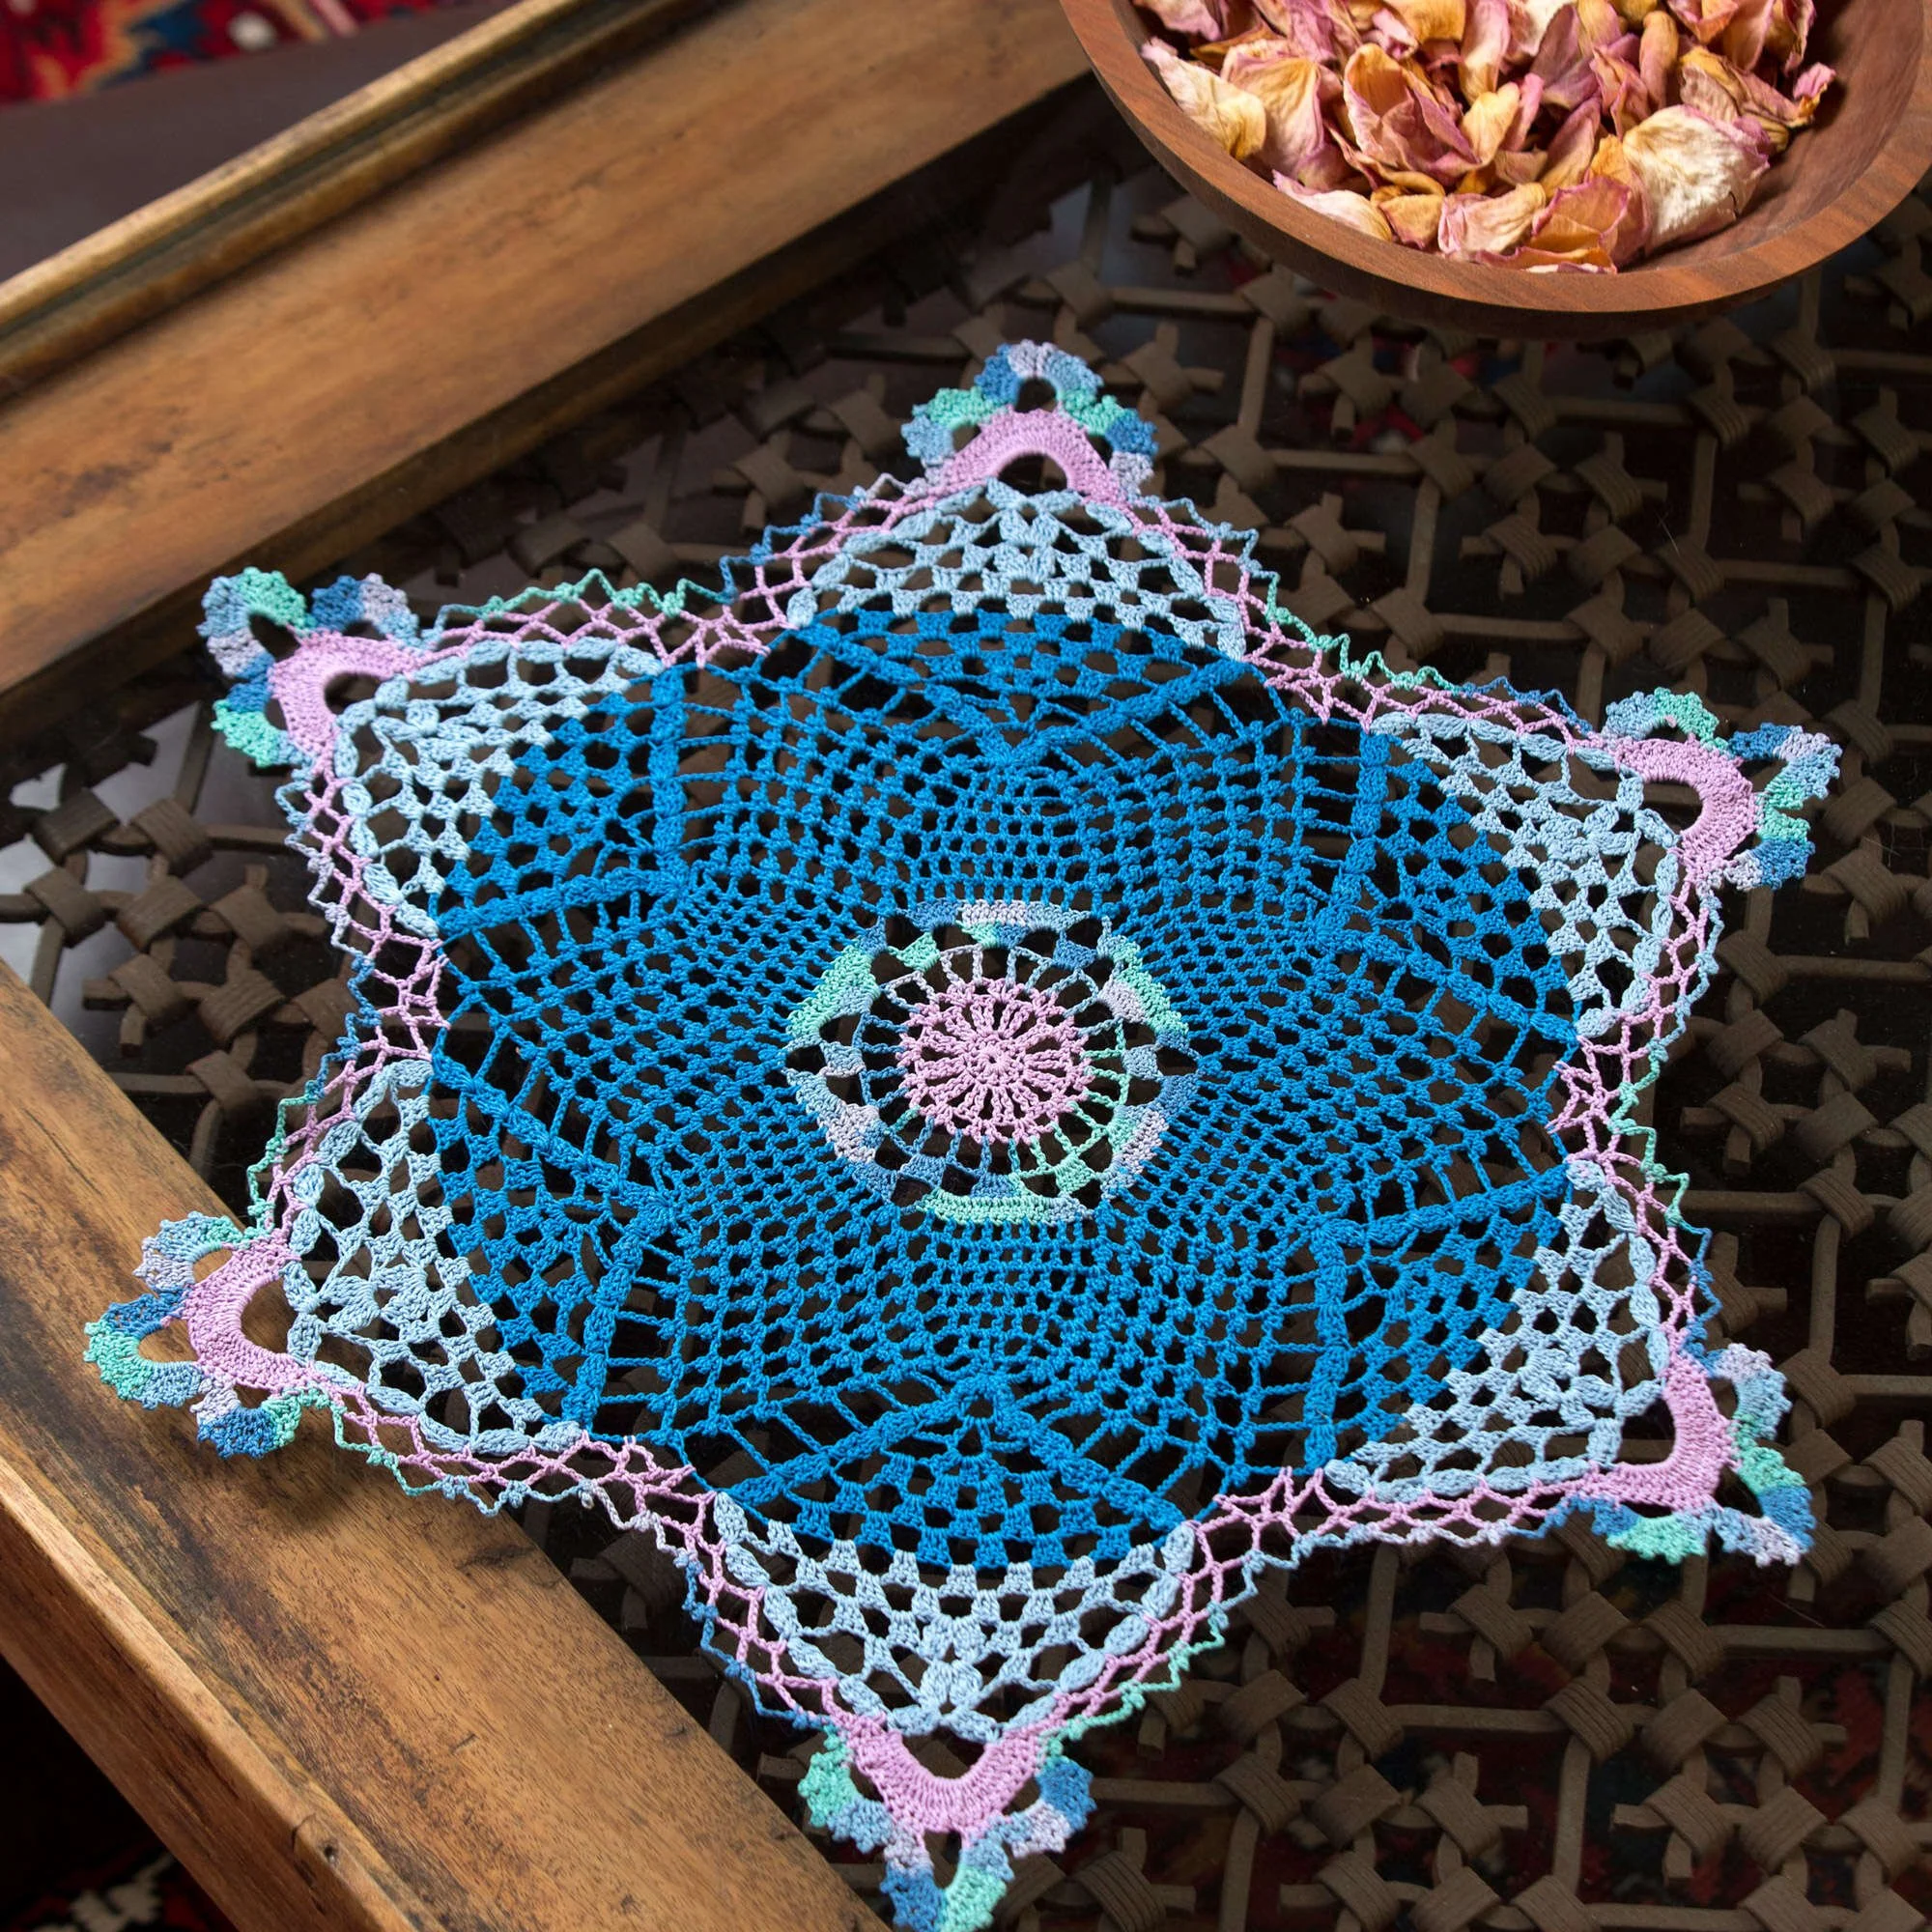
Snowflake Crochet Doily Pattern
Why you’ll love this pattern
The Crochet Snowflake Doily Pattern is a delightful project that brings a touch of elegance and charm to your home. Many crocheters find themselves enchanted by the delicate design and the satisfying rhythm of working with thread. This pattern is perfect for both beginners looking to enhance their skills and experienced crafters seeking a quick and enjoyable project. It’s especially wonderful for decorating during the holidays or making thoughtful handmade gifts for friends and family. You’ll appreciate how swiftly it comes together, allowing you to create something beautiful and functional.
"I loved making this snowflake doily! It was easy to follow and looks amazing on my dining table. Can’t wait to gift a few to family!"
How this crochet pattern comes together
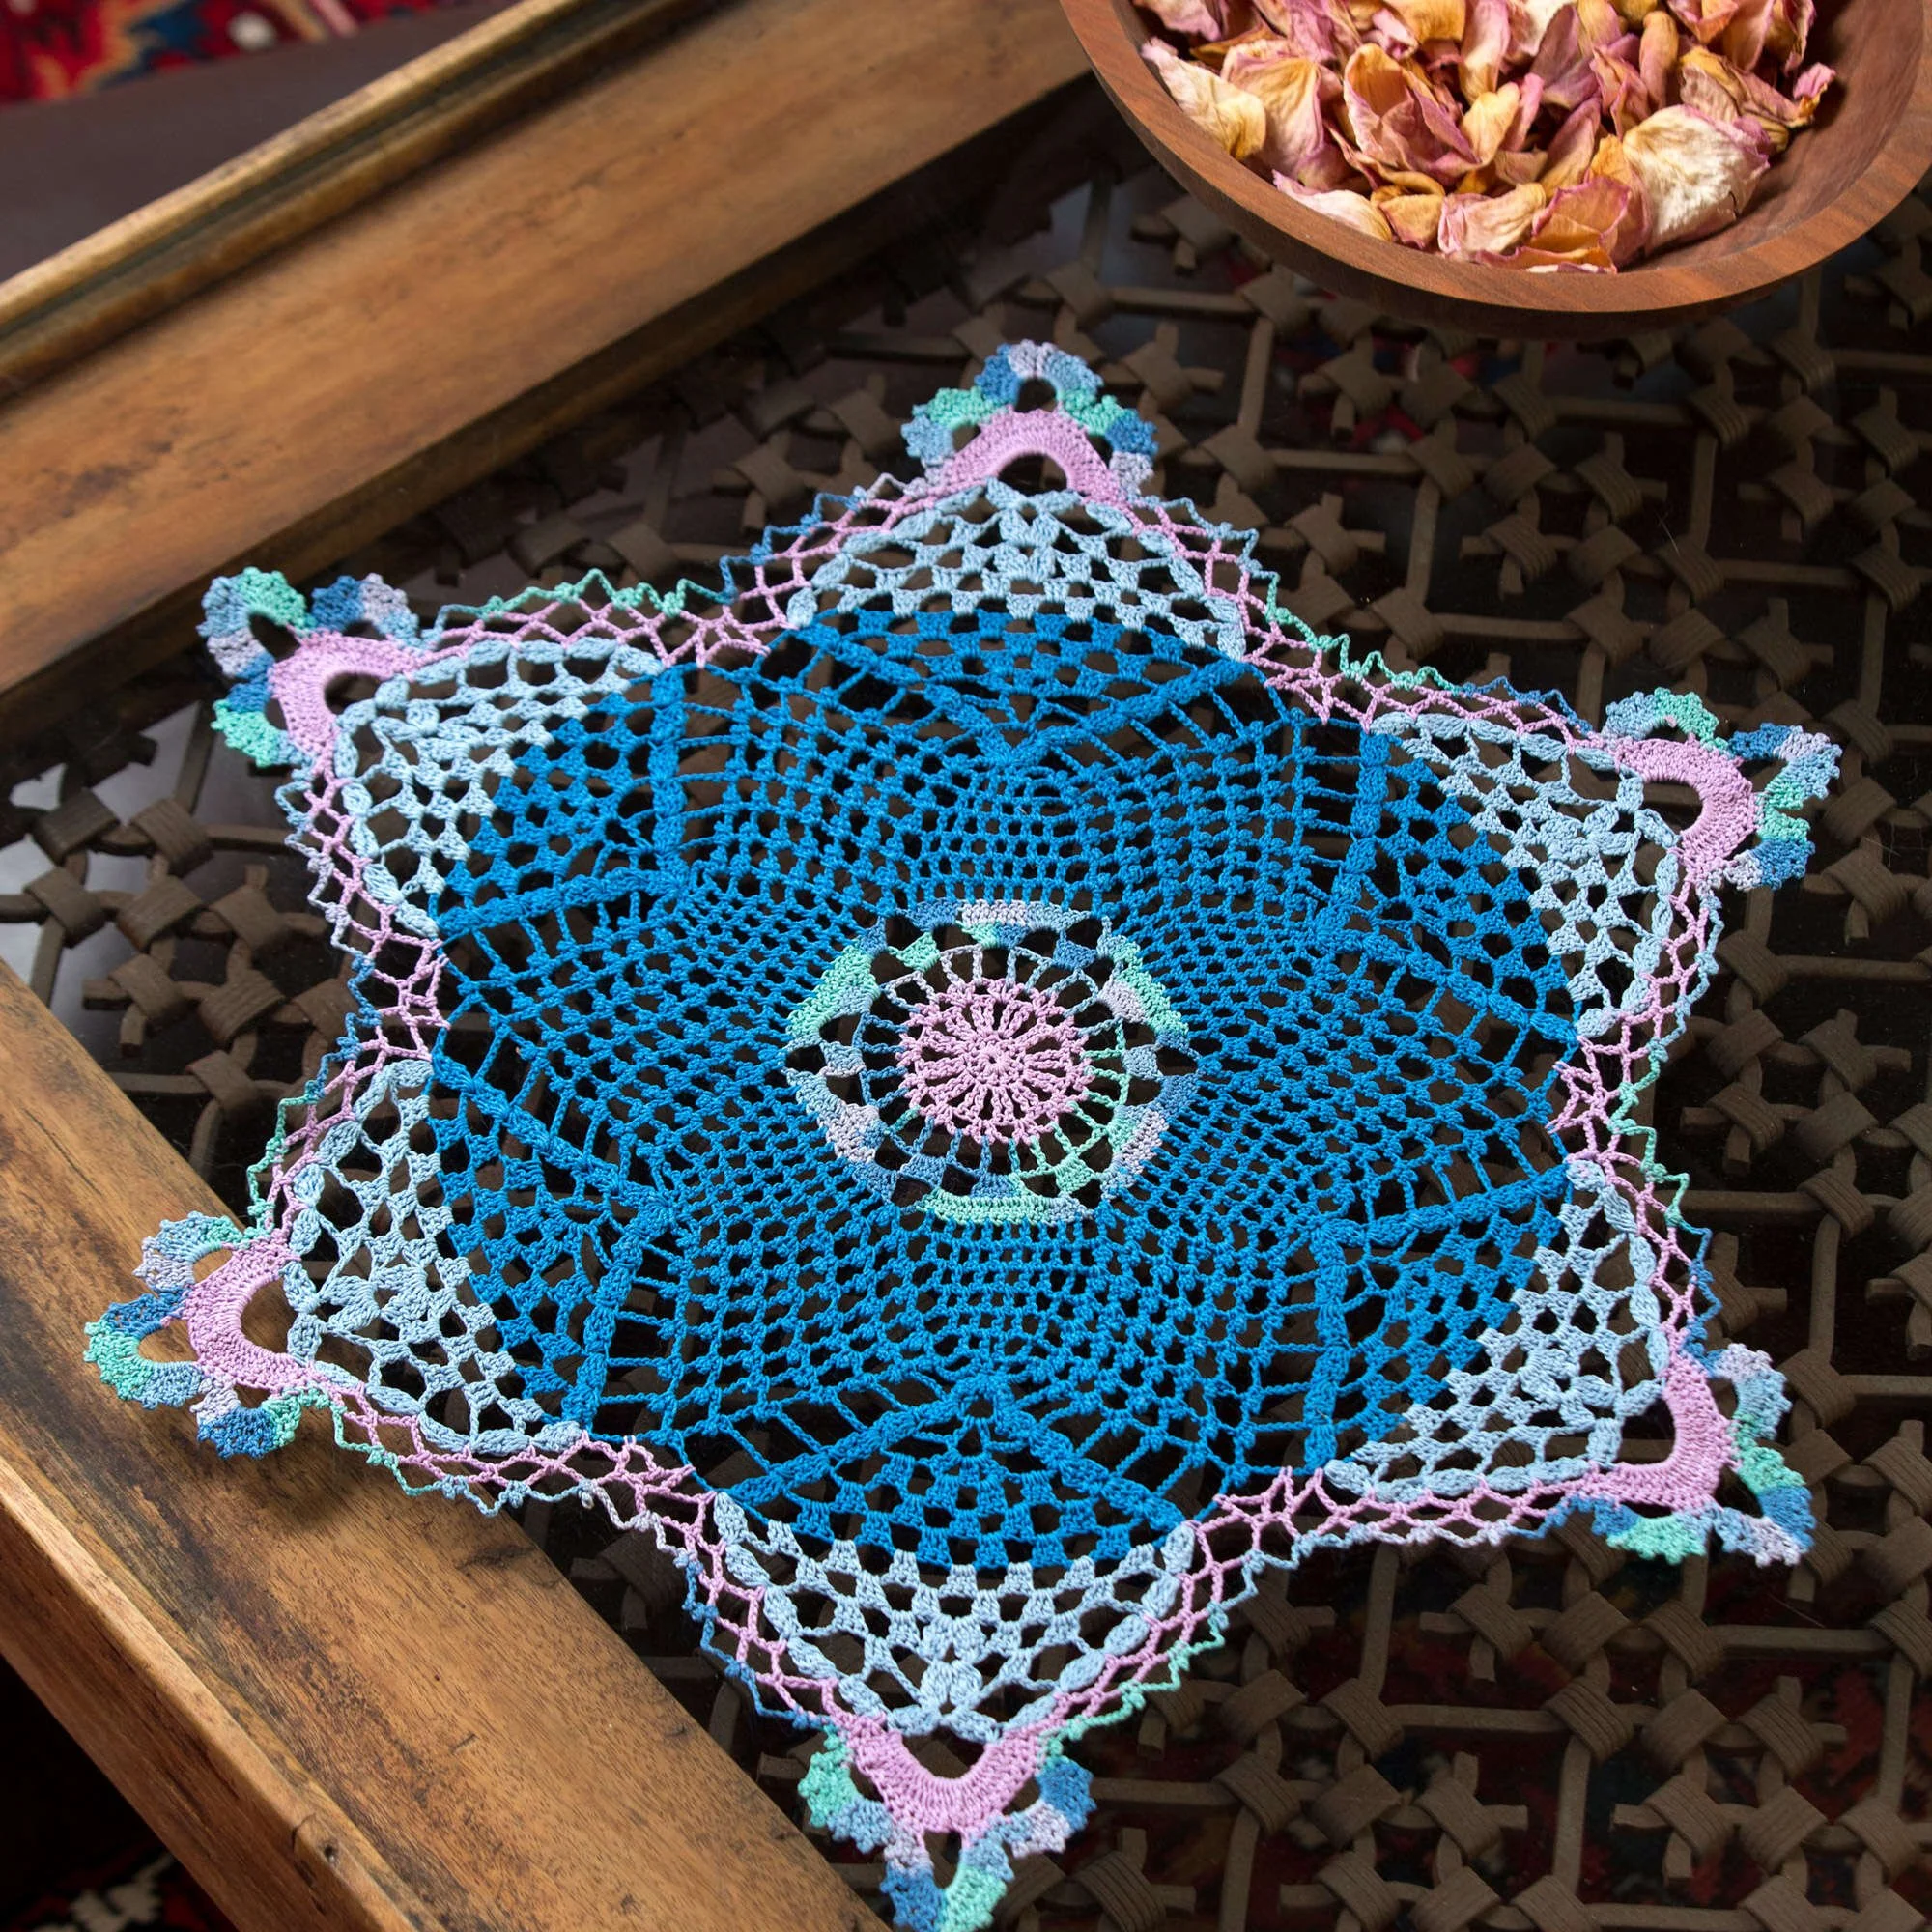
This pattern results in a stunning snowflake doily that showcases intricate design and beautiful color transitions. You will start with a simple ring foundation and progressively work through rounds that build upon each previous round, incorporating various stitches such as double crochet, treble crochet, and clusters. The likely skill level is intermediate, making it a great project for those who are already familiar with basic crocheting and ready to take on more complex patterns. The estimated completion time is approximately 4-6 hours, depending on your crochet speed.
Materials you’ll need
Gather the following materials to create your crochet snowflake doily:
- AUNT LYDIA’S® Classic Crochet Thread, Size 10: 1 ball each
- 495 Wood Violet (Color A)
- 995 Ocean (Color B)
- 805 Blue Hawaii (Color C)
- 480 Delft (Color D)
- Susan Bates® Steel Crochet Hook: 1.70mm (US 5)
- Thread needle
Notes:
- The AUNT LYDIA’S crochet thread is a lightweight cotton thread that gives the doily its delicate and crisp appearance, ideal for fine lace projects.
- Using smaller hooks like the 1.70mm will help maintain the intricate stitch structure necessary for this design.
Instructions
DOILY
Color A / Ring Foundation
- With Color A, ch 6; join with a slip st in the first ch to form a ring.
Round 1 (right side)
2. Ch 3 (counts as first dc), work 11 more dc in the ring; join with slip st in the top of the beginning ch-3—12 dc.
Round 2
3. Ch 4 (counts as first tr), tr in the same st as joining, *ch 2, 2 tr in next st; repeat from * around, ch 2; join with slip st in top of beginning ch-4—24 tr and 12 ch-2 spaces.
Color changes (continues as joined rounds, right side facing)
Round 3
4. Slip st in next tr, (slip st, ch 1, sc, ch 4, sc) in first ch-2 space, *ch 4, (sc, ch 4, sc) in next ch-2 space; repeat from * around, ch 4; join with slip st in first sc—24 sc and 24 ch-4 spaces.
Round 4 (with right side facing)
5. With right side facing, draw up a loop of B in any ch-4 space, ch 7 (counts as tr, ch 3), tr in next ch-4 space, *ch 3, tr in next ch-4 space; repeat from * around, ch 3; join with slip st in 4th ch of beginning ch-7—24 tr and 24 ch-3 spaces.
Round 5
6. Slip st in the first ch-3 space, ch 3 (counts as dc), 6 dc in the same ch-3 space, ch 5, skip the next ch-3 space, 5 dc in the next ch-3 space, *ch 5, skip the next ch-3 space, 7 dc in the next ch-3 space, ch 5, skip the next ch-3 space, 5 dc in the next ch-3 space; repeat from * to the last ch-3 space, ch 5, skip the last ch-3 space; join with slip st in the top of the beginning ch-3—Six 7-dc groups, Six 5-dc groups, and 12 ch-5 spaces.
Round 6
7. Ch 3, dc in the next 6 dc, 6 dc in the next ch-5 space, ch 5, 6 dc in the next ch-5 space, *dc in the next 7 dc, 6 dc in the next ch-5 space, ch 5, 6 dc in the next ch-5 space; repeat from * around; join with slip st in the top of the beginning ch-3—Six 19-dc groups and 6 ch-5 spaces. Fasten off.
Round 7 (with right side facing; join C)
8. With right side facing, join C with a slip st in the 2nd dc of any 19-dc group, ch 5 (counts as dc, ch 2 here and throughout), skip the next dc, dc in the next dc, *[ch 2, skip the next dc, dc in the next dc] 7 times, ch 6, skip the next dc, (sc, picot, sc) in the next ch-5 space; repeat from * around, ch 6; join with slip st in the 3rd ch of the beginning ch-5—54 dc, 12 sc, 6 picots, 12 ch-6 spaces, and 48 ch-2 spaces.
Continued Rounds on Doily (Rounds 8–19)
Round 8 – 19
9. Follow the intricate instructions for rounds 8 through 19 as described above, which will involve a combination of dc, sc, clusters, and picots to complete the stunning doily.
POINTS (worked separately in rows; total of 6 points)
- With the right side facing, draw up a loop of D in the next beginning cluster.
- Follow rows 1 to 5 for points, ensuring to create a total of 6 points.
EDGING (joined rounds around the entire outer edge)
- With the right side facing, draw up a loop of A in any ch-14 space.
- Continue with the instructions for rounds 1 to 3 for the edging to complete your doily beautifully.
FINISHING
- Fasten off and weave in ends. Block your doily to achieve your desired size and shape.
Ways to use your finished project
Once your Crochet Snowflake Doily is completed, there are countless ways to use this delicate doily. Here are some practical ideas:
- Home décor: Display your finished piece on coffee tables, dining tables, or as part of holiday decorations.
- Handmade gifts: Gift this lovely piece to friends or family as a personal touch for their home.
- Seasonal decorations: Use it during winter holidays to enhance festive moods.
- Kitchen accessories: Place hot dishes on it or use it as a drying mat for delicate kitchen items.
How to care for your crochet project
To keep your snowflake doily looking fresh and beautiful:
- Hand wash with mild detergent in cold water.
- Reshape while wet, laying it flat to dry.
- Avoid machine washing or drying, as this can distort the delicate stitches and shapes.
- Store the doily flat, away from direct sunlight to prevent fading.
Helpful crochet tips
Here are some tips to help you succeed with this pattern:
- Maintain even tension: This is key to achieving a uniform look.
- Count your stitches: Regularly check to avoid losing track, especially when working in rounds.
- Use stitch markers: Place them to mark the beginning of rounds or where colors change.
- Join rounds carefully: Ensure your joins are not too tight to avoid puckering.
Creative variations
Consider personalizing your crochet doily with these variations:
- Different yarn colors: Choose colors that match your home décor or season.
- Contrasting borders: Add a bright or darker border to give your doily a unique look.
- Seasonal palettes: Create doilies in seasonal colors for versatile decoration options.
Frequently asked questions
-
Is this crochet pattern beginner-friendly?
This pattern is suitable for those with an intermediate skill level; however, confident beginners may also enjoy the challenge. -
What yarn works best?
AUNT LYDIA’S® Classic Crochet Thread is recommended for its quality and ease of handling. -
Can I use a different hook size?
While you can use a different size, this may affect the overall size and drape of your finished doily. -
How long does the project take?
It typically takes about 4-6 hours, depending on your crochet speed. -
How should I wash the finished project?
Hand wash gently in cold water and lay flat to dry to maintain its beauty.



